Build a laser kit part 2 - 11
STEP 7: Quick interior detailing the dining area
Continued ...
41
42
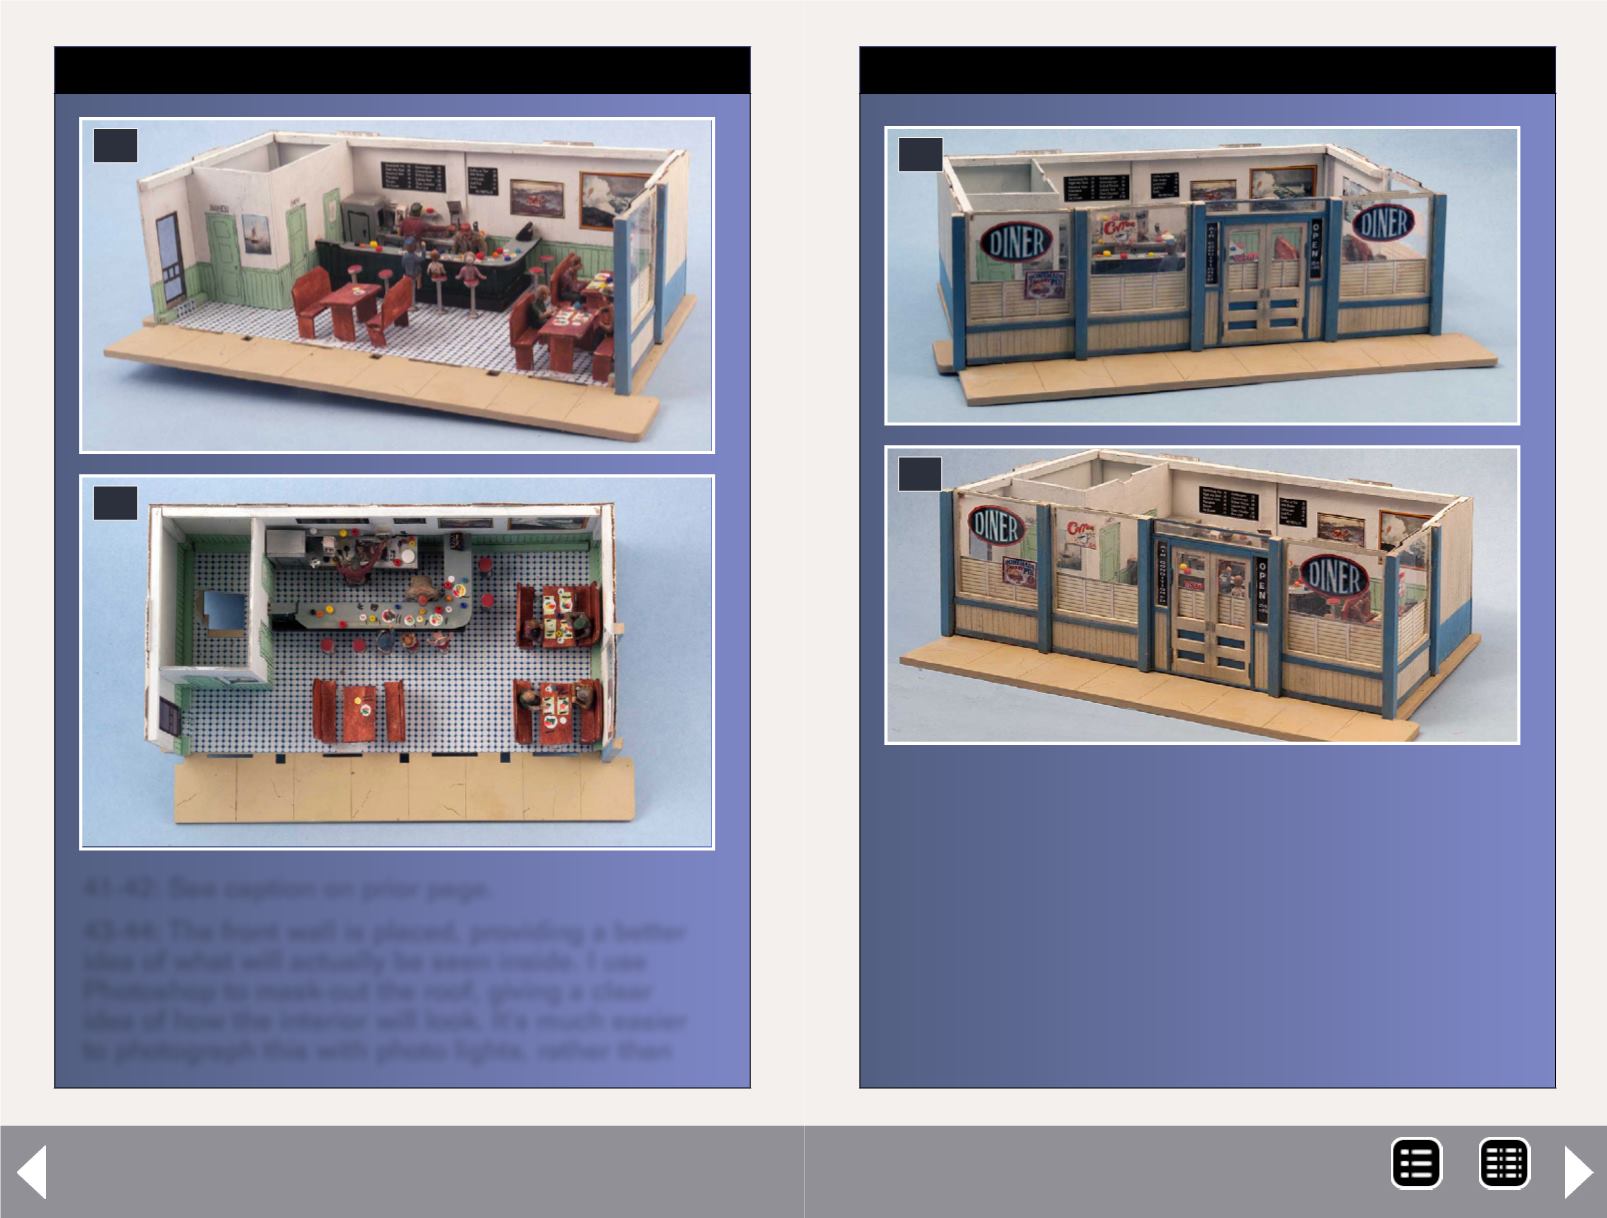
41-42: See caption on prior page.
43-44: The front wall is placed, providing a better
idea of what will actually be seen inside. I use
Photoshop to mask-out the roof, giving a clear
idea of how the interior will look. It's much easier
to photograph this with photo lights, rather than
STEP 7: Quick interior detailing the dining area
Continued ...
43
44
(43-44 continued): trying time exposures with the
structure lighting. Most of the window signs are
supplied with the kit. The signs and shades make
it more difficult to see inside, thereby making fine
detail less important. Those who are familiar with
the kit will see that the door has been moved one
panel to the right from the stock kit.
MRH-Oct 2013


