Build a laser kit part 2 - 7
STEP 6: Quick interior detailing the kitchen
Continued ...
33: An illustration board bathroom is installed at the
left rear. The door behind the counter leads to the
kitchen whether it is placed on the side or the rear.
33
34: Before
gluing the
bathroom
walls in
place, I cut
a hole in
the floor
to create
a hidden
path for the
electrical
service.
34
STEP 6: Quick interior detailing the kitchen
Continued ...
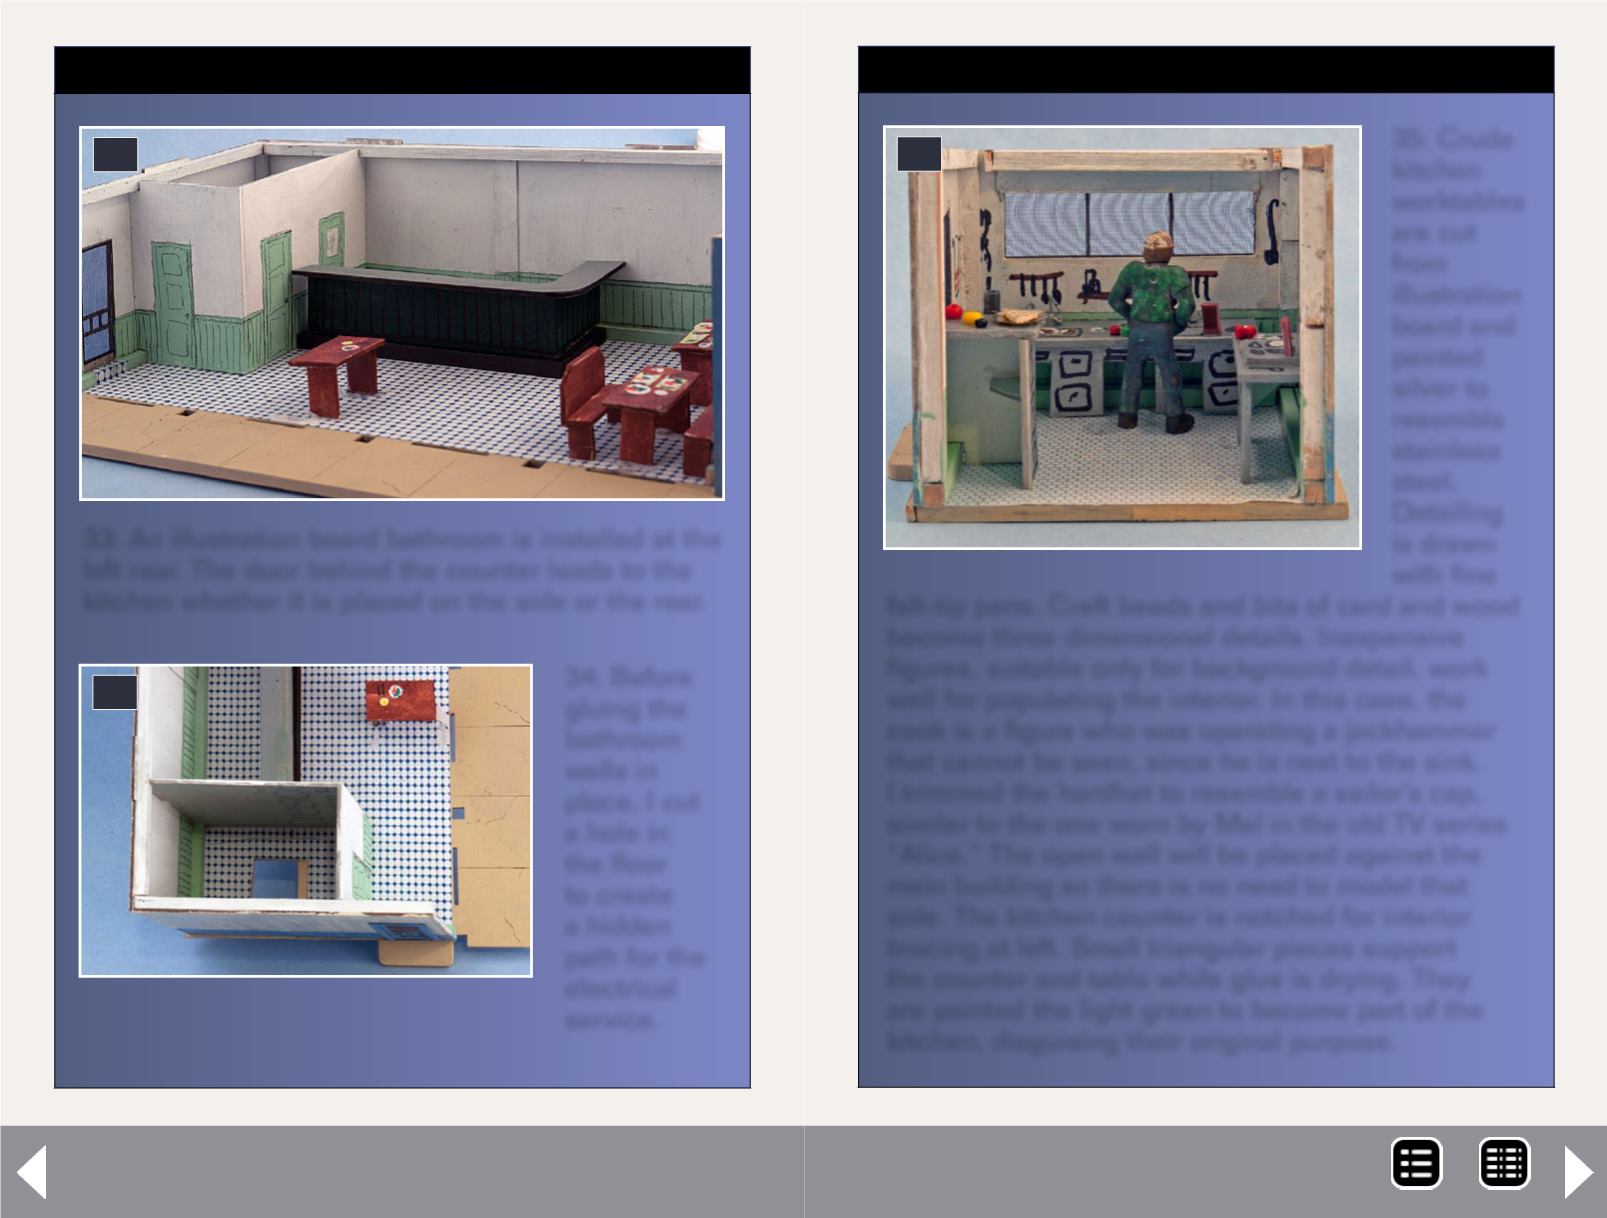
35: Crude
kitchen
worktables
are cut
from
illustration
board and
painted
silver to
resemble
stainless
steel.
Detailing
is drawn
with fine
felt-tip pens. Craft beads and bits of card and wood
become three dimensional details. Inexpensive
figures, suitable only for background detail, work
well for populating the interior. In this case, the
cook is a figure who was operating a jackhammer
that cannot be seen, since he is next to the sink.
I trimmed the hardhat to resemble a sailor’s cap,
similar to the one worn by Mel in the old TV series
“Alice.” The open wall will be placed against the
main building so there is no need to model that
side. The kitchen counter is notched for interior
bracing at left. Small triangular pieces support
the counter and table while glue is drying. They
are painted the light green to become part of the
kitchen, disguising their original purpose.
35
MRH-Oct 2013


