JMRI Generating switch lists - 4
Enter the name of your railroad. This will show up when you
print switch lists and train manifests. Next is orientation: The
SP considered itself an east/west railroad while the BN trains
ran north/south so I checked both boxes. Next, enter the maxi-
mum allowed length of a train on your railroad, as well as the
maximum number of engines for one train.
Switch Time is how long it takes you to set out or pick up a
single car. Travel Time is how long it takes to run from one
station to the next on your layout. These times can either
be in real time or fast time depending on how your layout
is operated. Scale, Car Types and Owner are pretty easy to
figure out. When starting out, it is best to select the Normal
Build Option. When you get used to the program, you can
change it to Aggressive.
Checking “Add Operation” will put an operations label in the
menu choices when the program starts. I’m not using RFID, so
I’ve left it unchecked. Since I will only discuss the car manage-
ment part of JMRI here, I will ignore the Panel Option section.
When everything on this screen is complete click on the Save
button and close the window to move on to the next section.
Locations
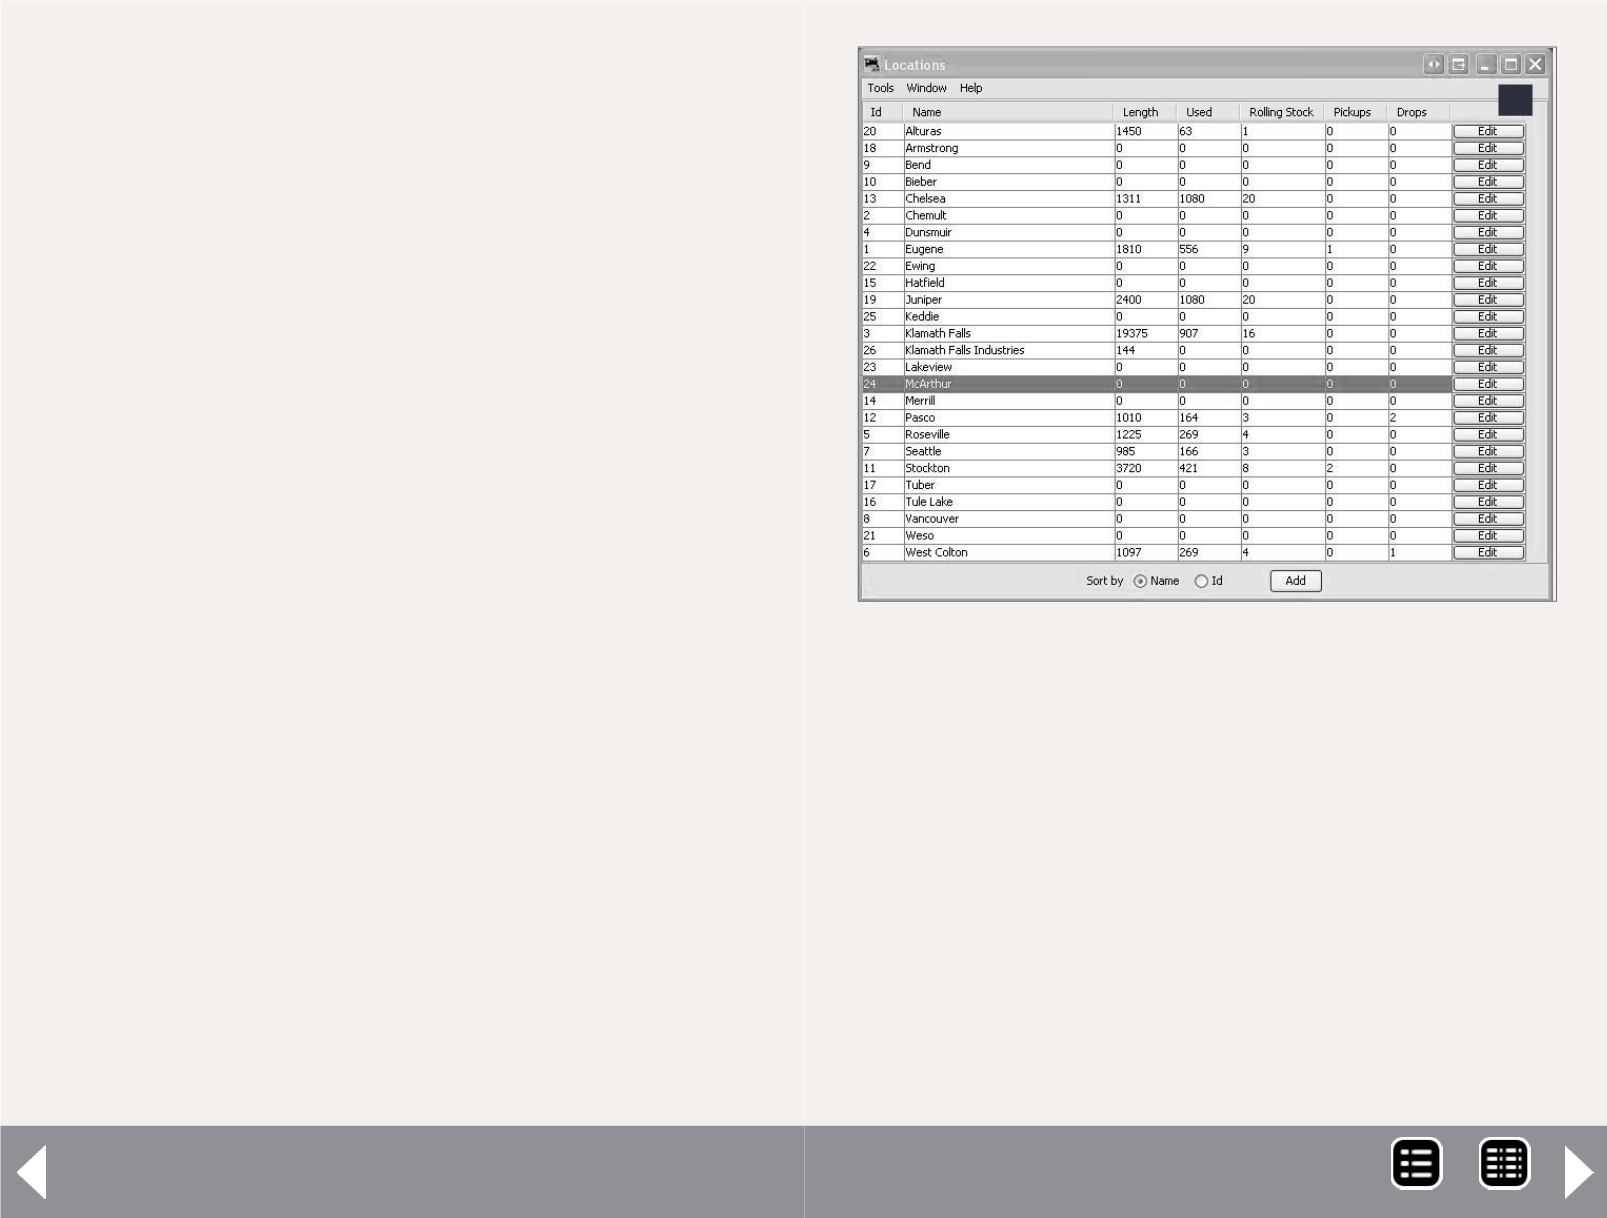
Now we start to get into the meat of the program: adding our
locations (3) into the program. Many of the locations on the
system map (1) are listed on the locations screen (3), and you
will notice there are locations listed that are not on the map.
Ewing and Weso are the two reversing loops on my layout.
They are used to turn the Amtrak and SP intermodal trains in
staging. Bend, Bieber, Dunsmuir and Eugene are the BN and
SP staging yards. Keddie and Vancouver are included because
certain BN trains will leave Klamath Falls with blocks for
those locations.
You can enter the stations in any order. Make sure that any
location on your layout that will have trains doing work is
entered. Also enter any off-layout locations served by your
trains. I'll explain why later. There are separate entries for
Klamath Falls and Klamath Falls Industries. I will explain the
reason for that a bit later, too. For now, all we want to do add
the individual locations. Hold off on putting in siding, yard,
interchange or staging tracks for now. Don’t worry if you forget
one or two. It’s easy to go back and add them later.
3
3: Locations screen. I have the locations sorted
alphabetically. These are the various stations both on
and off the layout that are used in building the trains.
MRH-Oct 2013


