Build a laser kit part 2 - 5
STEP 5: Putting the kit together
Continued ...
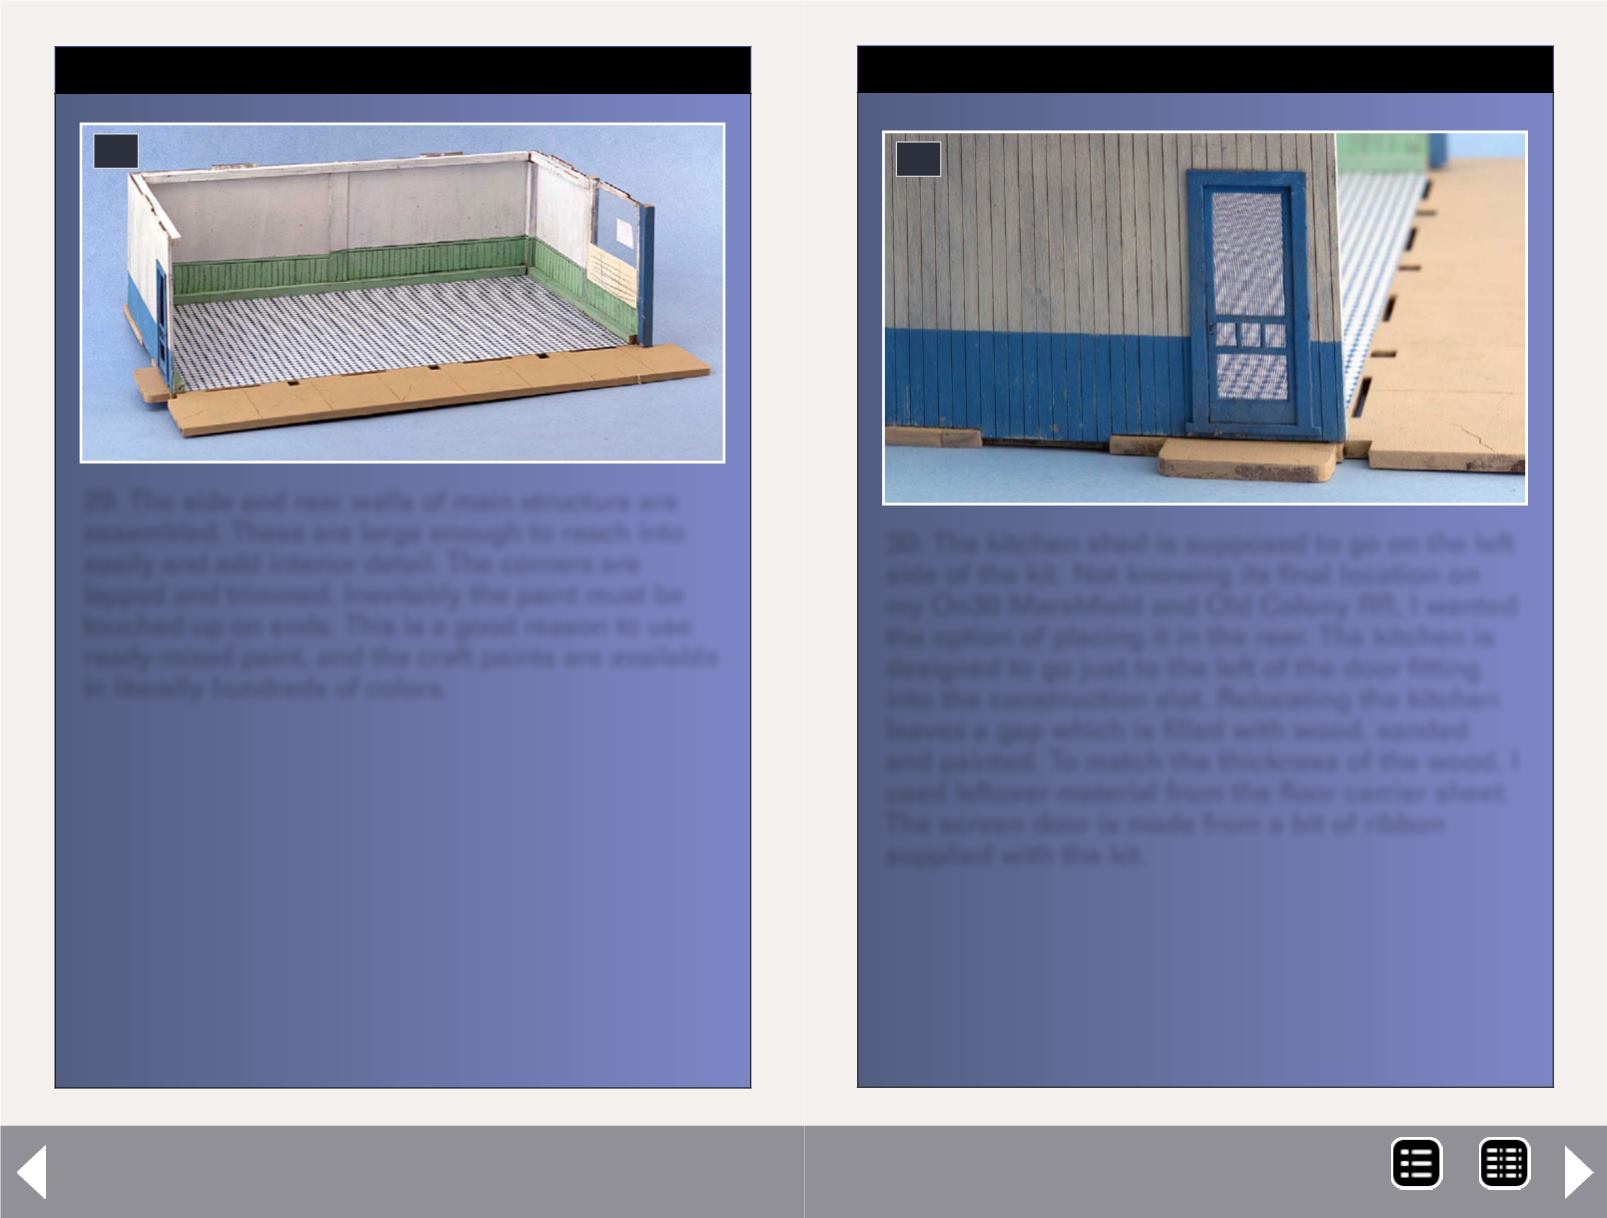
29: The side and rear walls of main structure are
assembled. These are large enough to reach into
easily and add interior detail. The corners are
lapped and trimmed. Inevitably the paint must be
touched-up on ends. This is a good reason to use
ready-mixed paint, and the craft paints are available
in literally hundreds of colors.
29
STEP 5: Putting the kit together
Continued ...
30: The kitchen shed is supposed to go on the left
side of the kit. Not knowing its final location on
my On30 Marshfield and Old Colony RR, I wanted
the option of placing it in the rear. The kitchen is
designed to go just to the left of the door fitting
into the construction slot. Relocating the kitchen
leaves a gap which is filled with wood, sanded
and painted. To match the thickness of the wood, I
used leftover material from the floor carrier sheet.
The screen door is made from a bit of ribbon
supplied with the kit.
30
MRH-Oct 2013


