The fuel tanks on second-generation EMD locomotives are
made by welding the end sheet onto the fuel tank from the
outside. This means the end pieces are slightly larger than the
sides of the tank. To simulate this, cut two pieces of .010” sty-
rene sheet that are .500”x1.5”. Glue one piece on each end;
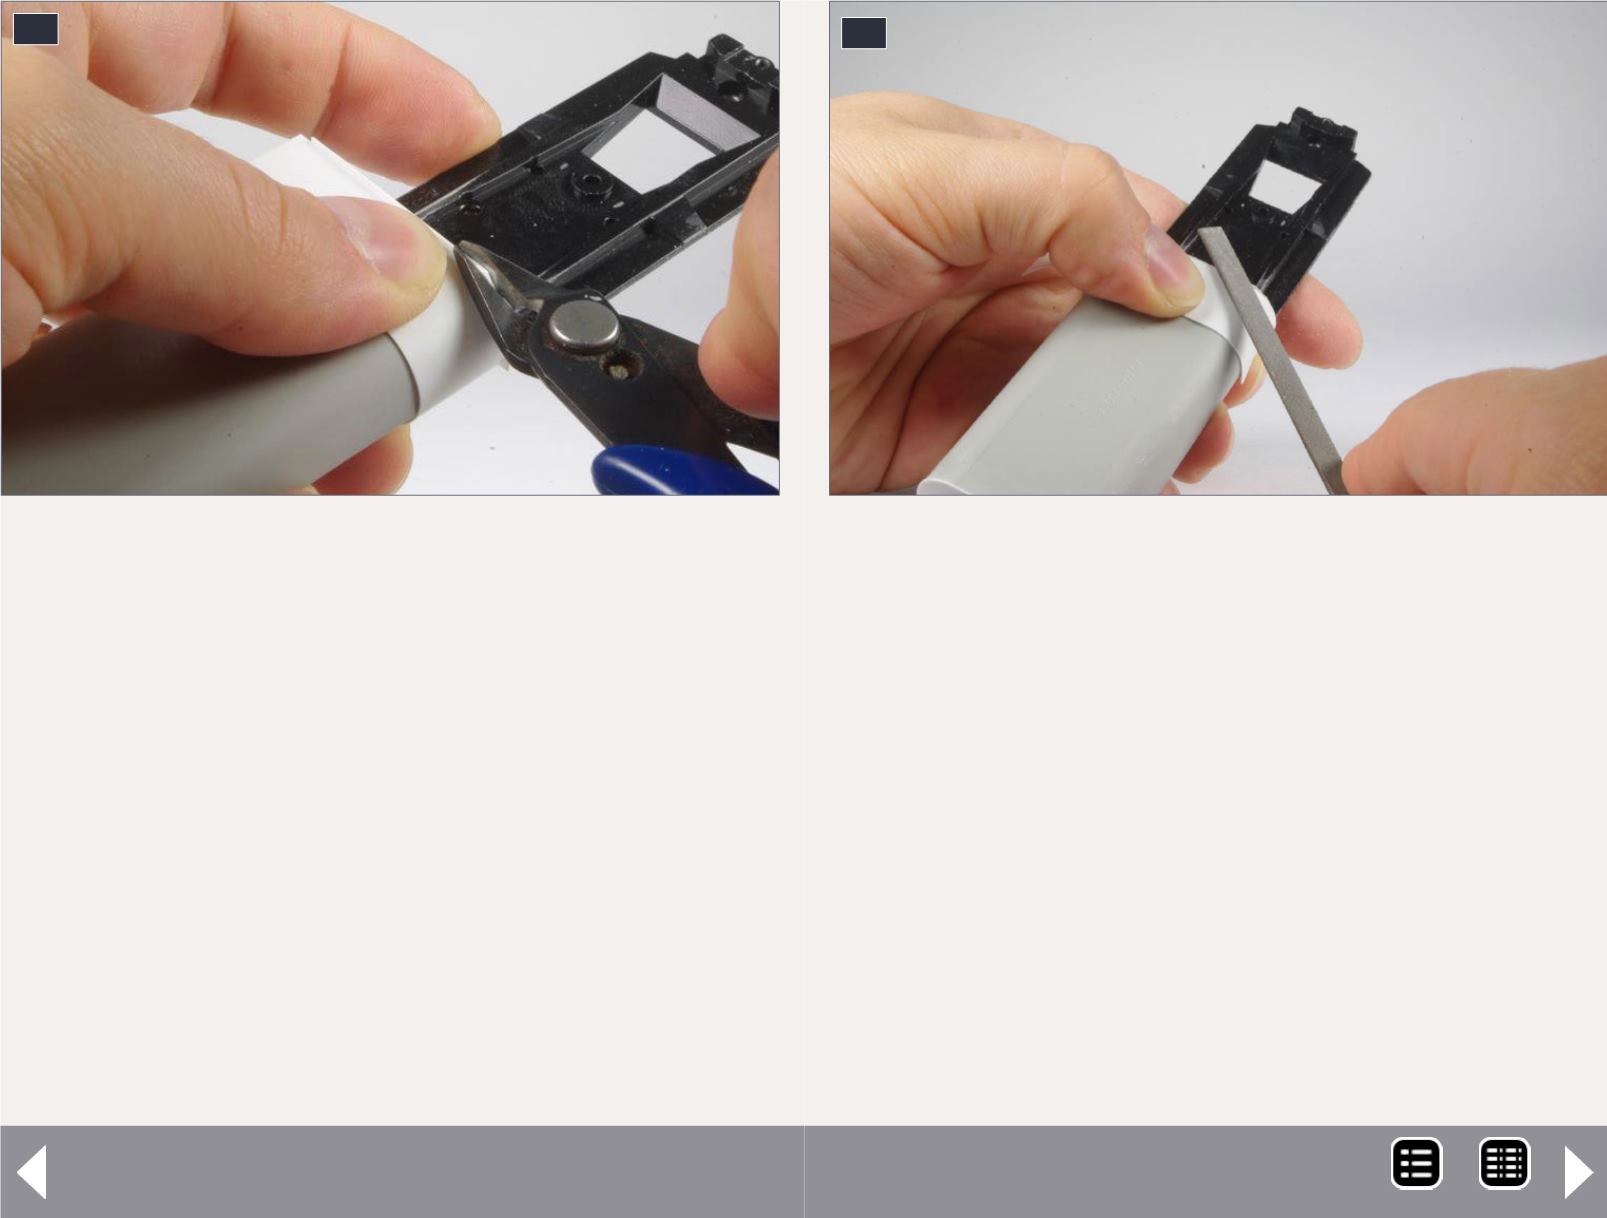
once the glue is dry, hold a scrap piece of .010” styrene sheet
against the oversize end piece and trim it flush as shown in
[46]. Once the rough cutting is done, use the same scrap of
.010” styrene and a small file to shape the new end sheets to
their final profile as seen in [47]. Sand with fine sandpaper as
necessary to remove any marks left by filing. You should now
have a .010” lip around each end of the fuel tank.
Now build new sides for the frame from pieces of .020”x.080”
styrene strip. Add additional layers as necessary to match the
rest of the frame. Test-fit the motor to make sure the styrene
46. Cutting new styrene fuel tank end plates.
46
Pan-Am SD45R part 2 - 5
47
47. Filing new fuel tank end plates.
strip does not interfere with it sliding into position. Putty and
sand the joints; once everything is dry and smooth, glue a
piece of .020”x.020” styrene strip along the bottom of each
side of the frame. This simulates the frame being made from
two parallel I-beams.
Following photos, add the applicable pieces from the Cannon
& Company 2156 fuel tank detail set. Drill a #56 hole in each
side of the fuel tank .250” from the front for the fuel filler. Drill
a #66 hole on each side for the top fuel gauge.
I also used the fuel tank brackets from this set rather than the
brackets included in the Details West SD45 detail kit. Be aware
the fuel tank brackets cover a couple of screw holes in the
frame. You may want to modify the brackets so the screw holes
are not blocked, or glue them in place after painting and final
assembly. I simply did not install one screw and modified the
MRH-Nov 2014


