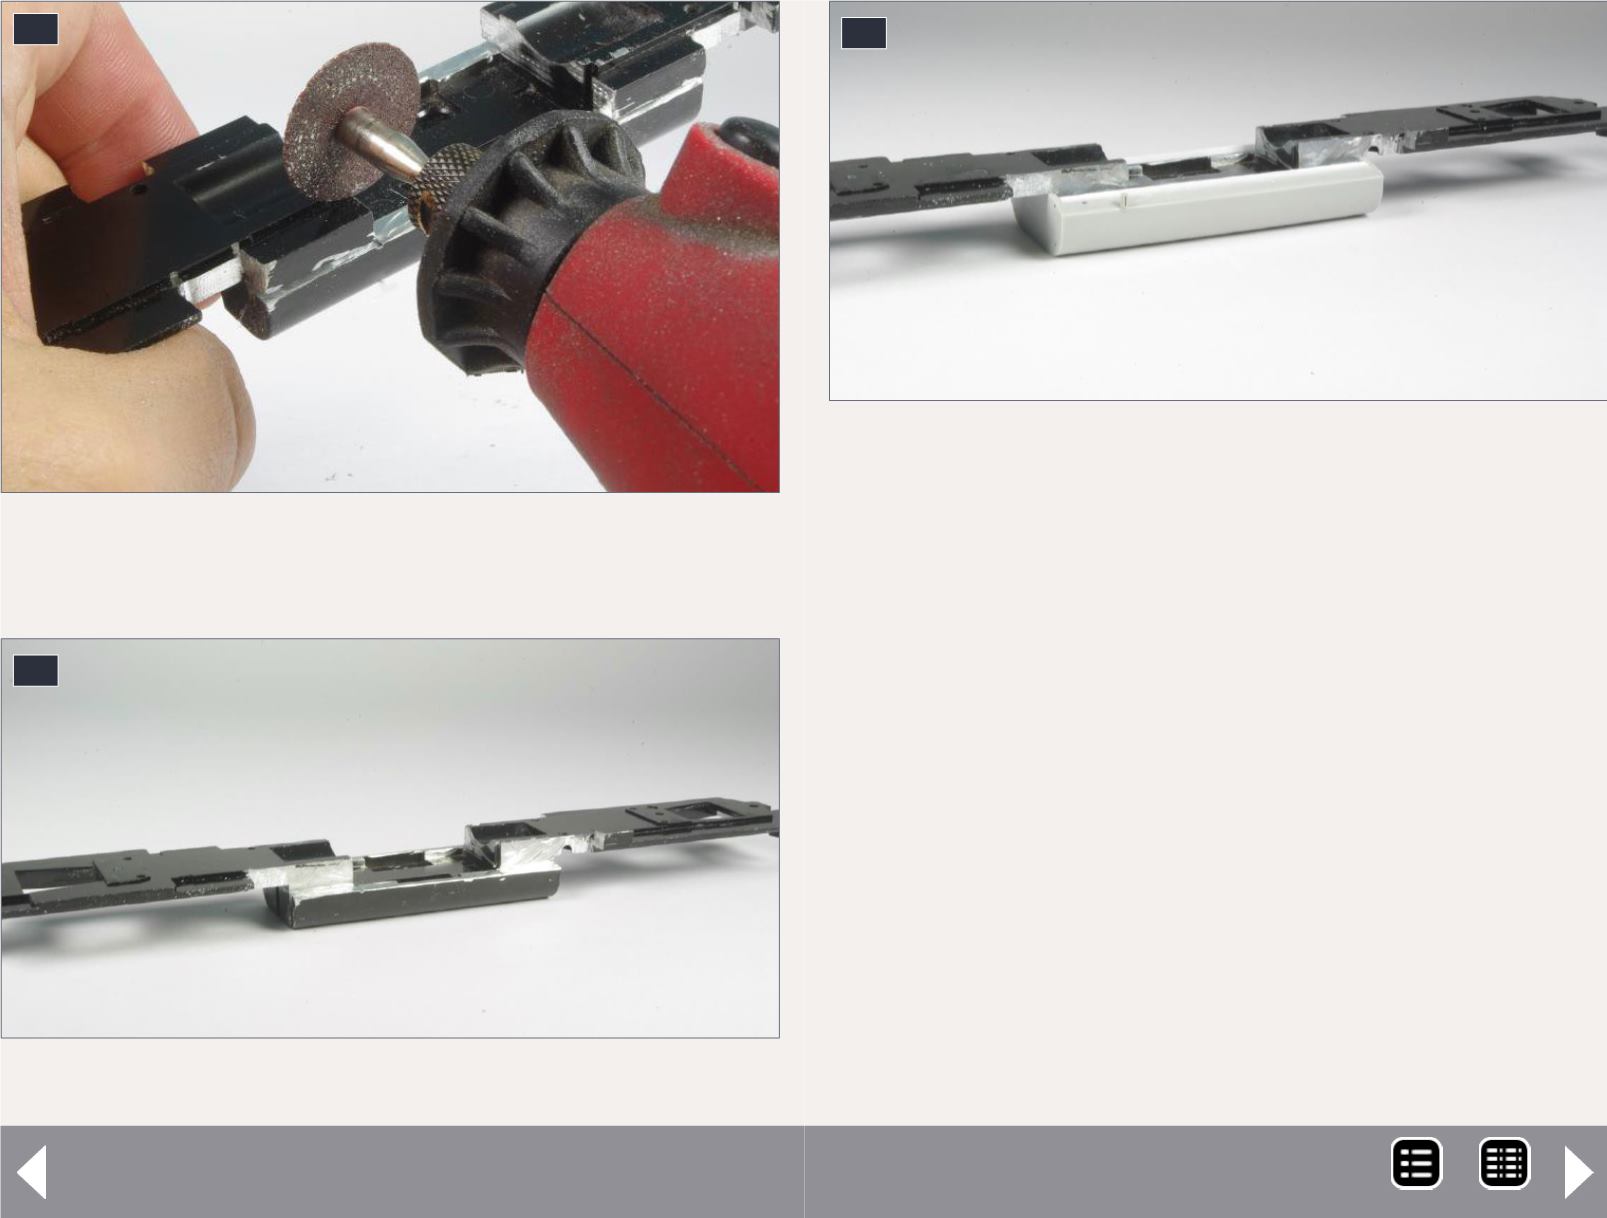
43. Making additional vertical cuts to the fuel tank.
43
44
44. The frame after all cuts and milling.
Pan-Am SD45R part 2 - 4
Once you have finished the cuts on the sides of the fuel tank
make cuts from the top as shown in [43]. These cuts should be
made along the edge where the frame gets thicker, and should
be deep enough to meet up with the cuts made from the sides.
Once you have finished cutting with the motor tool, clean up
any rough areas with a small flat file, and wash the frame with
soap and water. Your frame should now look like [44].
The next step is to glue the fuel tank to the frame. I used Mi-
croBond for this but you may want to use epoxy or another ad-
hesive. Glue a piece of .010”x.060” and a piece of .060”x.060”
styrene strip together for each side of the fuel tank giving you
two strips that measure .060”x.070”. Glue in place on the fuel
tank as shown in [45].
Fill the remaining gap at the front of the fuel tank top with a
piece of .060”x.080” styrene strip. Once the glue has dried you
can file, sand, and putty the top of the fuel tank to match the
profile of the ends.
45
45. Fuel tank installed, styrene strip added.
MRH-Nov 2014


