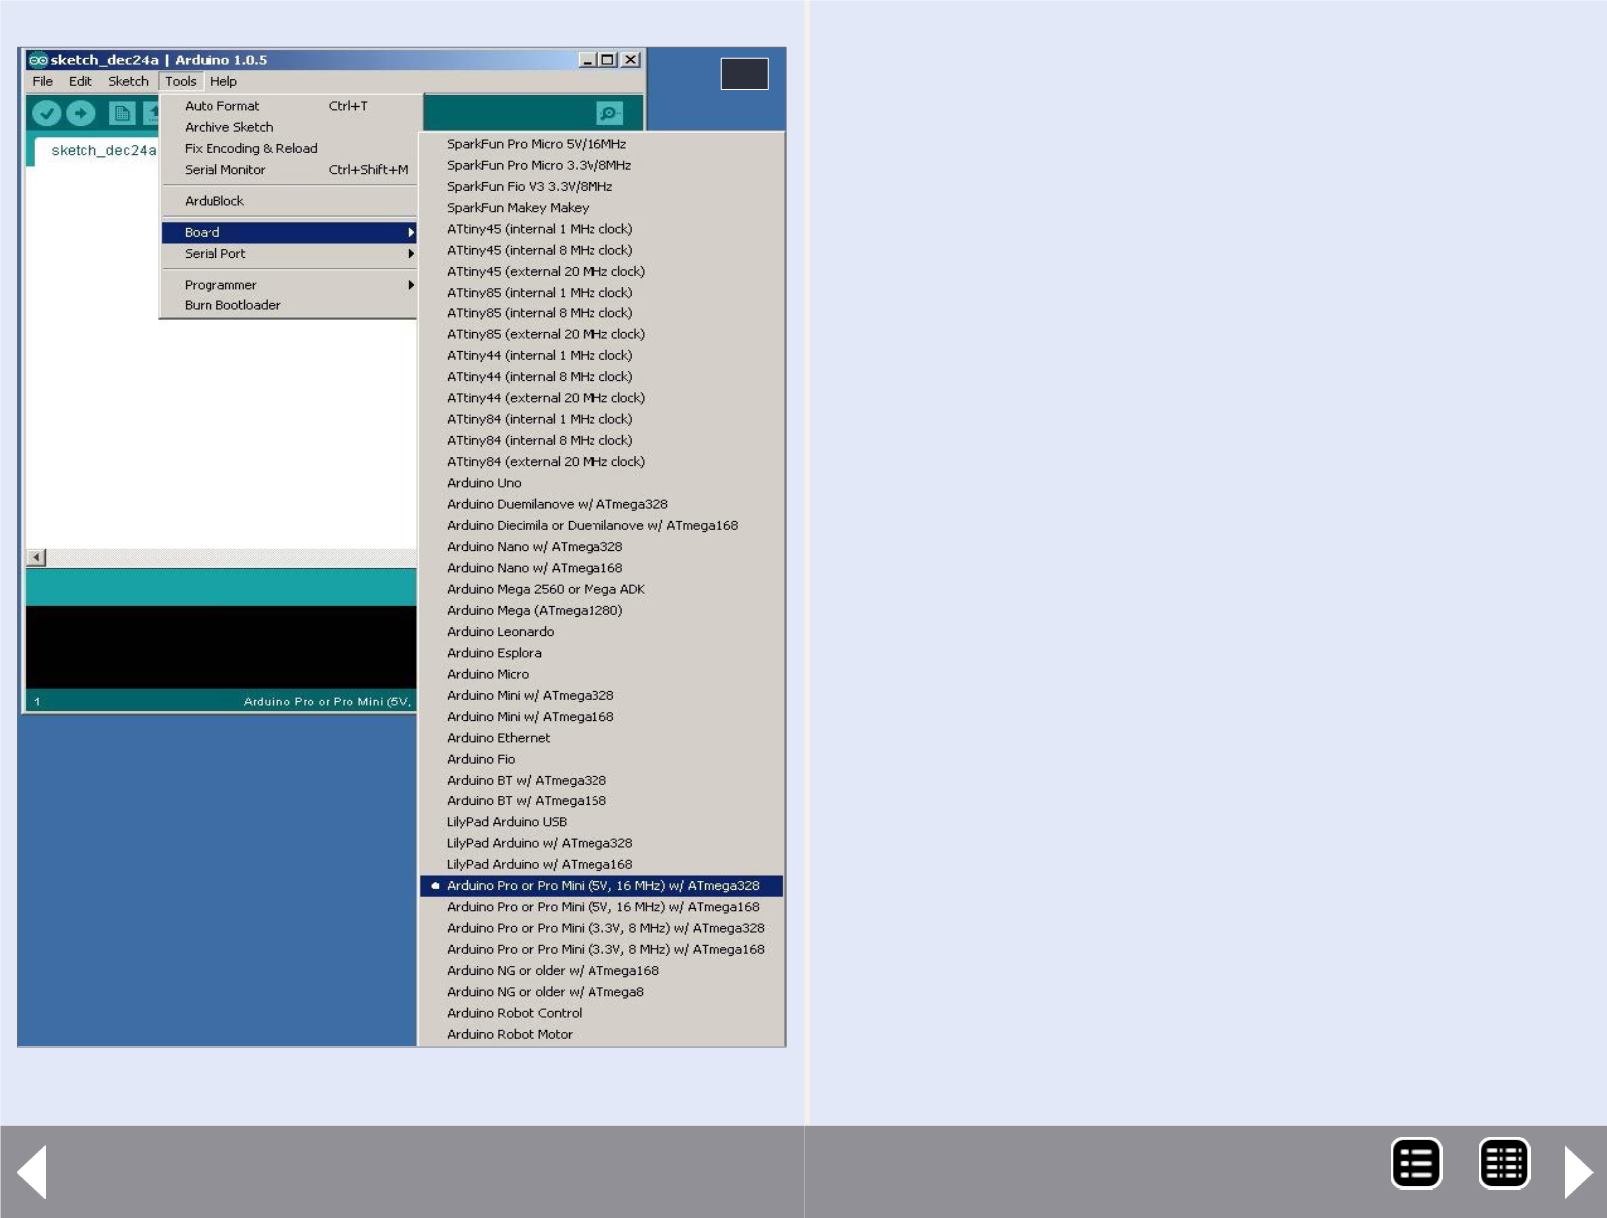
44. Tools menu and board selection.
44
Battery-powered models - 19
Starting from Scratch with an Arduino Pro
Mini (or Moteino)
Continued ...
This is the editor screen in which you can load, edit, save, and
download your programs, called sketches, for the Arduino. The
program shown is from the list of examples which are great start-
ing points for you to learn just howmuch you can do. With NO
modification, making sure your Pro Mini Board is connected and
selected properly, click on the circled right arrow button below
the edit menu pick, to the right of the circled checkmark. These
two screens should appear in succession:
You will also see the LEDs on the Pro Mini Board blinking along.
After a short time, a LED connected to Digital Pin13 will blink one
second on, one second off. You have now successfully set up your
Pro Mini Board! To prove a point, go back to your computer, and
in the IDE window with the Blink program, highlight and change
both of the delay(1000), lines to delay(90), need space, “and”
that is change the 1000 to 90. Hit the right arrow to download the
now-modified program and watch the change. Now the blink rate
is 90 milliseconds (0.09 seconds) on and off. This is how simple it is
to change the behavior of the Pro Mini.
Back to model railroading
While blinking a LED was instructive it is not particularly use-
ful. So here are some small projects that might be of interest to
modelers:
We do Windows!
One of the neatest animations I use is relatively simple to set
up with a Pro Mini. This was built as an example for my anima-
tion clinics. This sketch (program) randomly turns on 16 LEDs
MRH-Nov 2014


