STEP 2: Fittings
Wrap a couple of turns of Teflon tape around the
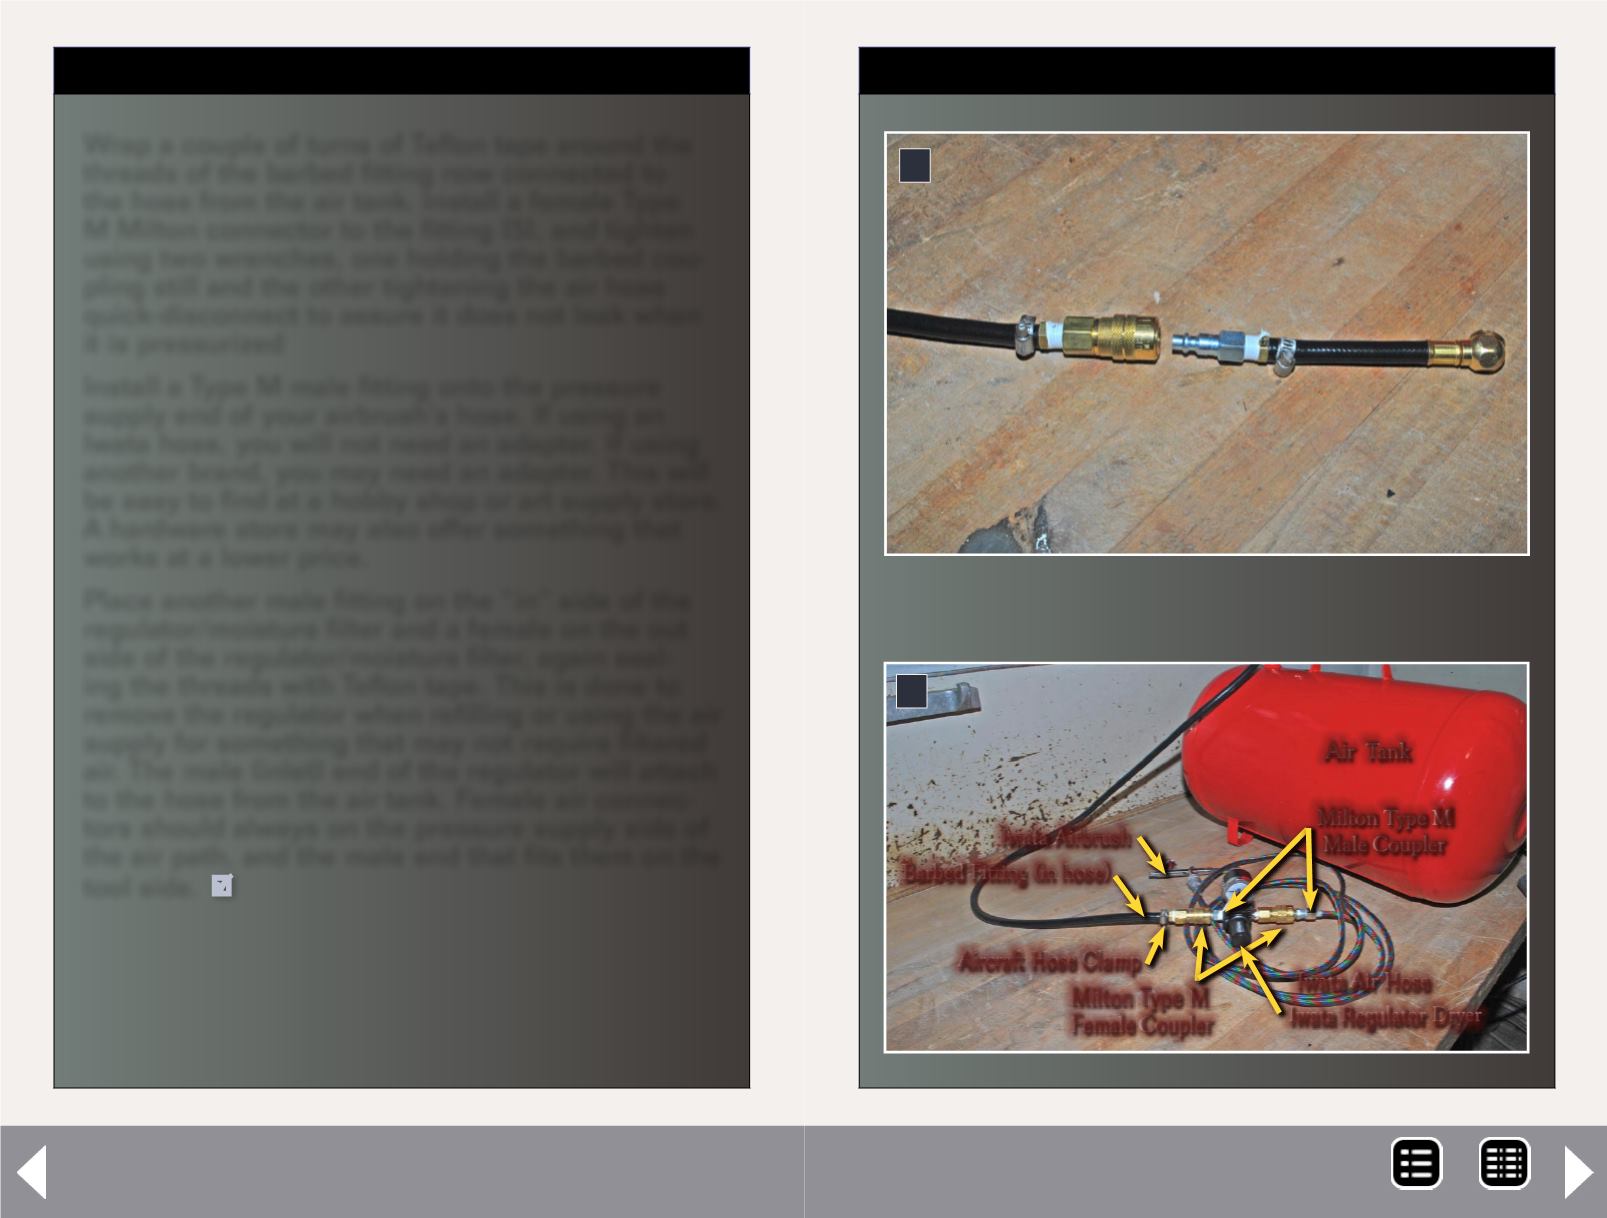
threads of the barbed fitting now connected to
the hose from the air tank. Install a female Type
M Milton connector to the fitting [5], and tighten
using two wrenches, one holding the barbed cou-
pling still and the other tightening the air hose
quick-disconnect to assure it does not leak when
it is pressurized
Install a Type M male fitting onto the pressure
supply end of your airbrush’s hose. If using an
Iwata hose, you will not need an adapter. If using
another brand, you may need an adapter. This will
be easy to find at a hobby shop or art supply store.
A hardware store may also offer something that
works at a lower price.
Place another male fitting on the “in” side of the
regulator/moisture filter and a female on the out
side of the regulator/moisture filter, again seal-
ing the threads with Teflon tape. This is done to
remove the regulator when refilling or using the air
supply for something that may not require filtered
air. The male (inlet) end of the regulator will attach
to the hose from the air tank. Female air connec-
tors should always on the pressure supply side of
the air path, and the male end that fits them on the
tool side.
Airbrush air supply - 4
STEP 2: Fittings
Continued ...
6
5
Air Tank
Milton Type M
Male Coupler
Milton Type M
Female Coupler
Iwata Airbrush
Barbed Fitting (in hose)
Iwata Air Hose
Iwata Regulator Dryer
Aircraft Hose Clamp
MRH-Nov 2014


