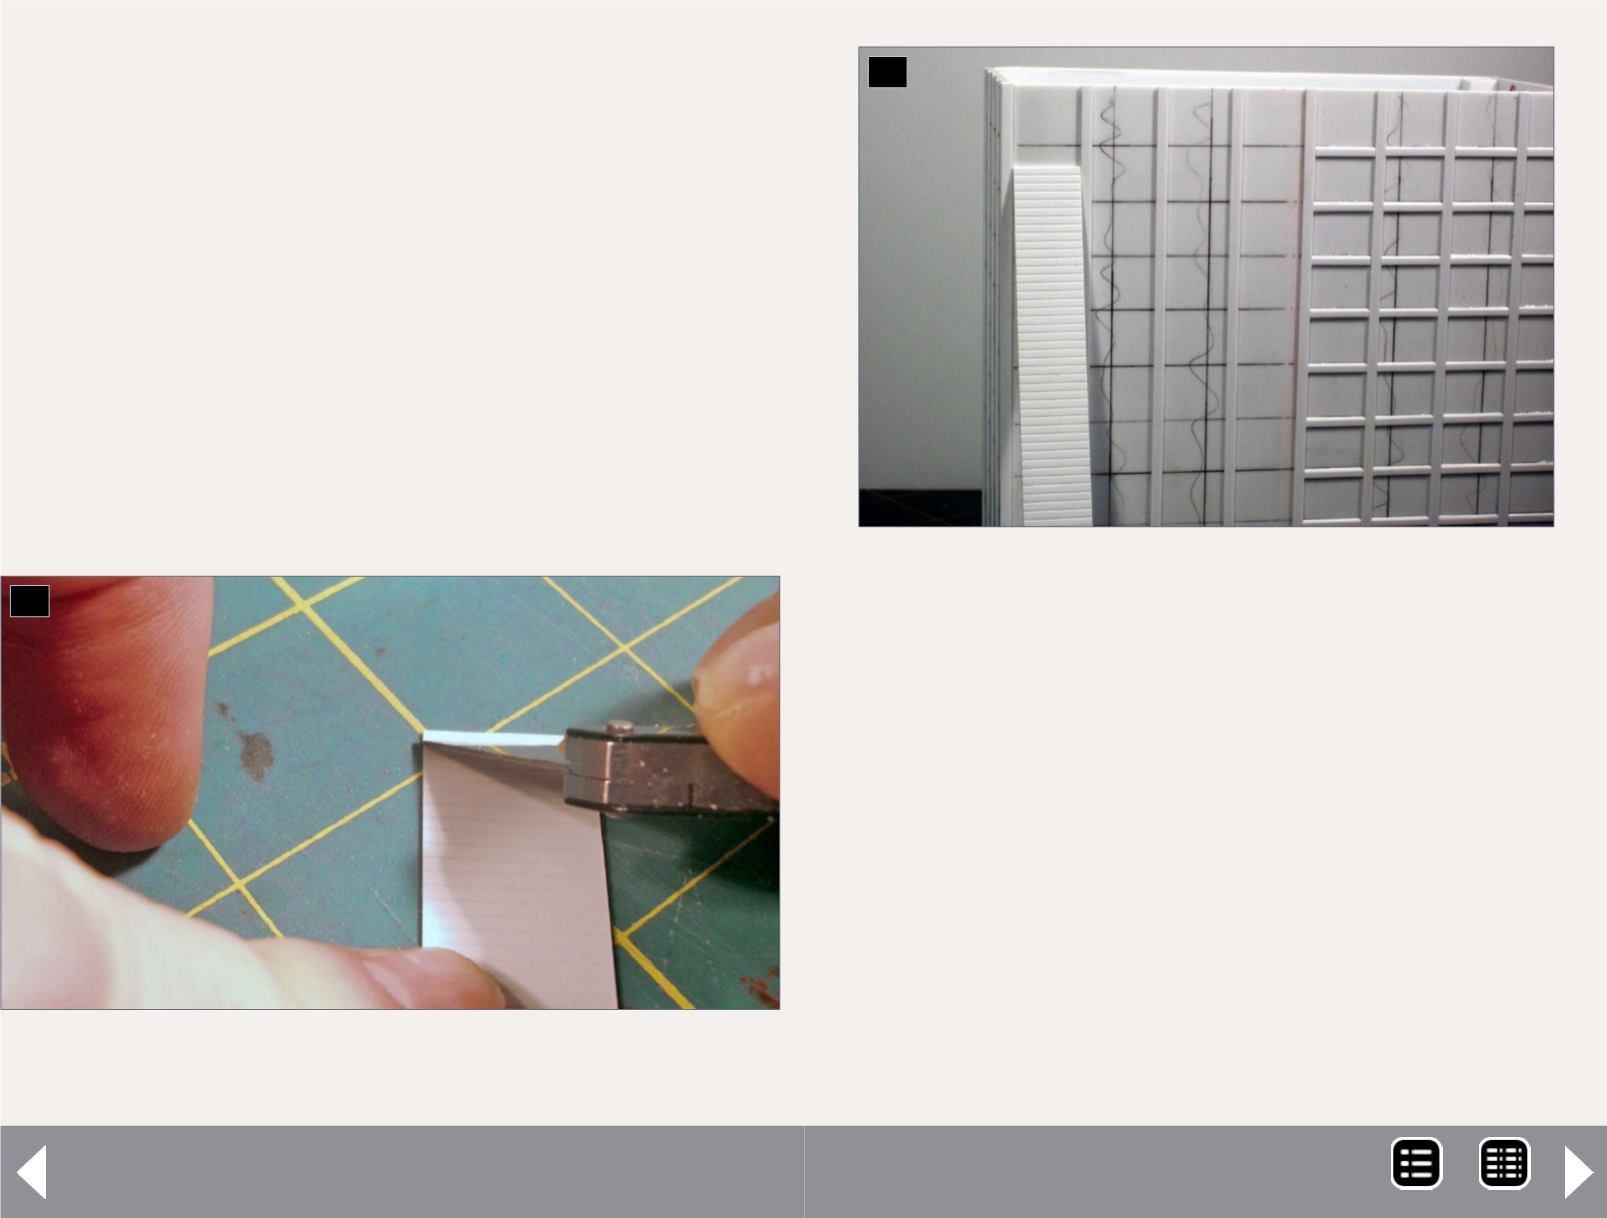
using a single-edge razor blade, cutting each cross brace at an
angle to represent the slope [14-15].
While tedious, I found the exercise of cutting the pieces slightly
more entertaining than my wife’s latest TV vampire series
which gave me the benefit of quality family time and modeling
time. After about two weeks spending about an hour a night in
front of the TV, I finished all four sides of the bin construction.
For those wishing to simplify the bin construction, the horizon-
tal bracing could be installed without the angled surface. This
wouldn’t affect the look of the building too much, but it was
important to me to capture this feature.
The final detail was the rivets extending the height of the ver-
tical braces. Recreating this was critical since I intended to
duplicate the prototype’s rust weathering on the completed
model, which would surely highlight this detail. The strips were
14. Photo showing how to cut the strip styrene for the
horizontal bracing on the feed bin.
14
Agway Feed Mill - 7
created using a pounce wheel along the edge of a .005” sheet
of styrene. Once the rivets were embossed into the styrene, a
straightedge was used to cut the styrene into strips .060” wide.
Each strip was then laid onto the vertical bracing using Model
Master Liquid Cement. This cement works well with styrene,
giving plenty of time to adjust and straighten the strips once
applied, but providing a secure welded seam between the sty-
rene pieces. Once the rivet strips were applied, I added Tichy
safety cages and walkway platforms per the photos, and com-
pleted the roof installation with Tichy railings. [16 and 17].
Silo base
The next portion of the building to tackle was the silo base.
I studied the prototype photos for several days to engineer
15. In-progress photo showing the partially assembled
feed bin and horizontal bracing being applied.
15
MRH-Sep 2014


