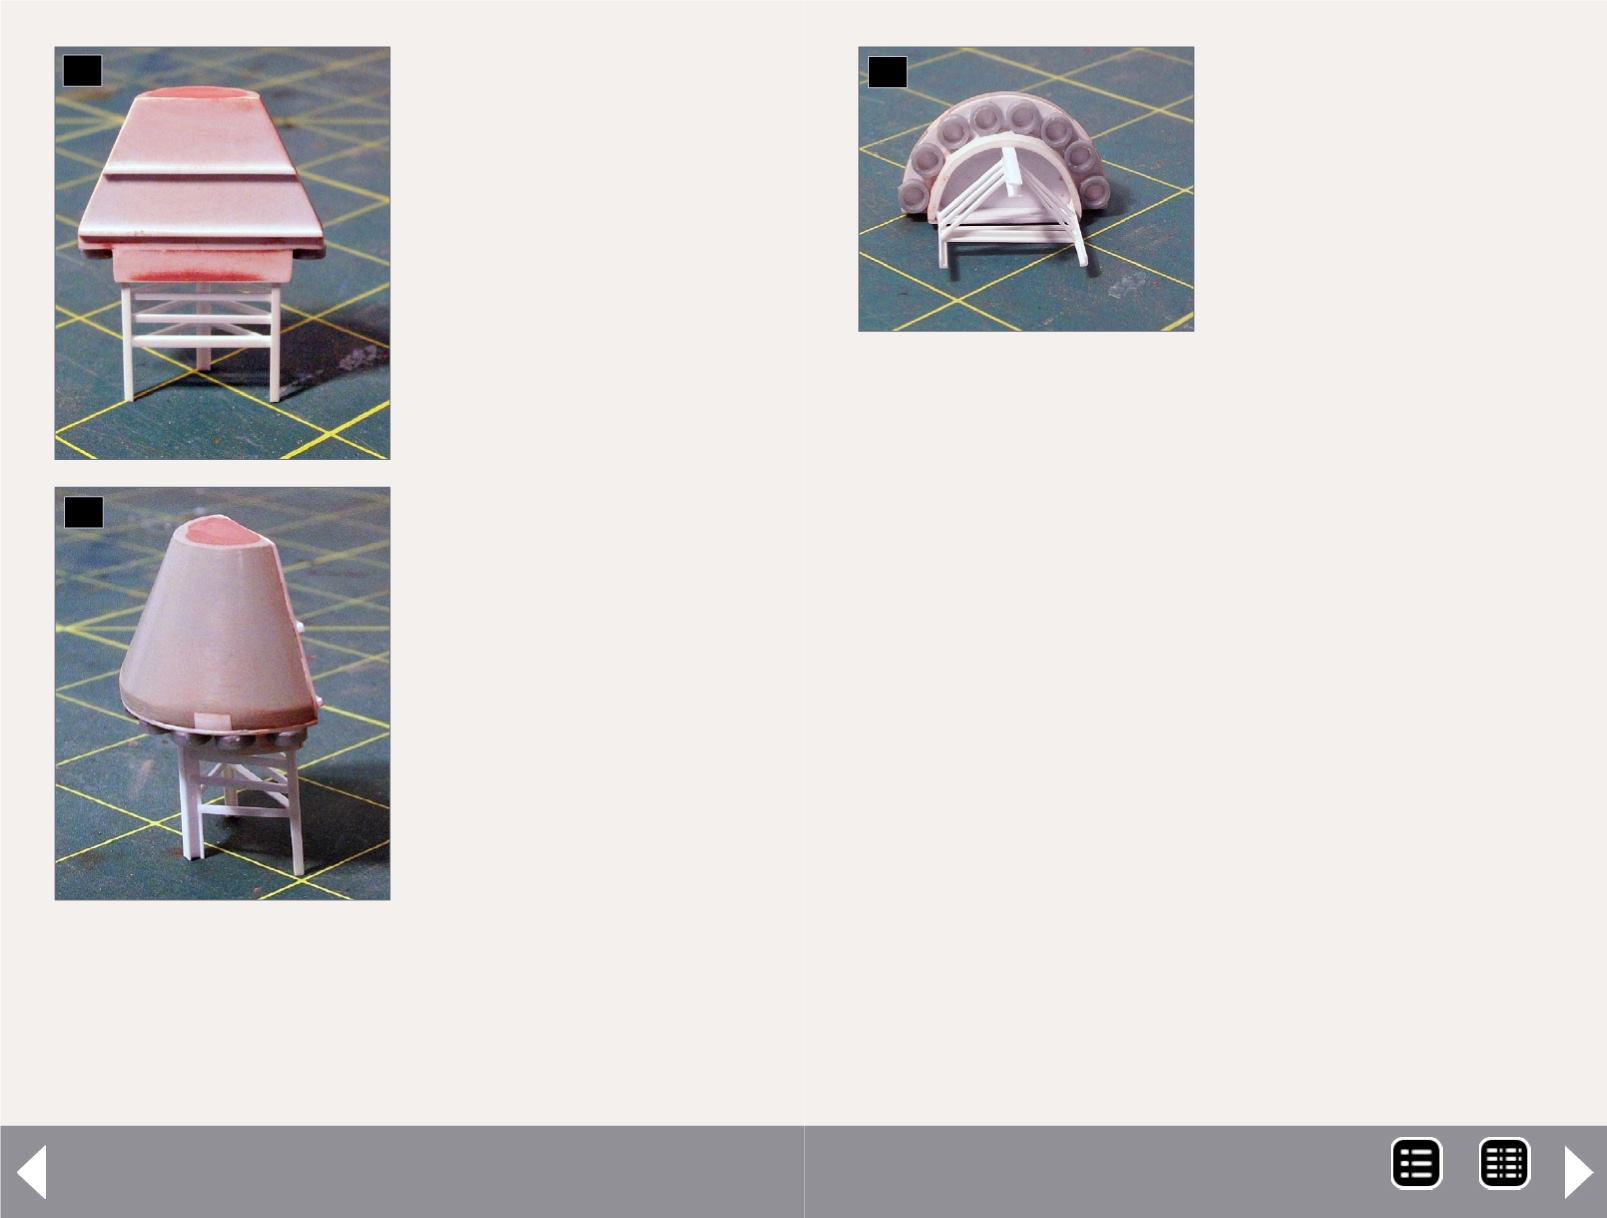
33. This bottom view of
the elevator distributor
head shows the legs
constructed of two pieces
of 0.060” angle and
one 0.080” H-column.
The legs rest against a
piece of 0.040” thick by
0.188” high styrene piece
wrapped around the base,
and offset just enough to
fit the Rix Products circular pipe inserts.
31. After cutting the Lego
part in half, a flat piece
of 0.010” styrene was
glued on the cut face
with ACC. Two 0.020” by
0.040” horizontal strips
were glued per photos of
the prototype. A second
piece of 0.010” styrene
was glued to the bottom
and sanded to the same
contour.
31
32
32. This side view of the
elevator distributor head
shows the legs that were
installed, and the Rix
Products circular piping
inserts glued to the base.
Rix Products distributor
piping would later be glued
in each insert.
Agway Feed Mill - 16
However, even with simple projects, lack of planning can
complicate things. Such was the case with the car unloading
shed. Because one of the elevators is located on top of the
car unloading shed, and the discharge piping to the silos was
pre-cut on the workbench, it wasn’t until I installed the car
unloading shed on the foundation built over the track and ties
that I realized I would have a 1/8” gap between the silos and
the discharge piping. Ultimately, my solution was to build up
the silo foundation base to make up the difference. Since the
only side that would show on the completed model was the
asphalt parking lot, it was easily fixed by building up joint
compound to elevate the base.
Diorama base
In my years of assembling large or even medium-size struc-
tures, I’ve found that building structures on a base is much eas-
ier than trying to assemble structures directly on a layout, and
offers the ability to create a diorama for photographs. It also
helps avoid the challenge of trying to detail a structure founda-
tion or area on a layout that’s not directly in the foreground.
33
MRH-Sep 2014


