-
STEP 14: Final Assembly
Continued ...
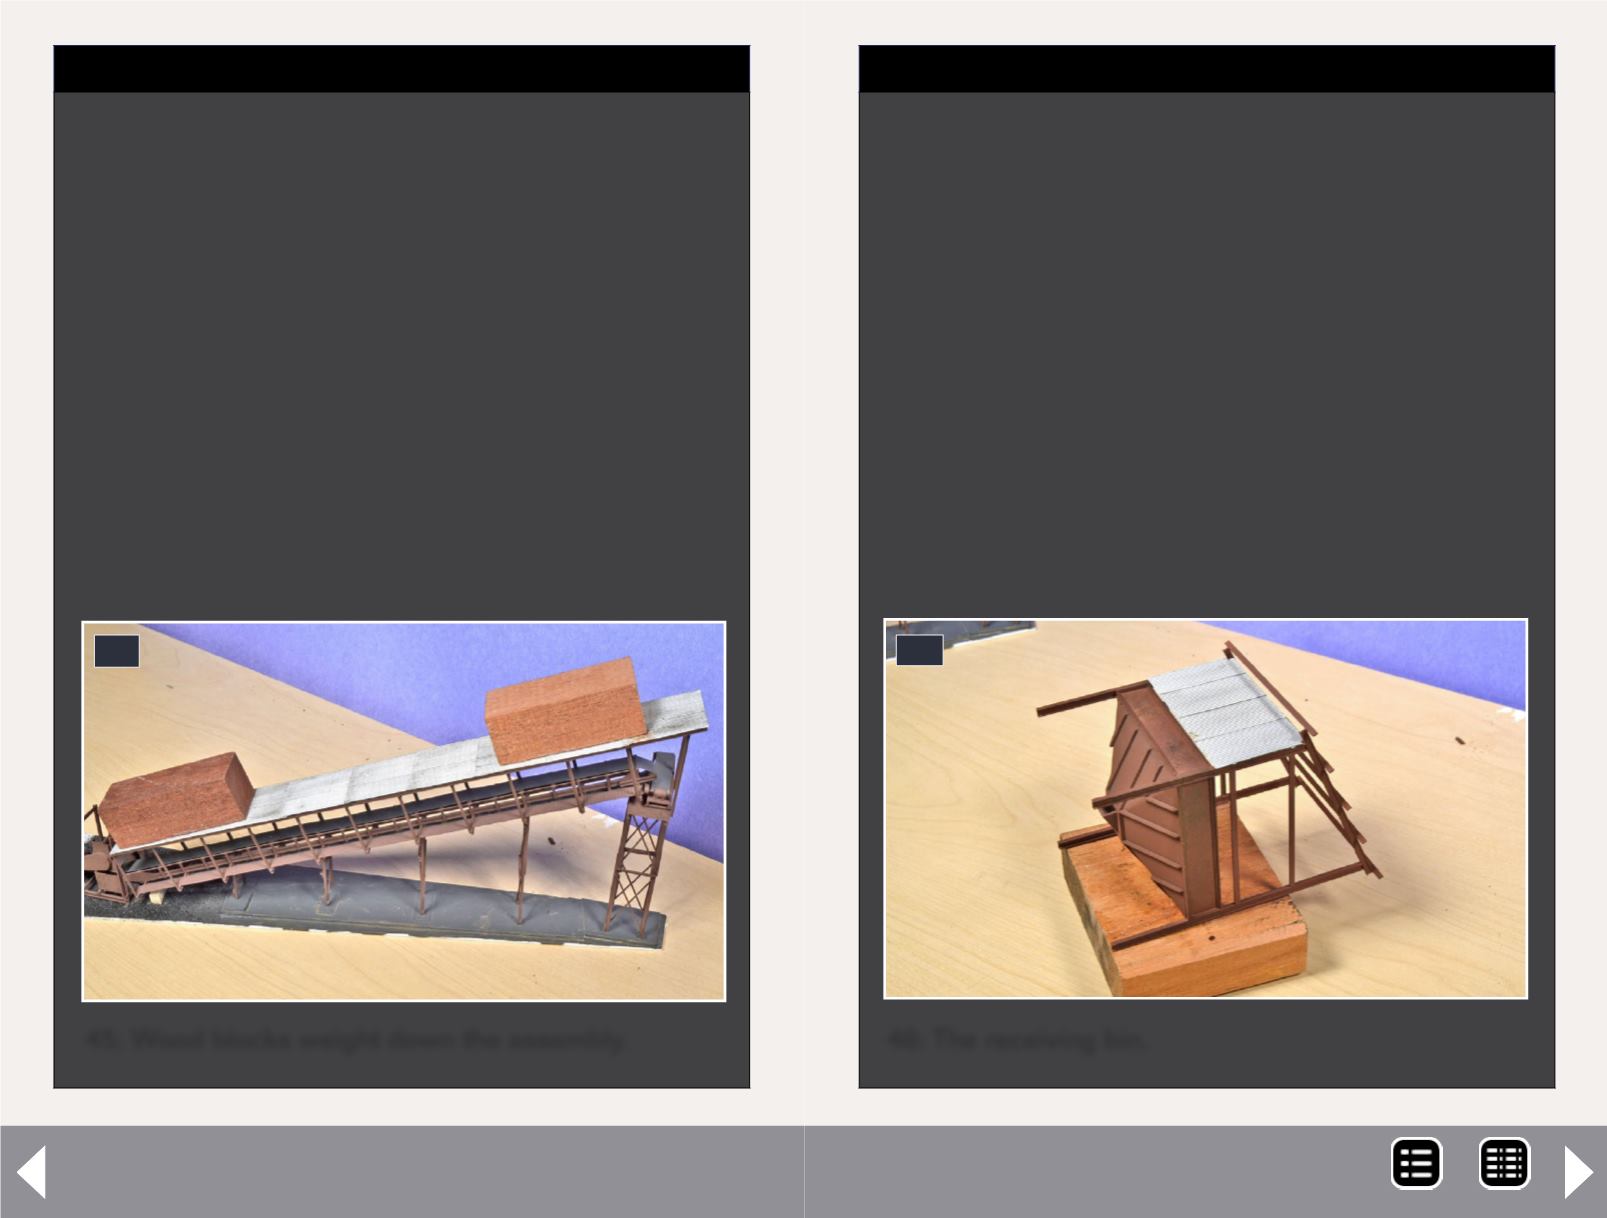
46: The receiving bin.
46
For the receiving bin, trim the styrene cross-braces on
the end piece of siding flush with the sides. Place a small
amount of two-part epoxy on the cross-braces and glue
the siding in place as shown in the photo here (46).
Next, glue the side pieces in place in the same manner as
the end piece. I placed two small wood blocks on the ends
of the sides in order to make sure that the siding was in
contact with the vertical supports.
Once the sides are finished, glue the roof in place.
STEP 14: Final Assembly
Continued ...
45: Wood blocks weight down the assembly.
45
To complete the construction of the structure, begin by
gluing the frames for the conveyor roofs to the corrugated
siding roof pieces. I used two part epoxy and applied it
sparingly to the top cross pieces, placing glue on every 4th
or 5th cross piece.
Repeat this step for the frame and roof for the breaker.
Because the roof of the large conveyor extends into the
frame of the breaker, trim the corner of the roof so it
will slide in past the roof support on the left side of the
breaker. Test fit both pieces, make any adjustments that
are needed and then glue them in place by applying two-
part epoxy very sparingly to the top cross braces on the
conveyor.
I placed several small wood blocks on the roof of the large
conveyor as shown in the photo here (45) in order to make
sure it sat down on the roof braces.
Coal loader, p2 - 12
MRH-Jan 2013


