-
STEP 14: Final Assembly
43: The final construction, and painting.
44
Prior to installing the siding and roofs, we’ll finish up construc-
tion of the conveyor. Set the large conveyor in place between
the breaker and the tower. Now position the small conveyor
so that the belt from the large conveyor extends slightly over
the top of the belt on the small conveyor.
Glue the small conveyor in place and then glue the large con-
veyor in place by brushing a small amount of liquid cement
between the I-beam supports and the bottom rails of the
large conveyor. Next, glue the 4 bents in place.
As you can see from the photo below, I had to shim 3 of the
support bents in order to get them in the right position. Use
small scraps of styrene for the shims.
Note that the receiving bin has not been glued in place yet-
we need to apply the siding to the back before this step. Once
the bents are in place, paint the surrounding styrene a grimy
black color.
Coal loader, p2 - 11
-
STEP 14: Final Assembly
Continued ...
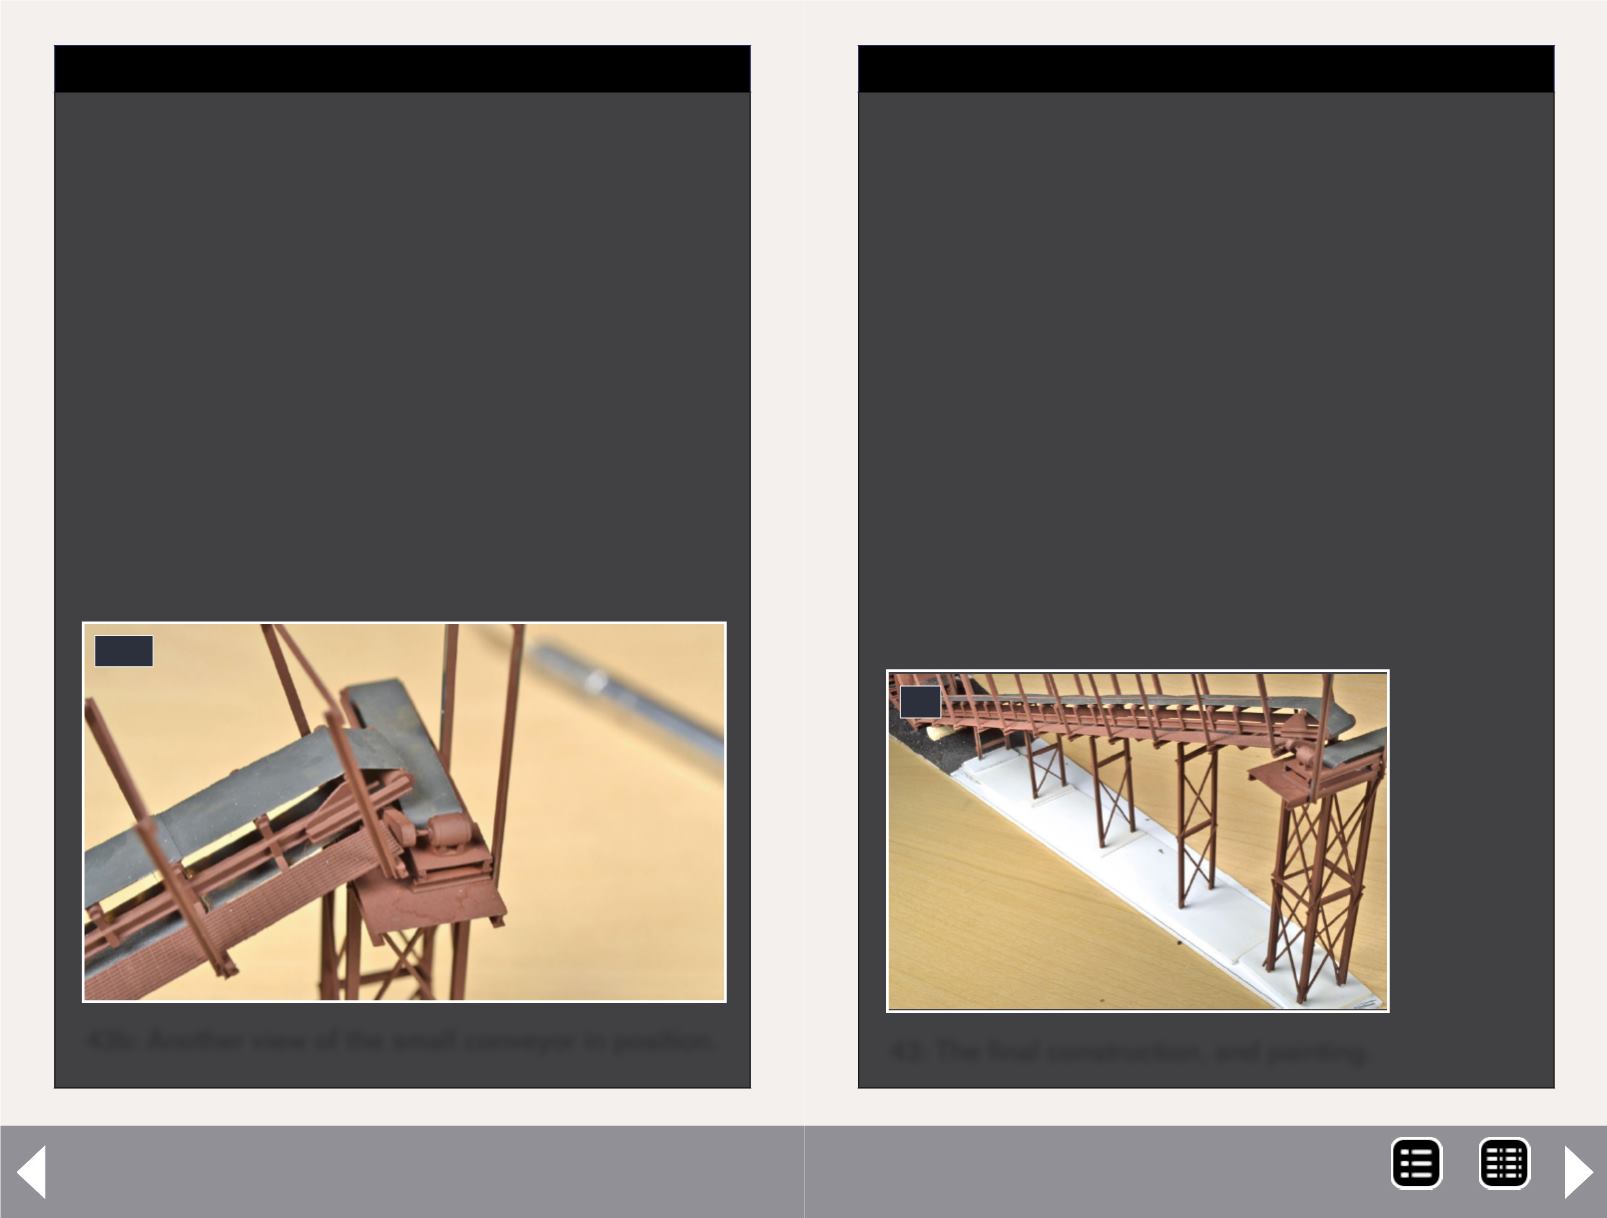
43b: Another view of the small conveyor in position.
43b
box. The belt cover is a piece of .060 styrene filed and
sanded to shape. Next, cut a piece of .060 I-beam to the
width between the channels and glue it at the end of the
channels under the platform.
Cut two small pieces of .060 I-beam and glue them parallel to
the bottoms of each channel approximately 3’ from the end
of the conveyor away from the motor.
Paint this assembly with the same rust color used previously.
When the paint is dry, make the belt from a strip of masking
tape and paint it a grimy black color.
Photos 43a and 43b show the small conveyor in position at
the top end of the tower.
MRH-Jan 2013


