-
STEP 12: Conveyor Roof
Continued ...
insuring that it was flush with the edge of the roof edge piece.
Once all of the cross pieces are in place, glue the other roof
edge piece flush with the cross pieces. Now cut a piece of
scale 2’ x 4’ to the length of the conveyor and glue it in the
center between the two roof edge pieces.
Once the roof for the large conveyor is complete, repeat the
same steps for the roof of the breaker. Cut the roof edge
pieces so that the roof of the breaker will extend slightly over
the roof of the conveyor.
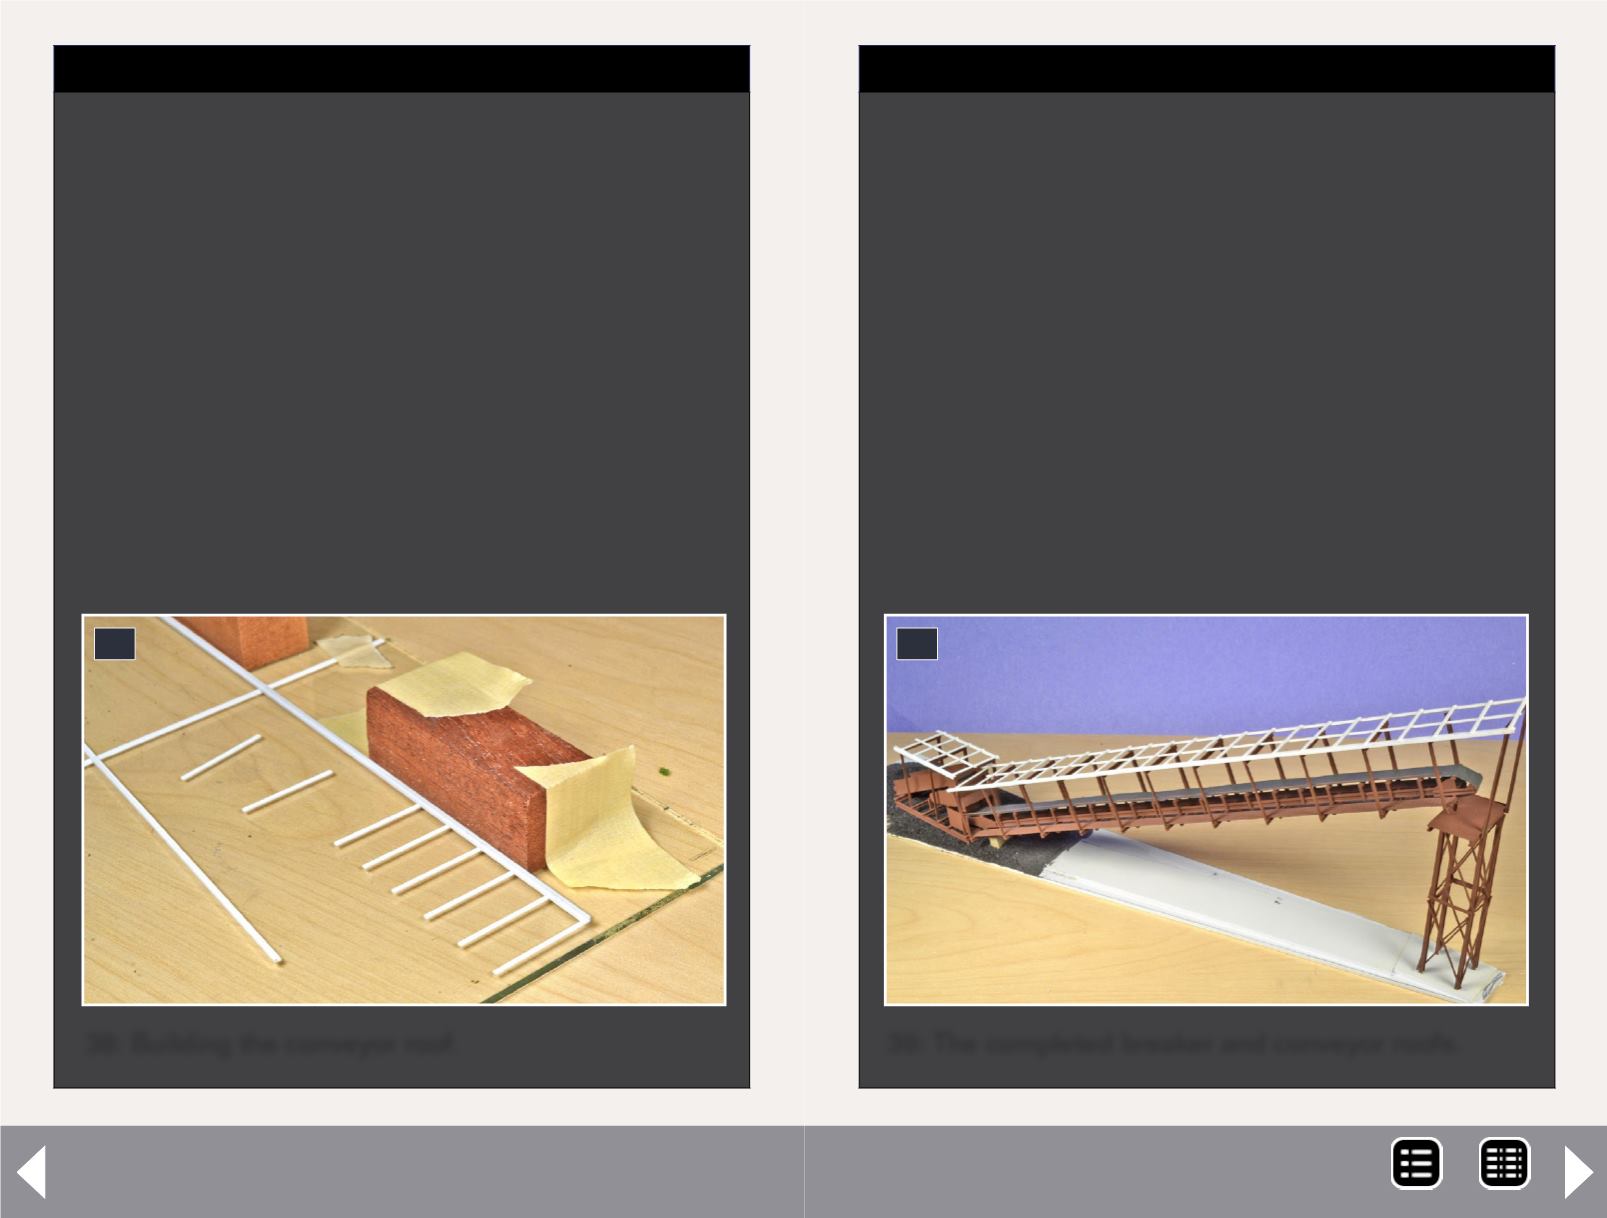
The photo here (39) shows the completed breaker roof and
conveyor roof set in place. Next, paint both of these assem-
blies with the rust color used previously.
39: The completed breaker and conveyor roofs.
39
-
STEP 12: Conveyor Roof
For the roof of the conveyor, measure the distance from just
beyond the edge of the roof bracket on the tower to the last
roof bracket at the other end of the conveyor. Cut 4 pieces of
scale 2” x 4” to this length. Glue two of the pieces together
so that the 2” edge of one piece is flush with the 4” piece of
another and repeat this with the second two pieces – see the
photo here (38).
These two pieces will be the edges of the roof frame. Next,
cut pieces of 2” x 4” to a scale 6’9” length and glue them to
the long side of one of the roof edges at 3’ intervals.
As you can see in the photo here (38), I made a jig for this step
by taping a small block to my work surface and taping a piece
of scale 2’ x 6’ away from the block. This allowed me to slide
the 6’9” pieces under the roof edge piece until it hit the block,
38: Building the conveyor roof.
38
Coal loader, p2 - 7
MRH-Jan 2013


