-
STEP 10: The Receiving Ramp
Continued ...
I also stippled on some of this stain in the center of the
ramp to represent oil and grease from the constant stream
of dump trucks backing up to unload coal. We’ll add some
additional weathering later.
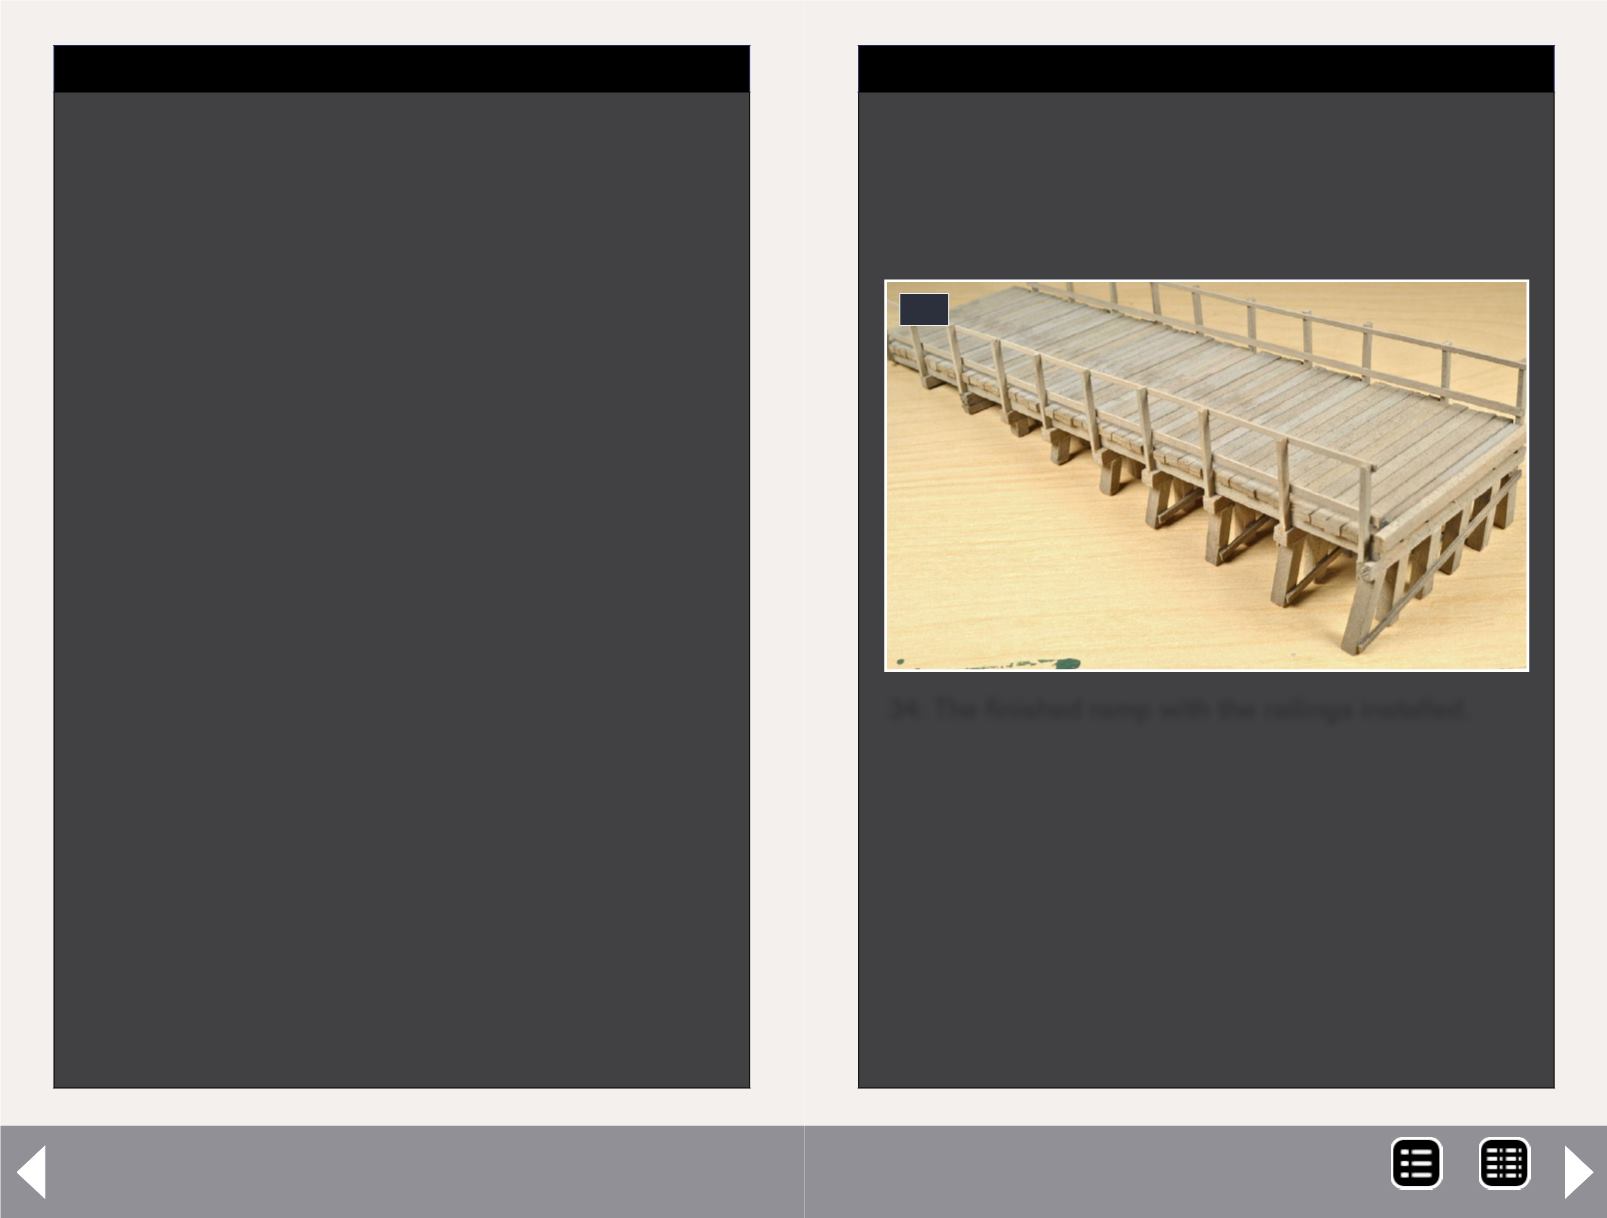
34: The finished ramp with the railings installed.
34
-
STEP 10: The Receiving Ramp
Continued ...
I used a Northwest Shortline Chopper for the various
pieces of scale lumber and set the stopper at a distance
of 14 3/4’ from the blade. I varied the length of the floor
boards by cutting various pieces slightly shorter than 14
3/4’. The first board at the top should be cut equal to the
distance between the joists. This piece will be placed over
the top of the bent, and we need to leave room to glue the
railing posts.
The floor pieces at each of the bent tops should be cut in
a similar fashion. The photo here (33) shows the flooring
being installed. Note the floor boards at the tops of the first
three bents- each has been cut flush with the edge of the
floor joists as described above (33).
Installing the railings will finish the ramp part of the project.
For the posts, cut 20 pieces of 4” x 6” to a length of 5 1/2’
and glue them to the top of each bent. The lower railing is
a piece of 2” x 6” and the upper railing is a piece of 2” x 4”.
Cut both pieces slightly longer than the distance between
the posts at each end and glue them in place.
Photo 34 shows the completed ramp with the railings in
place. Don’t forget to touch up the unstained ends of the
basswood. I used the same black stain used earlier but
diluted it about 50/50 stain to water. I used a small brush
and lightly touched each end in order to avoid getting too
much stain around the ends of the pieces.
Coal loader, p2 - 4
MRH-Jan 2013


