4
4. Remove flash from the parts with a hobby knife.
Build your first resin car - 3
sure that you are not applying too much pressure to one side
or end. I use this method to clean up the very fine small parts
that are in the kit. The most important thing to remember is to
check often and take your time.
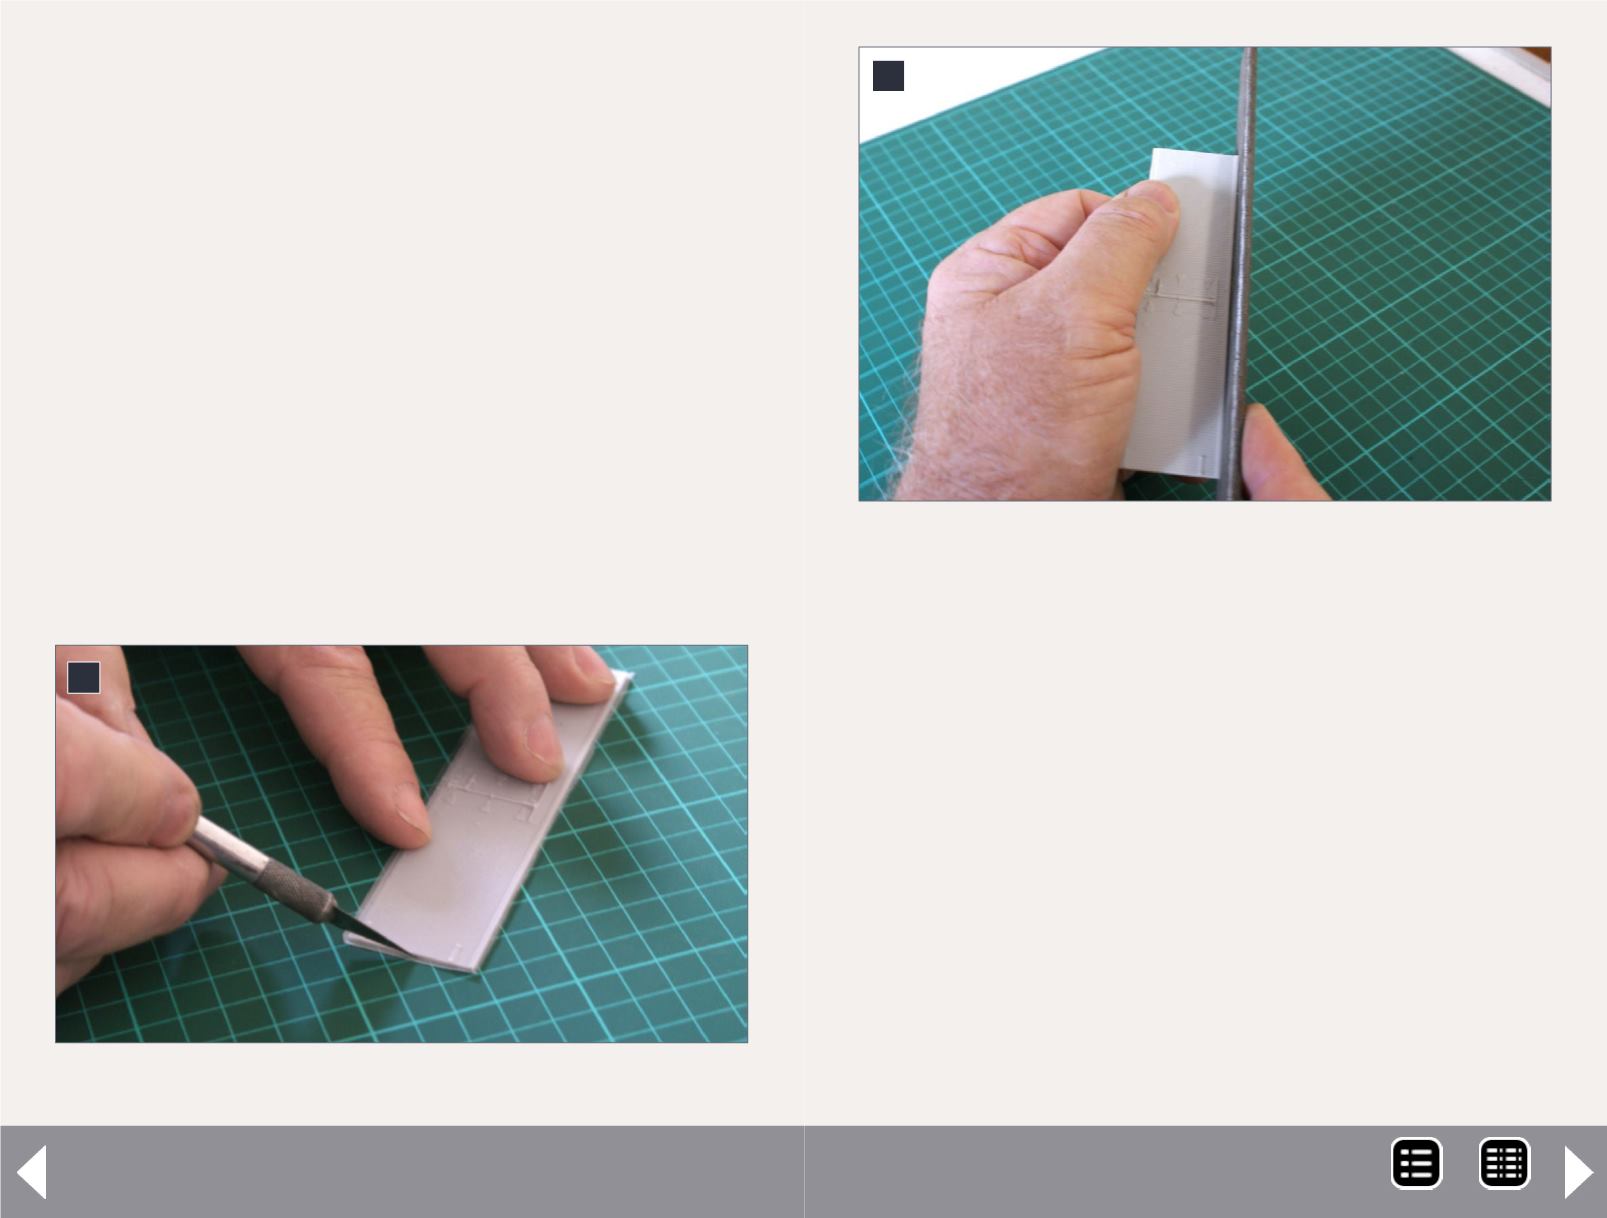
I cut the flash away from the bigger parts with a hobby knife.
The flash on this kit is very thin and fine. I make sure I have a
sharp blade and replace it a couple of times. Resin dulls blades
very quickly. Once the flash is removed, I gently run a file along
the edges to true them up and ensure they are square. I take
my time since this step is important. Any mistakes here can
affect the assembly and look of the car later. I use a large mill
file for this. I find that it has a very flat and true surface. Some
of the smaller hobby files can cause you to wander. Try not
round off the corners of the car. If you do, it can be fixed, but it
is better not to.
After using the file, sand the back of the part lightly to
remove the glossy surface and help the glue grab on to the
part. There only needs to be some “tooth” on the back of the
part to be effective. Once all the parts are cleaned up, this [6]
is what you have.
With this kit there are six ice hatches, but you only need four
for the car. Most resin manufacturers include spare parts.
This helps if you make a mistake, or a small piece flies off into
Neverland. They are also handy for the spare parts box.
Smaller parts can also be cleaned up by sanding. If I damage
one of the smaller parts cleaning it up, I look at how is made.
I can sometimes make a new part out of styrene. Check your
parts list before throwing out the large amount of excess flash
and resin dust. You may throw out a very small part you will
need later. Ask me how I know!
5
5. True up the sides with a large file.
MRH-Aug 2014


