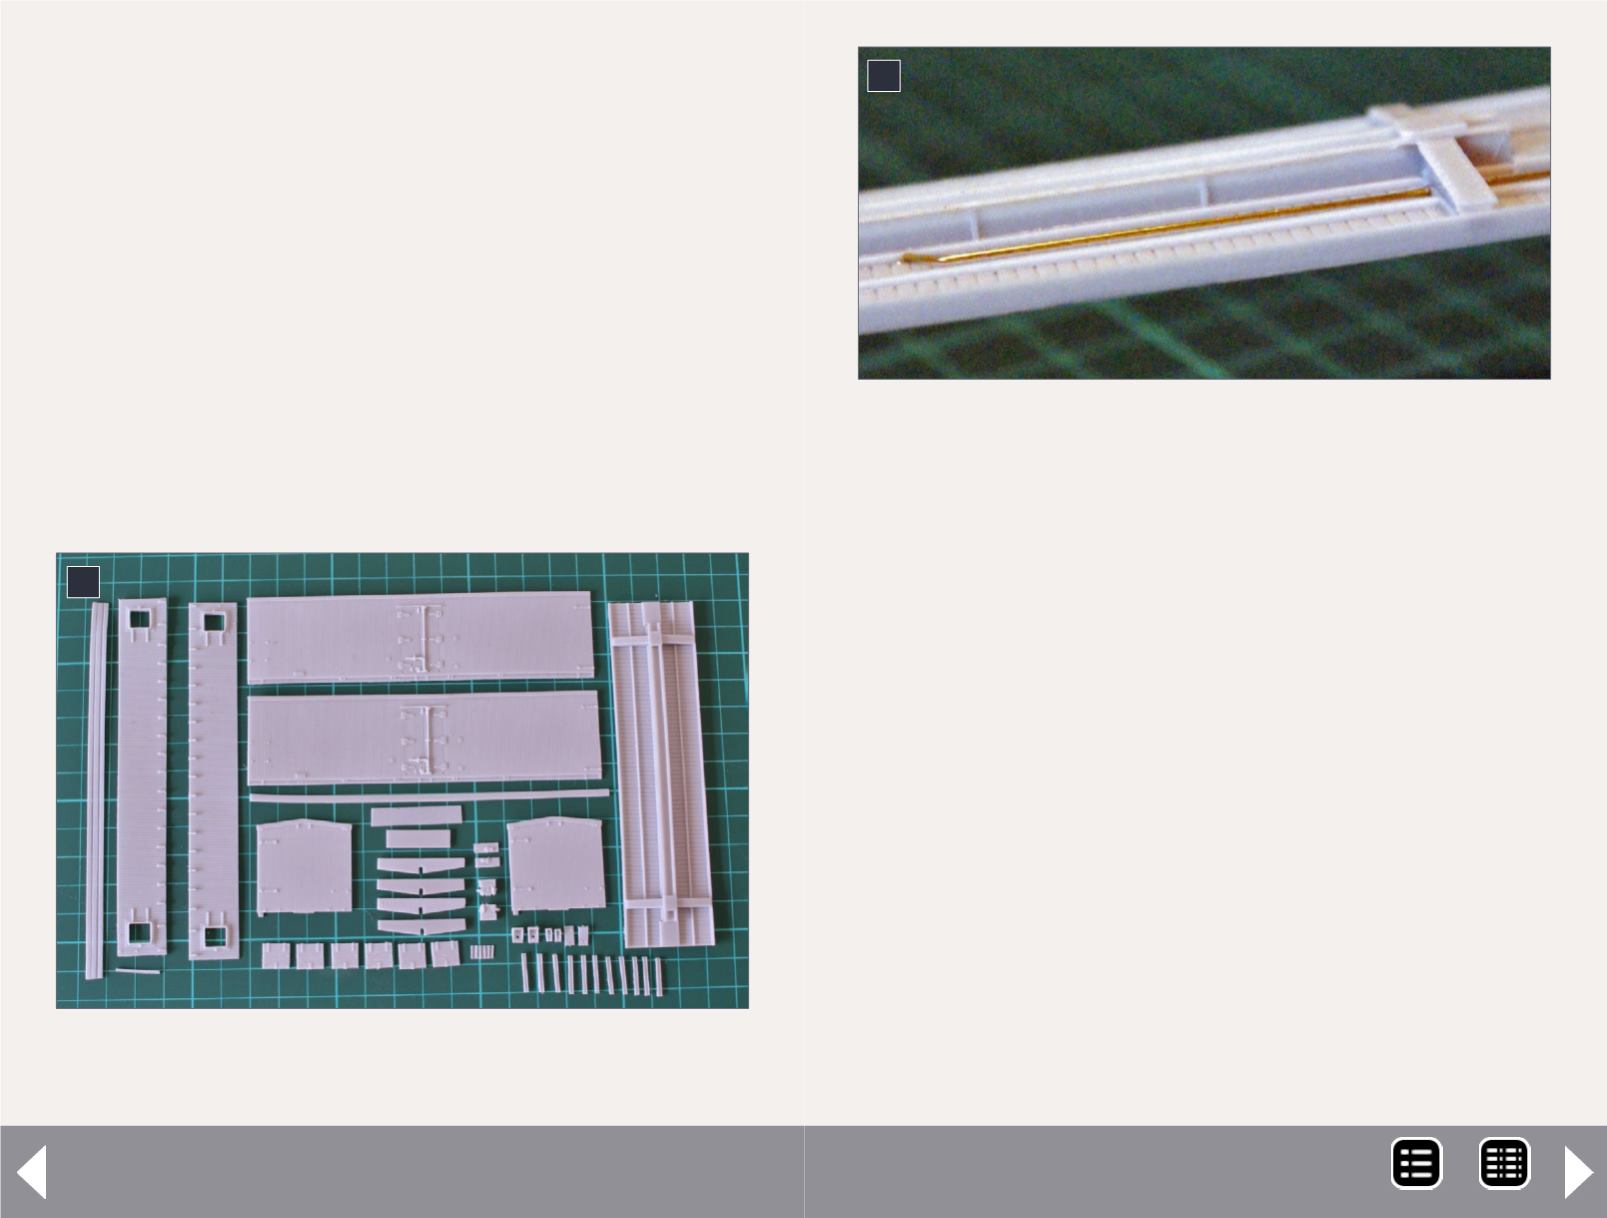
How to assemble the kit
Before starting assembly, check the sides for length and height.
They should match exactly. Mine were the same height but not
the same length. I carefully sanded the longer side until the
two sides were the same length. It is essential that the ends
and sides match each other. If they don’t, the model will be out
of square and the underframe or the roof will not fit without
gaps. Resin can sometimes shrink in the molding process and it
is not unusual for parts to be different sizes.
Now it is time to do some assembly. Read the instructions
before starting. Sometimes there are hidden treasures for you
to find. Familiarize yourself with the assembly sequence. For
this kit, after reading the instructions I changed the sequence.
6. All of the resin parts with flash removed and ready
for assembly.
Build your first resin car - 4
6
The instructions call for painting the sides, ends, roof and
underframe before assembling the basic box. I find this hard
to do as it is practically impossible to clean up glue spills on a
painted surface.
Begin with the underframe. This includes all of the brake parts
and stringers. Eight stringers are required. If you want to add
the train line for the brakes, do it now before installing the
stringers. The instructions on this kit did not call for a train line,
but I like to add it. I use .015” brass wire to represent the train
line and drill through both bolsters [7] with a size 74 drill for a
tight fit. TIP: Drill a small distance into the center of the car at
the angle so that the wire can be seated in the channel.
In [8] you can see a stringer ready to be attached to a verti-
cal rib. Before doing so, file a small indent into one end of the
stringer to help them to seat properly.
Now for the brake parts. I followed the instructions here and
added the brake reservoir, valve and brake cylinder with the
7. Train line attached to the underframe.
7
MRH-Aug 2014


