I drilled #79 holes in all the spots where I previously filled the
grab iron holes. A Detail Associates nut-bolt-washer casting was
glued into each hole, then I drilled a second hole just above
each NBW casting for the actual grab irons. BLMA grab irons
are installed using a piece of .030” styrene strip as a spacer to
keep all of the grab irons an equal distance from the hood.
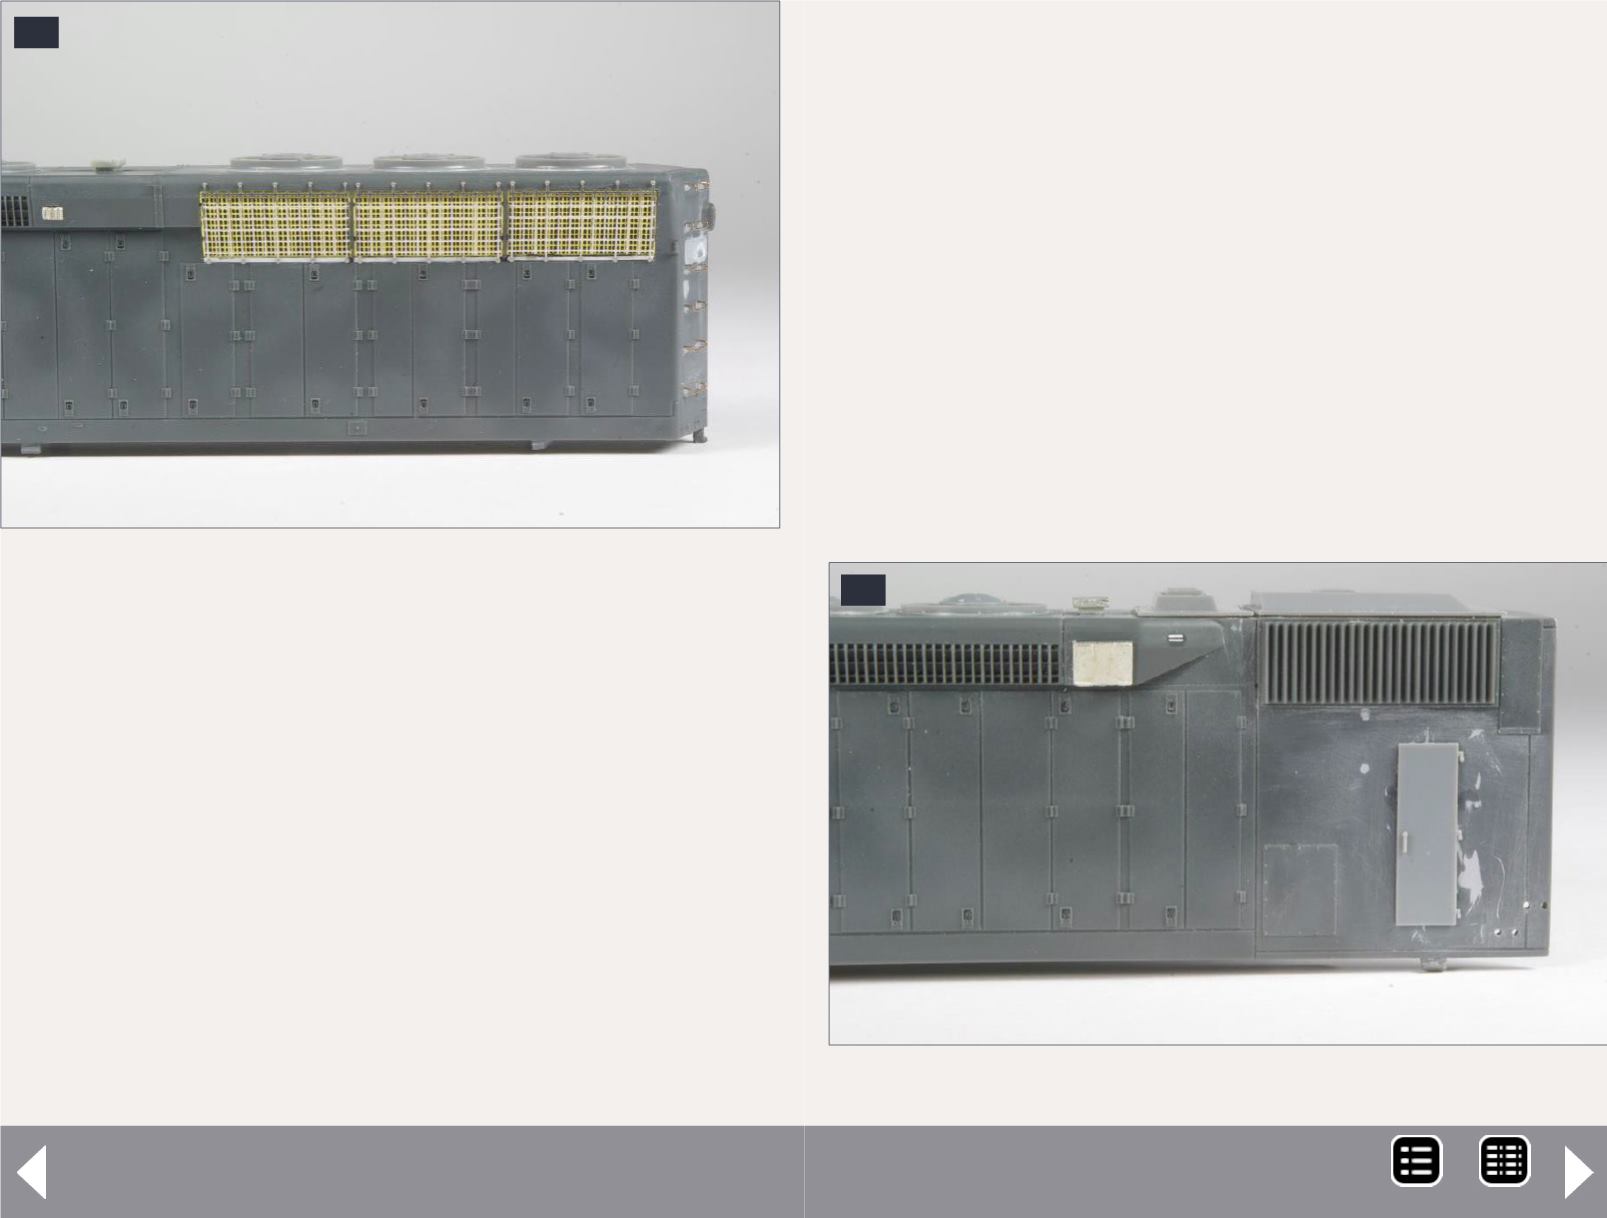
Next I installed the Cannon inertial filter hatch, turbo hatch,
dynamic brake fans, and radiator fans. Install the two dynamic
brake vents, the one from the Details West detail kit in front of
the dynamic brake fans and the Detail Associates vent behind.
The dynamic brake access doors are glued on, as are small lou-
vers from the Details West SD45 detail kit. The very small lou-
vers are located on the front of the dynamic brake blister, and
cut from small pieces cut from .005” styrene sheet. I glued the
17
17. Plano radiator grilles step 4.
Pan-Am Railways SD45R - 8
Cannon generator compartment door on the right side of the
hood .120” from the bottom of the hood and .360” from the
front [18].
Plano 14651 lift rings are installed on the dynamic hatch and
Plano 14652 lift rings on the radiator compartment, turbo
hatch, and inertial filter hatch. Bend the curved grab iron
behind the rear radiator fan using .008” brass wire. I added the
sand filler hatch and lift tabs on the rear of the hood from the
Plano 14771 winterization hatch screen. I used lift tabs from
Sunrise Models, but these parts are no longer available. A #76
hole was drilled where I previously plugged the hole for the
handbrake wheel. Glue a short piece of .015” wire in the hole;
use this as a mounting pin to attach the hand brake wheel from
the Cannon short hood kit.
18. Electrical cabinet/clean air room door.
18
MRH-Oct 2014


