Pan-Am Railways SD45R - 4
Once you have gathered all your tools and materials, the first
step is to disassemble the model. There are two small Phillips
screws which hold the shell to the frame, they are a bit hid-
den, so follow [5-6] to locate them and remove them. At this
point I will concentrate on the shell; I will come back to the
chassis later.
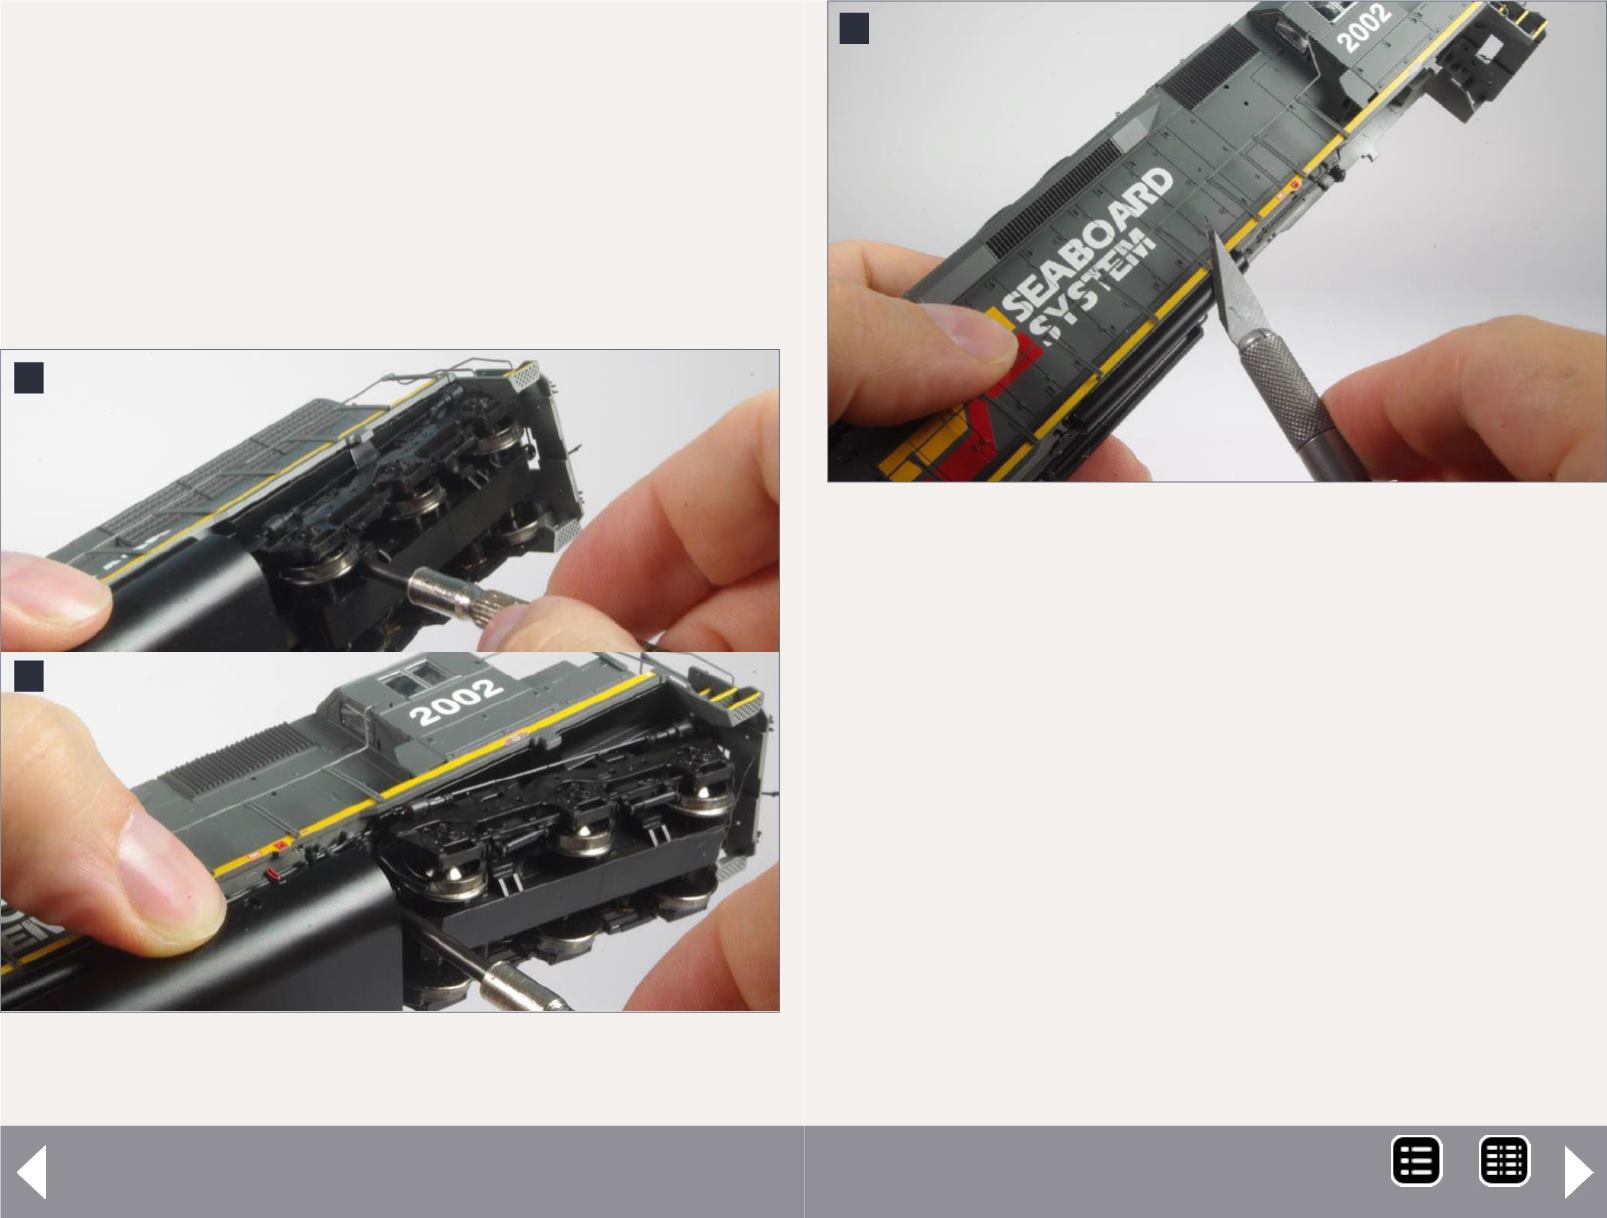
Next remove the handrails. I found the easiest way to do
this was to slide a #11 blade under the edge of each handrail
5-6. Removing the rear and front screws which secure
the shell to the frame.
5
6
stanchion [7] and twist it to loosen the stanchion. I disassem-
bled the shell into its major components [8].
Continue to remove all of the added-on details. I discovered
that many of the plastic parts are inserted in their mounting
holes, then the mounting pins are melted on the inside of the
shell. Quite often you can shave off the melted part with a
hobby knife and then pop the part right off. To remove the side
radiator grilles, use a dental pick or small screwdriver to push
out the mounting pins from inside the shell.
Once the shell has been disassembled and the details
removed, it is time to strip the paint. The best thing for strip-
ping Proto 2000 paint is 99% isopropyl alcohol or isopropa-
nol. I put the parts of the shell in an airtight container, pour
in enough isopropyl alcohol to cover everything, then let
everything sit for a couple of hours. I scrub the parts with a
7
7. Removing the Proto 2000 handrails using a #11 blade.
MRH-Oct 2014


