Next assemble the cab, sub-base, and short hood all into a
single unit. Install BLMA grab irons into the previously drilled
holes and glue from the inside. Once again use a piece of .030”
thick styrene as a spacer to ensure all the grab irons are the
same distance from the hood. Glue the step on the left front of
the sub-base. Do not install the rear right cab steps yet.
The pilots, sills, and walkways
The first step with the sill is to file off the anticlimbers and fill
the holes in the pilots with various sizes of styrene rod and
strip. Fill the handrail stanchion holes on the left side with
.020” styrene rod. Mark new stanchion holes directly below
the old holes. The rear three holes should be .050” from the
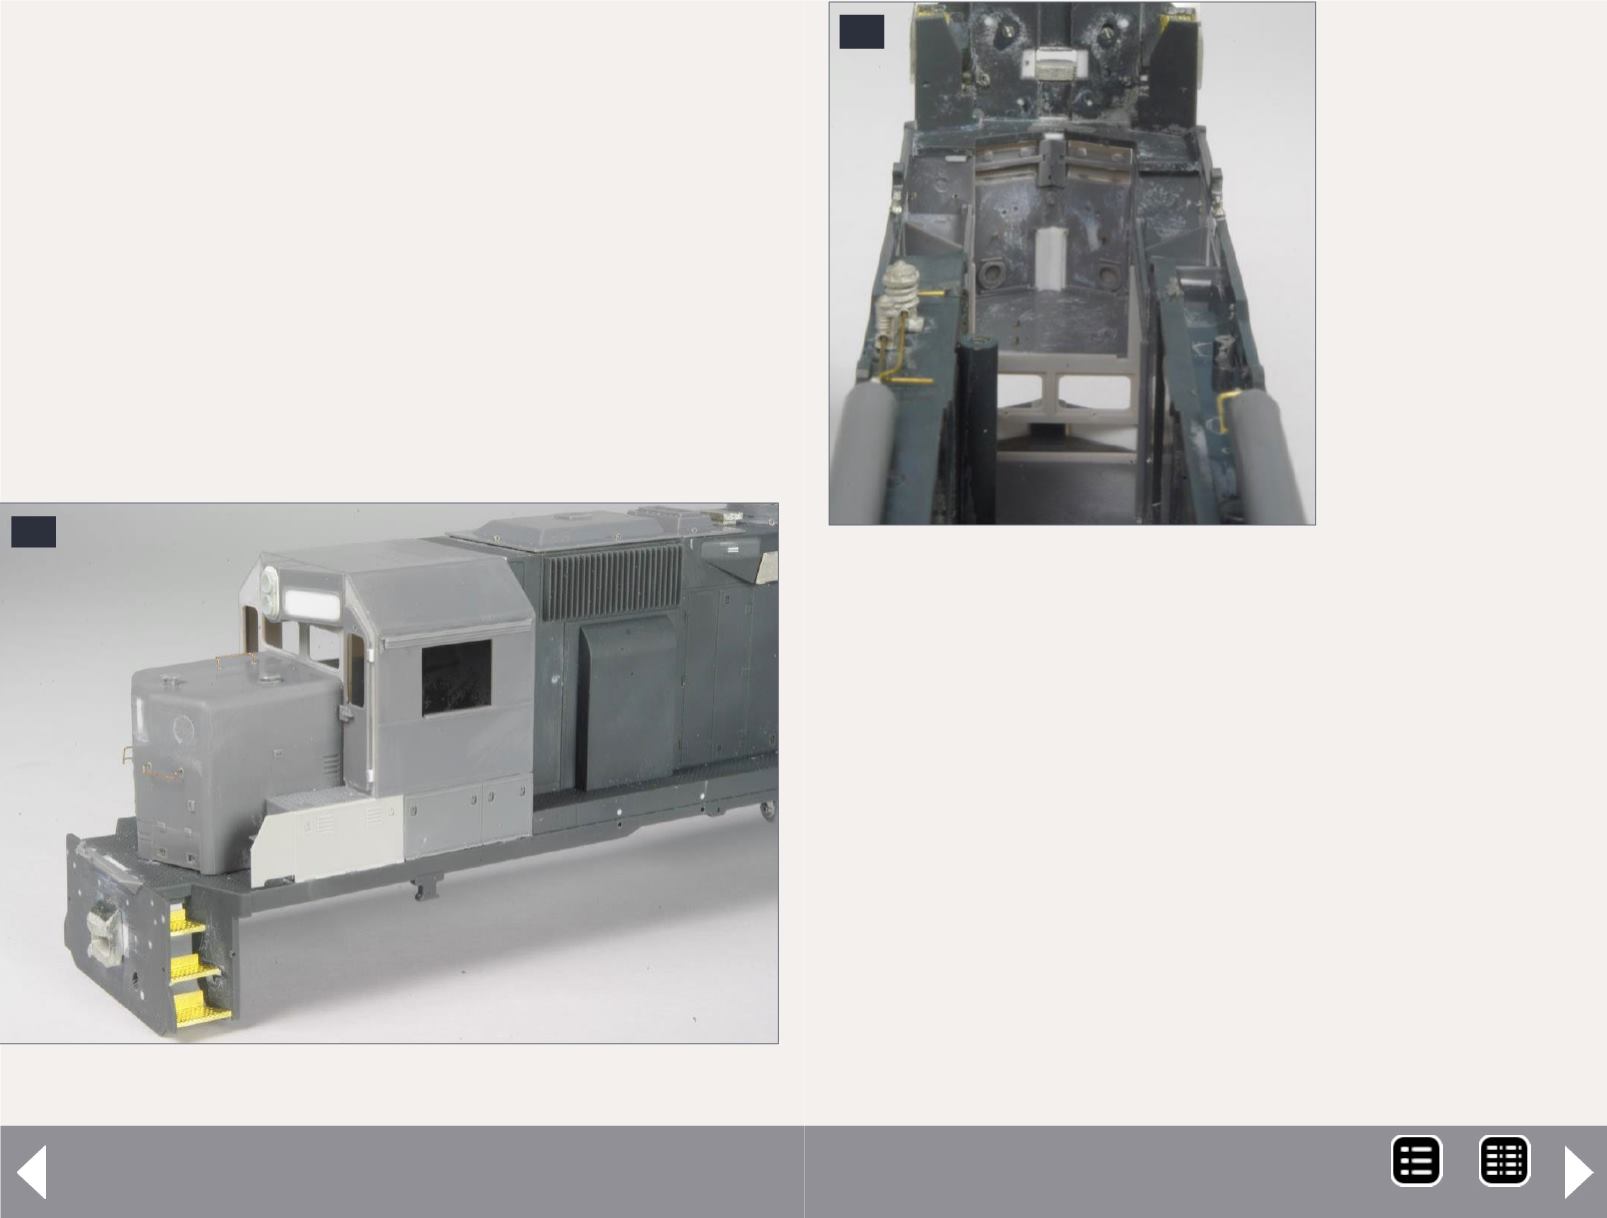
23. Cab and short hood left side view.
23
Pan-Am Railways SD45R - 11
top of the walkway
and the remain-
der .140” from the
top of the blower
duct. Drill all the
holes with a #70
bit.Remove the
cab sub-base using
either a razor saw
or nippers, and file
the area to match
the rest of the
side sills. The sill
unit is quite fragile
once the sub base
is removed, so be
careful when work-
ing on it.
It will regain its strength once the new sub-base and cab are
attached. If your model has the long blower duct on the left
like mine, this is a good time to shorten it. Once you shorten
the blower duct, there will be a gap in the walkway; fill this
with a piece of styrene. When filling the gap on my model, I
also glued on a piece of Cannon etched brass walkway material
from my scrap box.
Cut off the corner steps, leaving a bit behind to attach the
Cannon etched steps. Glue short lengths of .020x.030” styrene
strip in the holes where the middle steps were, as shown in
[26]. Bend the Cannon steps following the included directions
and attach them as shown in [27].
24
24. Inside of short hood built up
with styrene.
MRH-Oct 2014


