almost straight out, then feed them through the doors on the
plow. Slide the plow into place, then glue the mounting pins
from behind. Once the glue is dry, trim the plow mounting pins
flush with the back side of the pilot and bend the MU hoses
down into place so they have a natural drape to them. Glue
Details West 266 MU hoses on the rear pilot. Also on the rear,
glue on one of the brake hoses from the Details West SD45
detail kit.
You will notice the rear pilot has angled slots near the top cor-
ners. I made these by drilling #73 holes where I figured the
ends of the slots should be, then I used a fresh #11 blade to cut
out the area between each pair of holes.
Next drill holes in both pilots for the coupler lift bar brackets.
I made each coupler lift bar or pin lifter from three pieces of
29
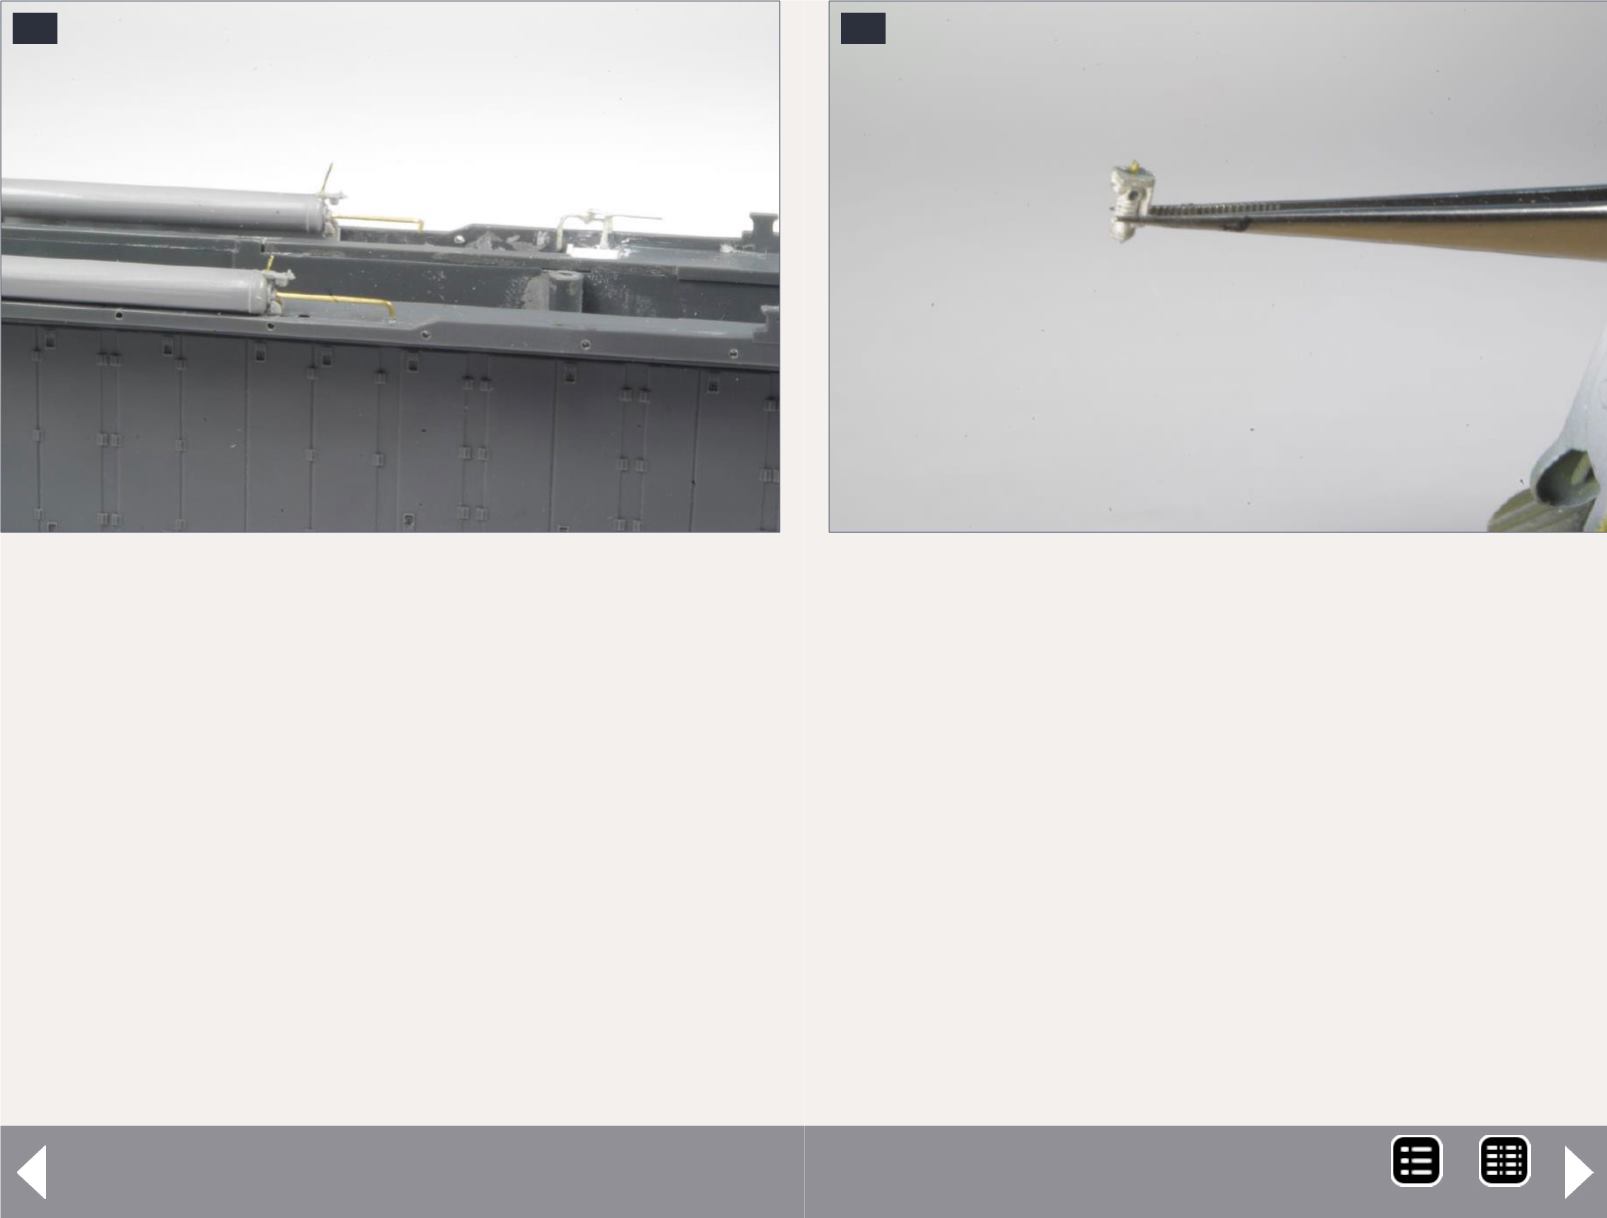
29. Reinforcing air tank drains with brass wire.
Pan-Am Railways SD45R - 14
30
30. Details West air filter modified and mounting pin
made from brass wire.
.010” brass wire. The rear bar is mainly horizontal while the
outer two pieces of the front bar angle upward from the cen-
ter. First bend the outer pieces for the front and rear using
photos as a guide. Note the inner end has a bend that curves
180° back toward the outer edge of the pilot. Slide the Detail
Associates brackets onto the bars and glue them in place on
the pilots.
On a real EMD locomotive the middle piece of the coupler lift
bar attaches to the two outer pieces but not the pilot. To give
the middle piece strength on my models, I attach it to the
pilot; to do this, first drill a #80 hole in the pilot just above
the curved inner end of each coupler lift bar piece you previ-
ously glued on. Following photos, bend the inner part from
MRH-Oct 2014


