brass wire pieces in the handrail kit or bend your own from
one long piece of wire. I use the second option for my mod-
els but this does take some practice. You also have to decide
if you want to solder the handrails to the stanchions or glue
them. Soldering definitely makes the strongest handrail, but
you have to be careful not to melt any parts on the plastic
shell. I suggest the use of flux, heatsinks, and perhaps a low-
temperature solder. On my recent models I have used Mi-
croscale MicroBond to glue the handrails to the stanchions, in
fact I now use MicroBond in all situations where I used to use
regular CA adhesive.
Continue with all the other handrails, following the Smokey
Valley instructions and photos. When drilling the vertical
35
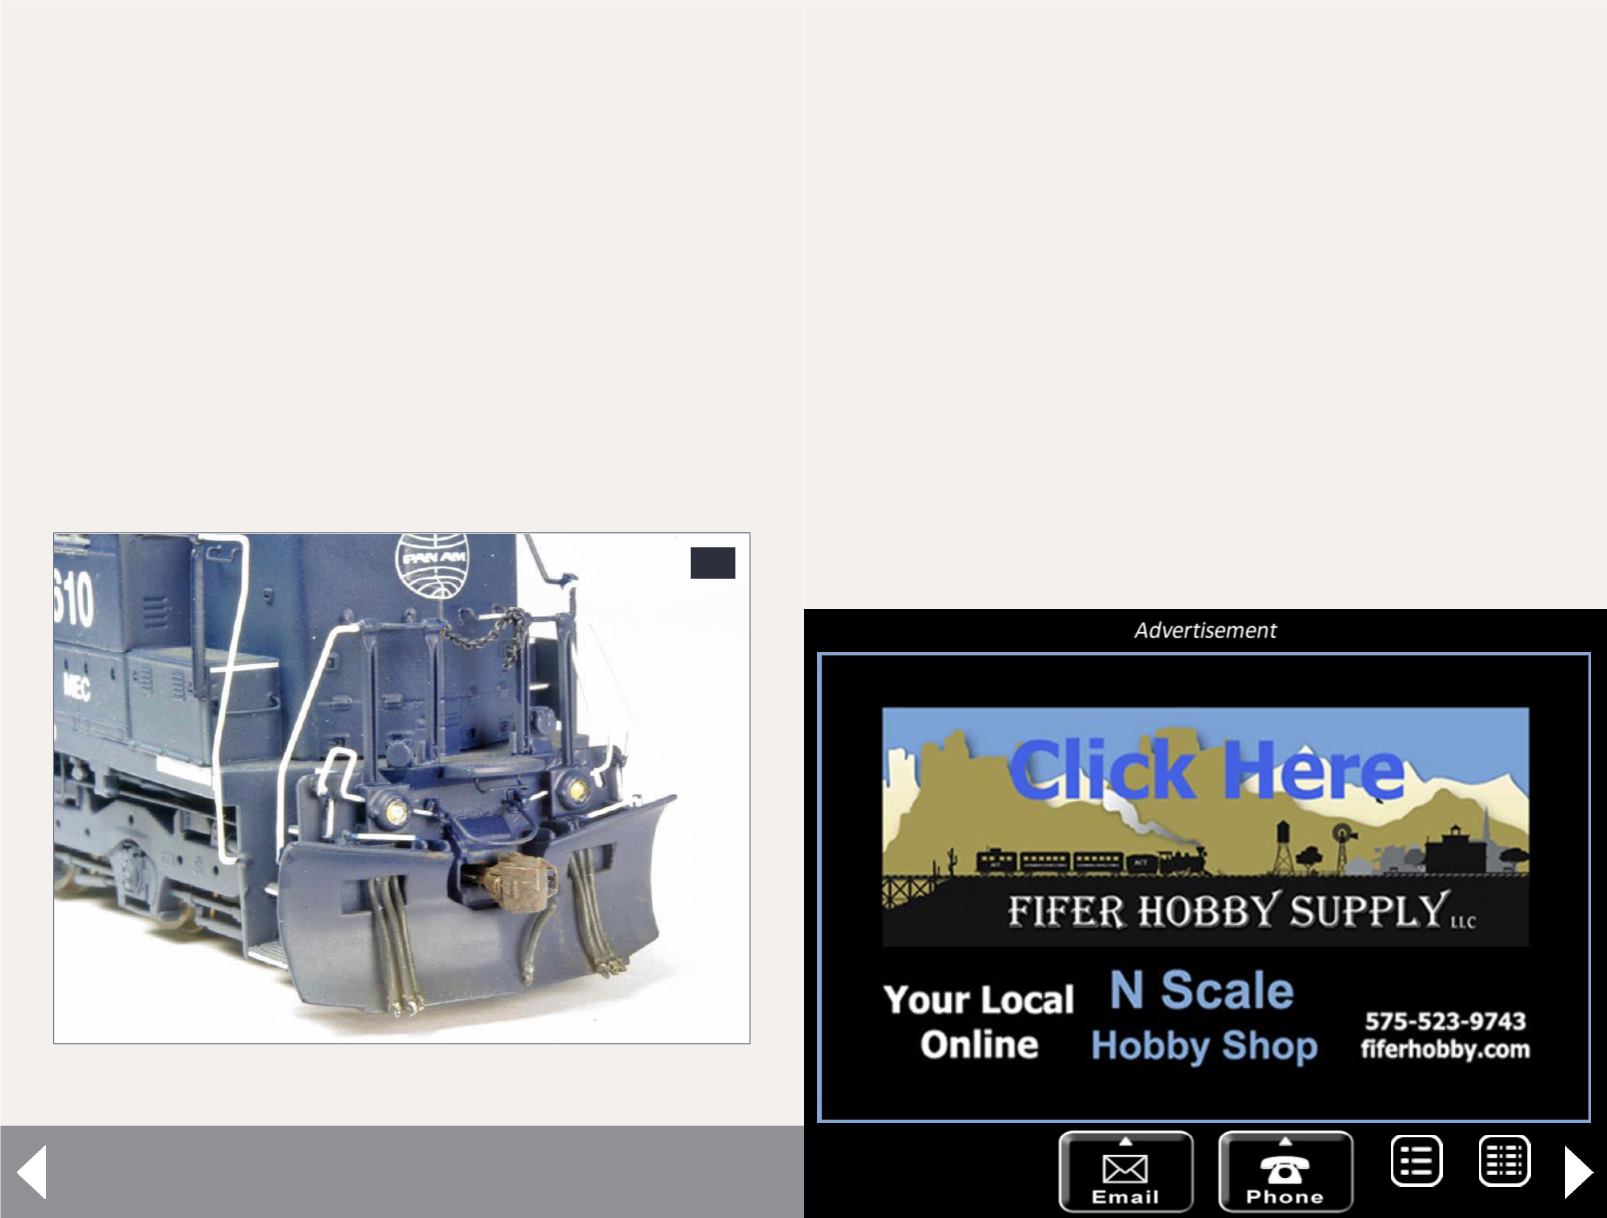
35. View of finished front pilot.
Pan-Am Railways SD45R - 17
holes for the end stanchions, be careful not to drill all the way
through the anticlimber.
Once most of the work is done to the shell, you can add the
fragile parts which could be easily damaged or broken off. On
this model that includes the details on the cab roof, the sun-
shades above the cab windows, and the underframe bell.
Install a Details West 373 horn rather than the horn included
in the Details West SD45 detail kit. Drill a hole in the top of
the number board assembly for mounting the horn. Trim the
mounting pin on the horn so it is long enough to provide a
strong mount but short enough so it will not interfere later
when you are installing headlights. I used two spacers made
from styrene strip while gluing the horn so it would be at the cor-
rect height. The front spacer is a piece of .030”x.060” strip and the
rear is a piece of .030”x.080” strip. These can be seen in [34].
MRH-Oct 2014


