Installing a sound decoder - 10
throw and the headlight will come on.) Advance the throttle a
notch or two and the engine should move forward. Stop and
change direction and the backup light should come on. If you
have a Firebox Flicker LED, press the function you wired it to
(5 or 6) and it should come on. Set its CV (51 or 52) to 141 and
the flickering should start. If the LED seems too bright, a dab
of yellow paint will soften the glare. If all these functions look
normal, you can assume you installed your decoder properly.
Now, take the engine back on the bench and put the headlight
bulb into the hole you drilled for it; I hold it in with some plastic
tape on the inside of the smoke box door. Then route the engine
wiring neatly so it is away from any moving parts and out of sight.
This is a good time to replace the boiler weight, but you may
have to saw off some of it to fit under the decoder. A hacksaw
with pretty large teeth works well, but be sure to file off any
sharp edges afterward. If possible, use the original mounting
holes and screw, but be very careful not to tighten it down and
pinch some wires. When you’re satisfied that the wiring is clear
and not pinched, put the boiler back on properly.
TIP:
It is easier to place the boiler upside down on a soft sur-
face and drop the frame/running gear down into it, rather than
fit the boiler down over the frame – you can see if any wires
are caught, pinched or in the wrong place. Then run the engine
on the layout for several minutes as a final test. Don’t forget to
set the decoder address to the number on the side of the cab.
I also like to set CV3 and CV4 to values around 30 or more, to
give easy more prototypical acceleration and slowing down;
this will also extend the life of gears and couplers.
Finally, I like to include a data sheet explaining the details of
the installation, a wiring diagram, and any CVs I changed from
the factory defaults. This will be handy if there’s a problem five
years from now when the details are forgotten.
I also encourage my customers to leave their engines on the
layout or in a larger box where they do not need to disconnect
the engine and tender each time they are used. This will wear
out the cable connectors pretty quickly and, unfortunately, the
cables do not come with a lifetime warranty. Replacing them
will be time-consuming and expensive.
I hope you enjoy your sound-equipped loco for a long time!
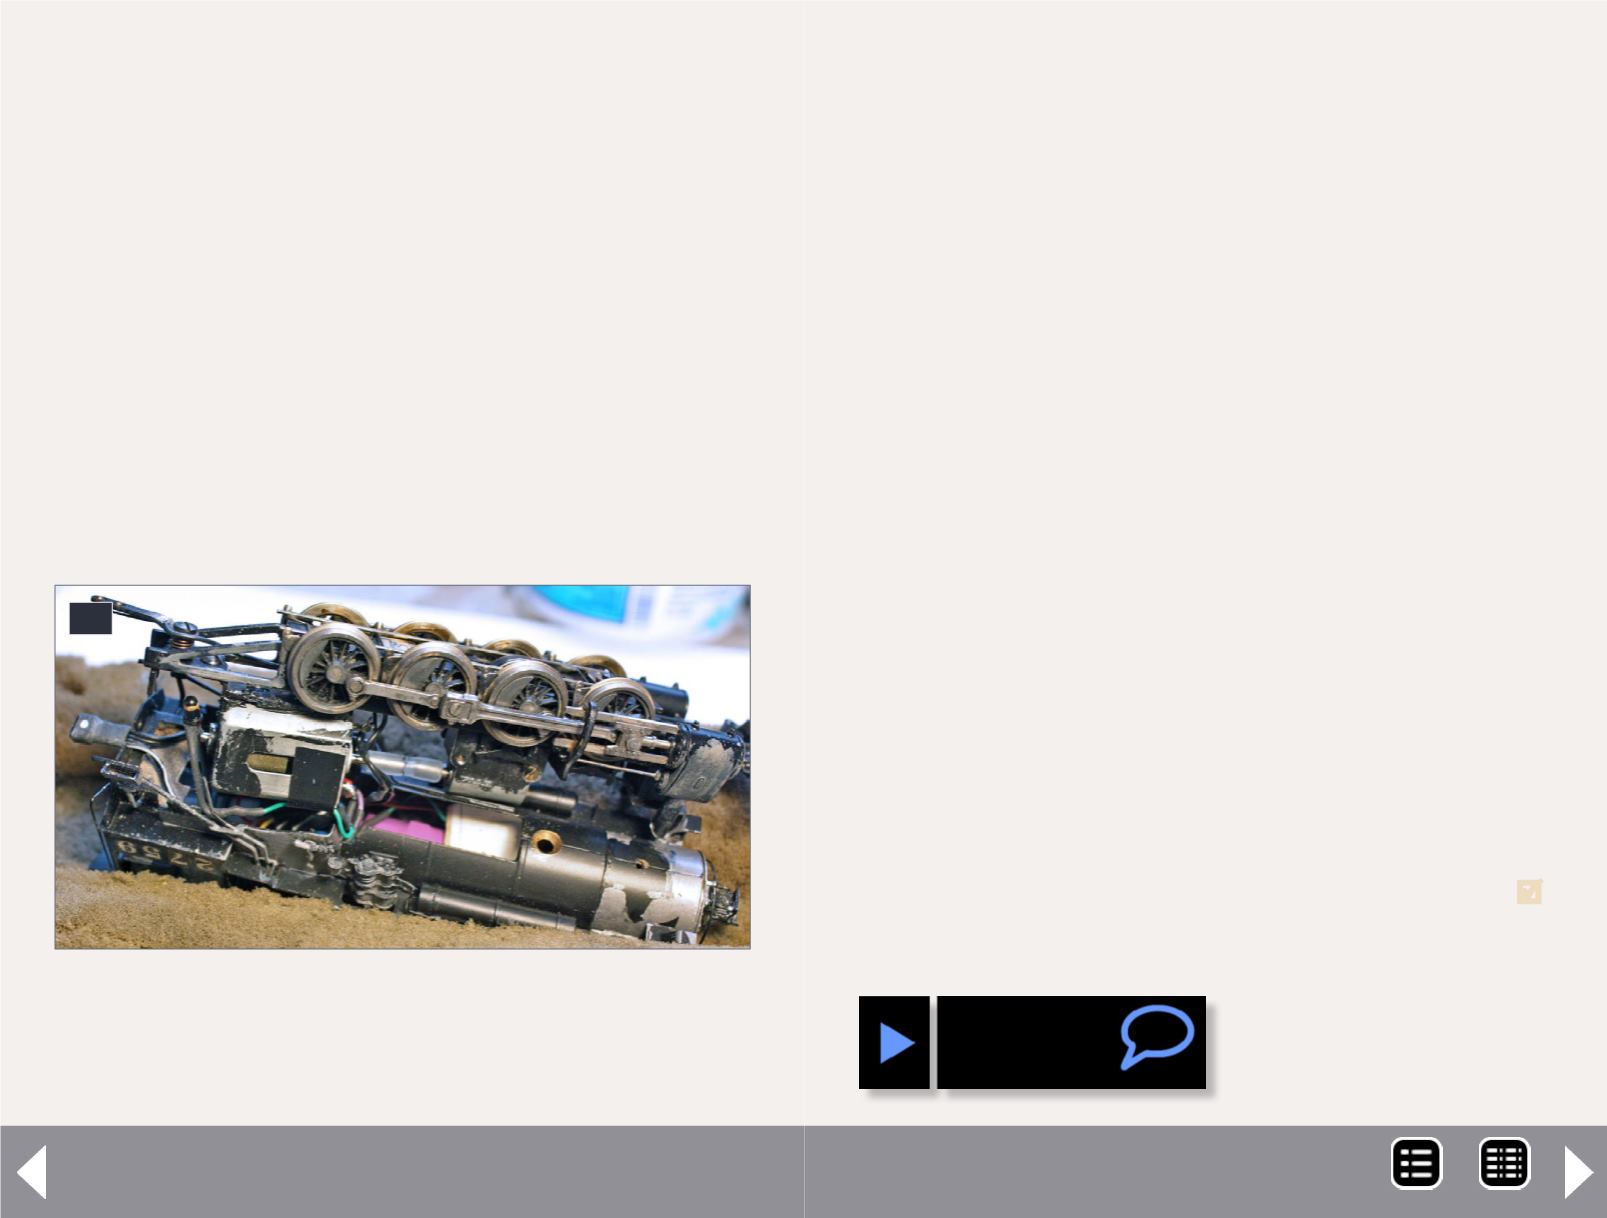
10: Drive is ready to drop into boiler – the Firebox
Flicker LED is to the left of motor, 4-pin cable in notch
in apron at left; pink decoder can be seen in boiler.
Wiring is carefully routed to avoid moving parts.
10
MRH-Dec 2013


