Installing a sound decoder - 9
resistor for the backup light in the tender where there is plenty
of room.) After the wiring for the lights and the flat cable are
finished, you should have two leads to the motor (orange and
gray) and two leads to the track power (red and black) remain-
ing to be wired; the red lead will go to the loco frame and the
black lead will go to the draw bar.
The orange lead will go to the motor terminal which formerly was
connected to the frame or right rail. I always solder the black lead
directly onto the draw bar itself rather than the terminal or nut on
the shoulder screw – this eliminates one sliding connection that
often gets dirty or corroded, and causes stalling. While soldering
the lead to the draw bar (6), hold the contact wire with a clamp or
forceps so it doesn’t move, and make sure it is well-soldered and
fits snugly against the stud on the tender.
At this point, if you have accounted for all the wires on the
decoder and there are no bare connections anywhere, check
the wiring to the track, motor and lights once more, for pinched,
stretched or damaged leads. If all looks well, you should now be
ready for a quick check before you button up everything.
Set the boiler loosely on the engine, place the engine and ten-
der on the track and plug the cables between them (WARNING!
Take care not to plug the four-pin cable “one pin off” or you
will wreck the decoder!), then turn on the DCC controller.
In a second or two you should hear the compressor pumping
and some light steam sounds. Select Loco address 3 and try the
whistle – if it blows, press the Headlight button and you should
hear the dynamo crank up and the headlight ramp up to full
brightness. (A small “quirk” in the Tsunami sometimes will have
it power up with the backup light on in Forward direction, but
as soon as you advance the throttle, you will hear the Reverser
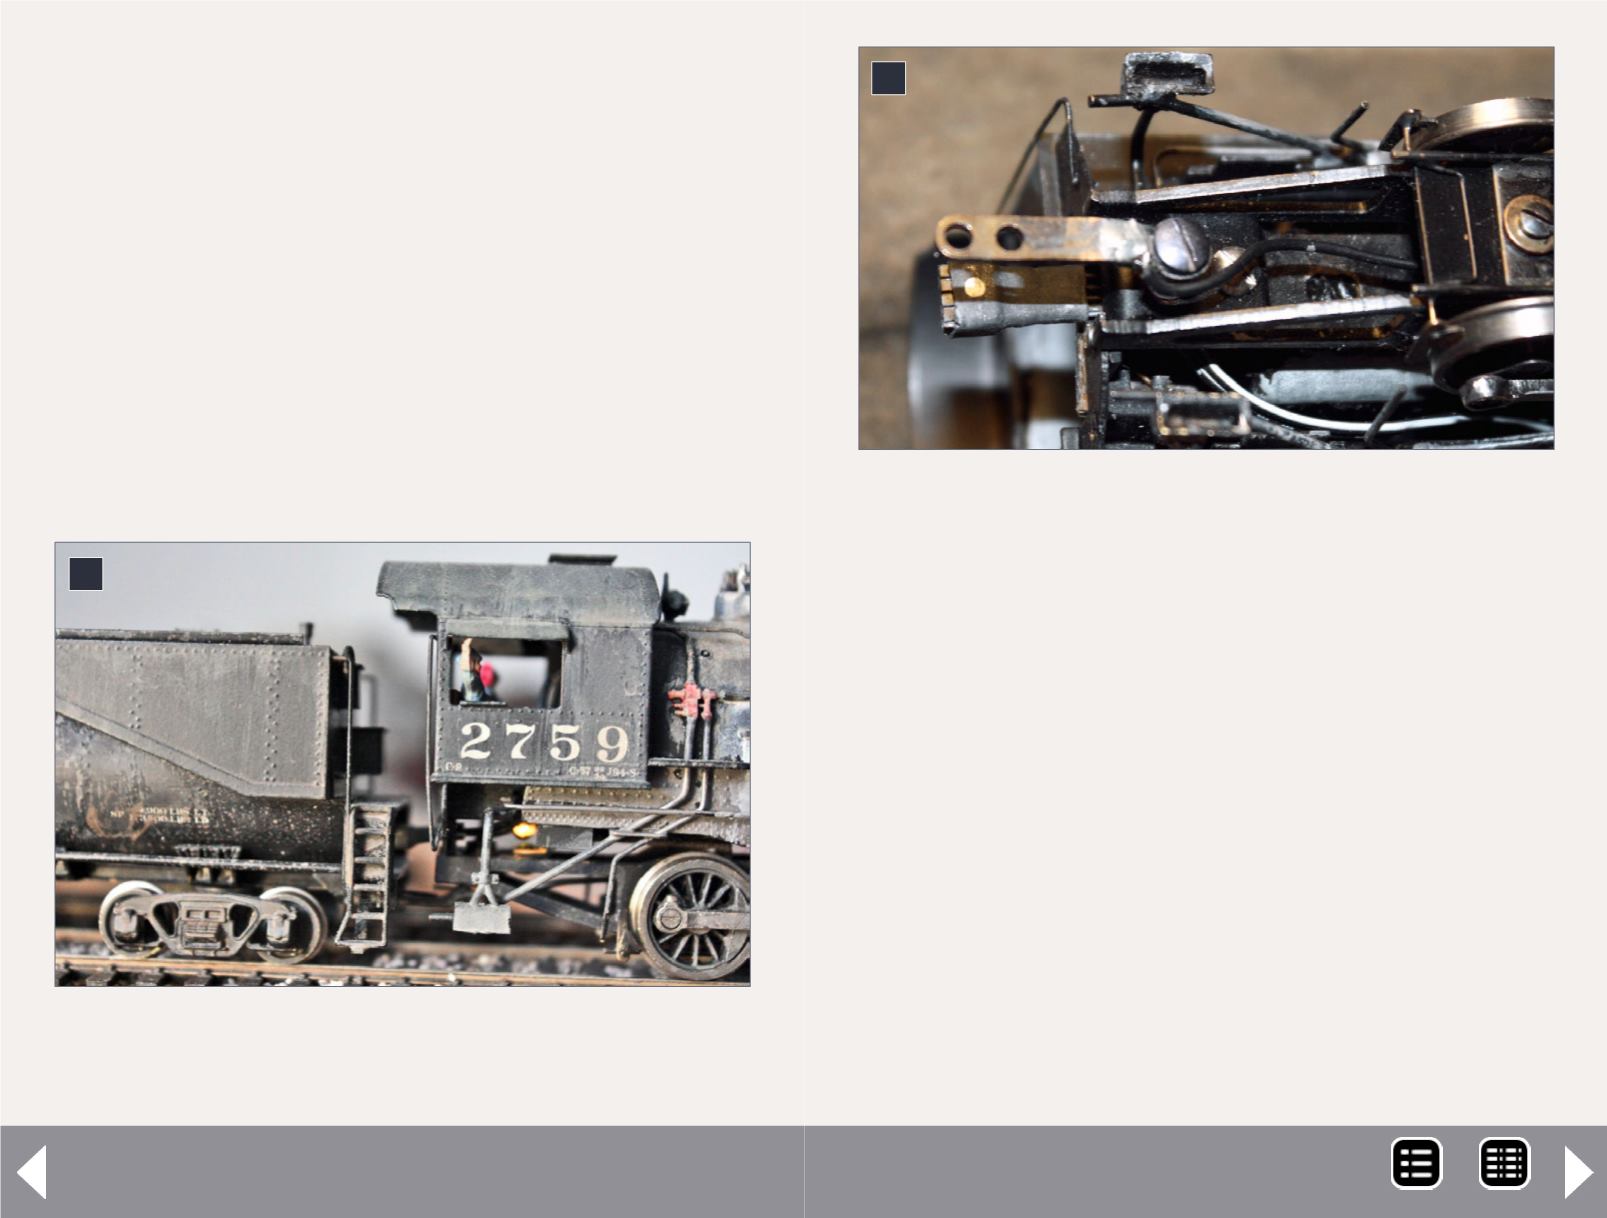
9: Black power lead soldered to drawbar.
9
8: This shot shows the “Firebox Flicker” LED at rear
of firebox, and the flat cable to the tender can be seen
just to the left of it. Drawbar is down below it.
8
MRH-Dec 2013


