Weathering wall signs - 4
Once you figure you have the size you need, make a
print of your work, but not just any print.
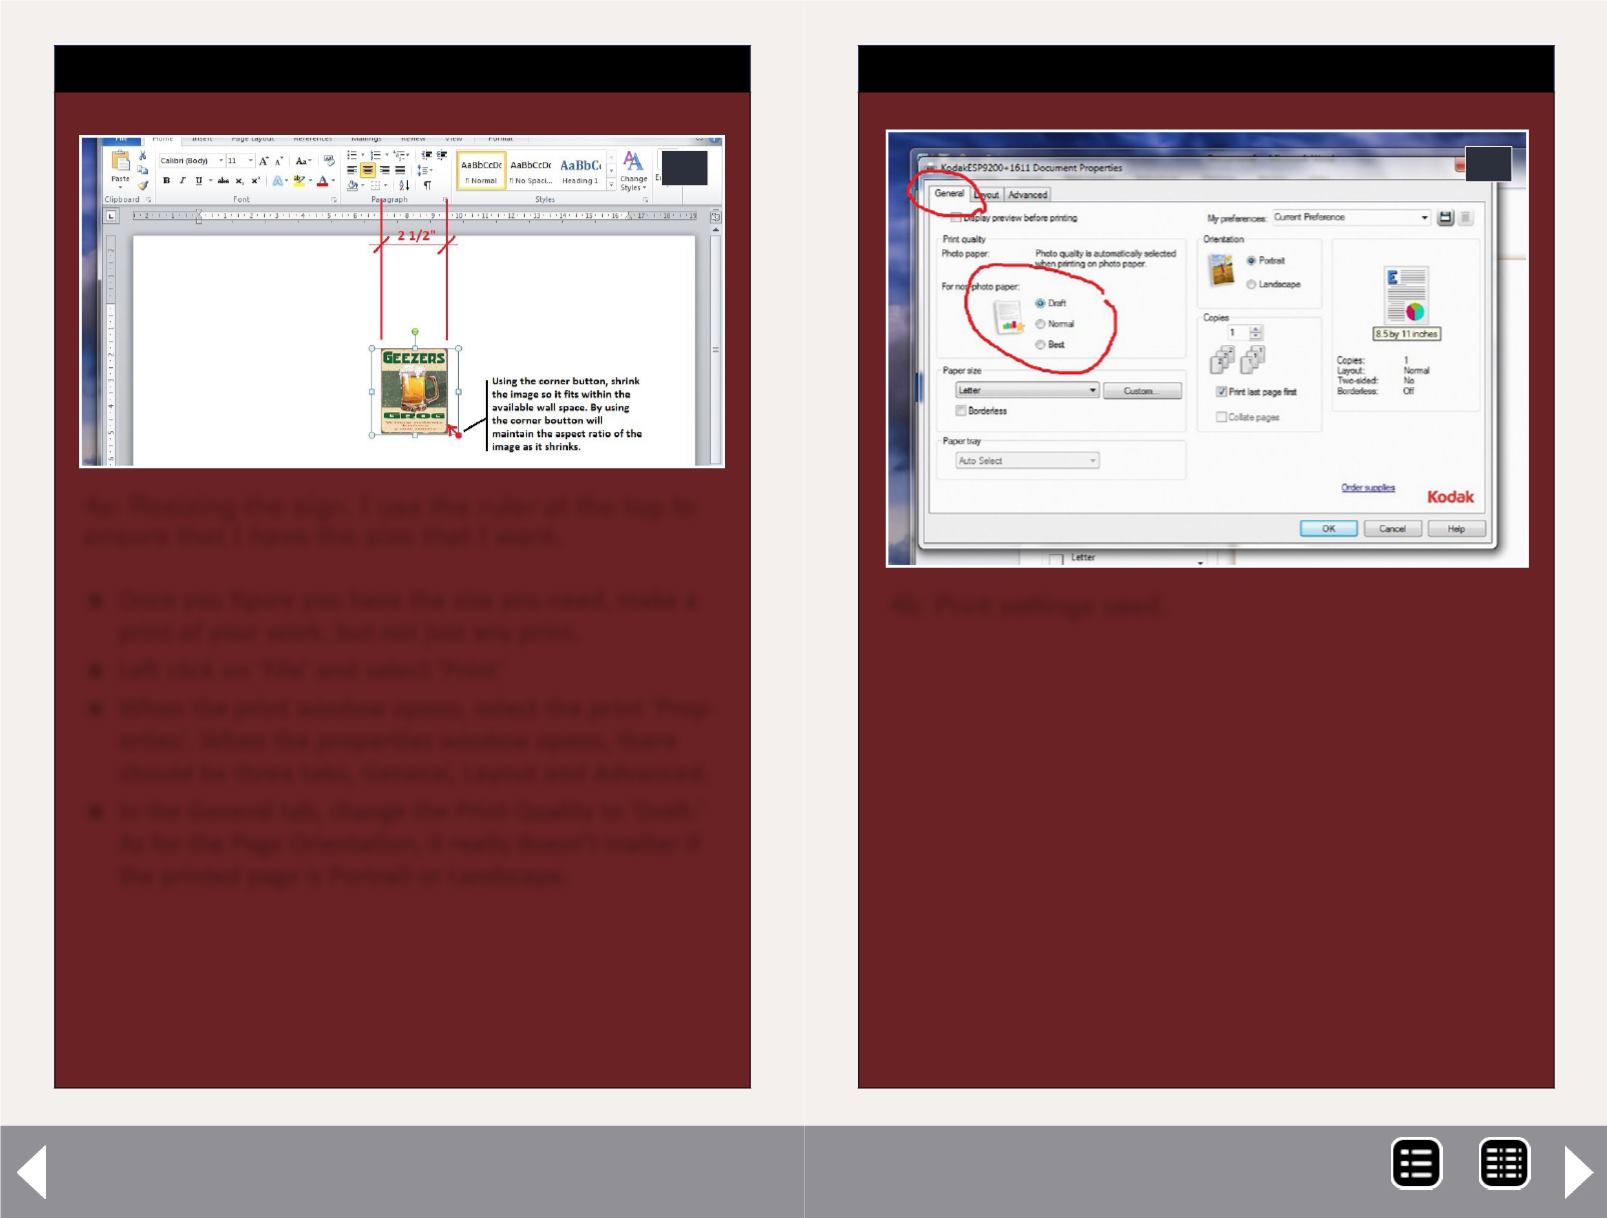
Left click on ‘File’ and select ‘Print’
When the print window opens, select the print ‘Prop-
erties’. When the properties window opens, there
should be three tabs, General, Layout and Advanced.
In the General tab, change the Print Quality to ‘Draft.'
As for the Page Orientation, it really doesn’t matter if
the printed page is Portrait or Landscape.
STEP 4: Resizing the image
Continued ...
4a
4a: Resizing the sign. I use the ruler at the top to
ensure that I have the size that I want.
STEP 4: Resizing the image
Continued ...
4b
4b: Print settings used.
There is no point in wasting your colored ink, so in the
Advanced tab you will need to change from Color to
Black and White. Once you’ve made the changes, go
ahead and make a print. You’ll need it for the next step.
MRH-Dec 2013


