Reserve the smooth edges for joints running across open scen-
ery, and hide the rougher edges along the backdrop, fascia. or
roadbed. When this is impossible, carefully cut the fabric paral-
lel to the threads and/or seal the edges with a little hot glue or
white glue to prevent fraying.
Applying the plaster
We use US Gypsum’s USG Hydrostone plaster [8], because that’s
what our local supplier carries. Other similar grades should do
just as well. Contrary to model railroad lore, there is only one
BURLAP HARDSHELL |
9
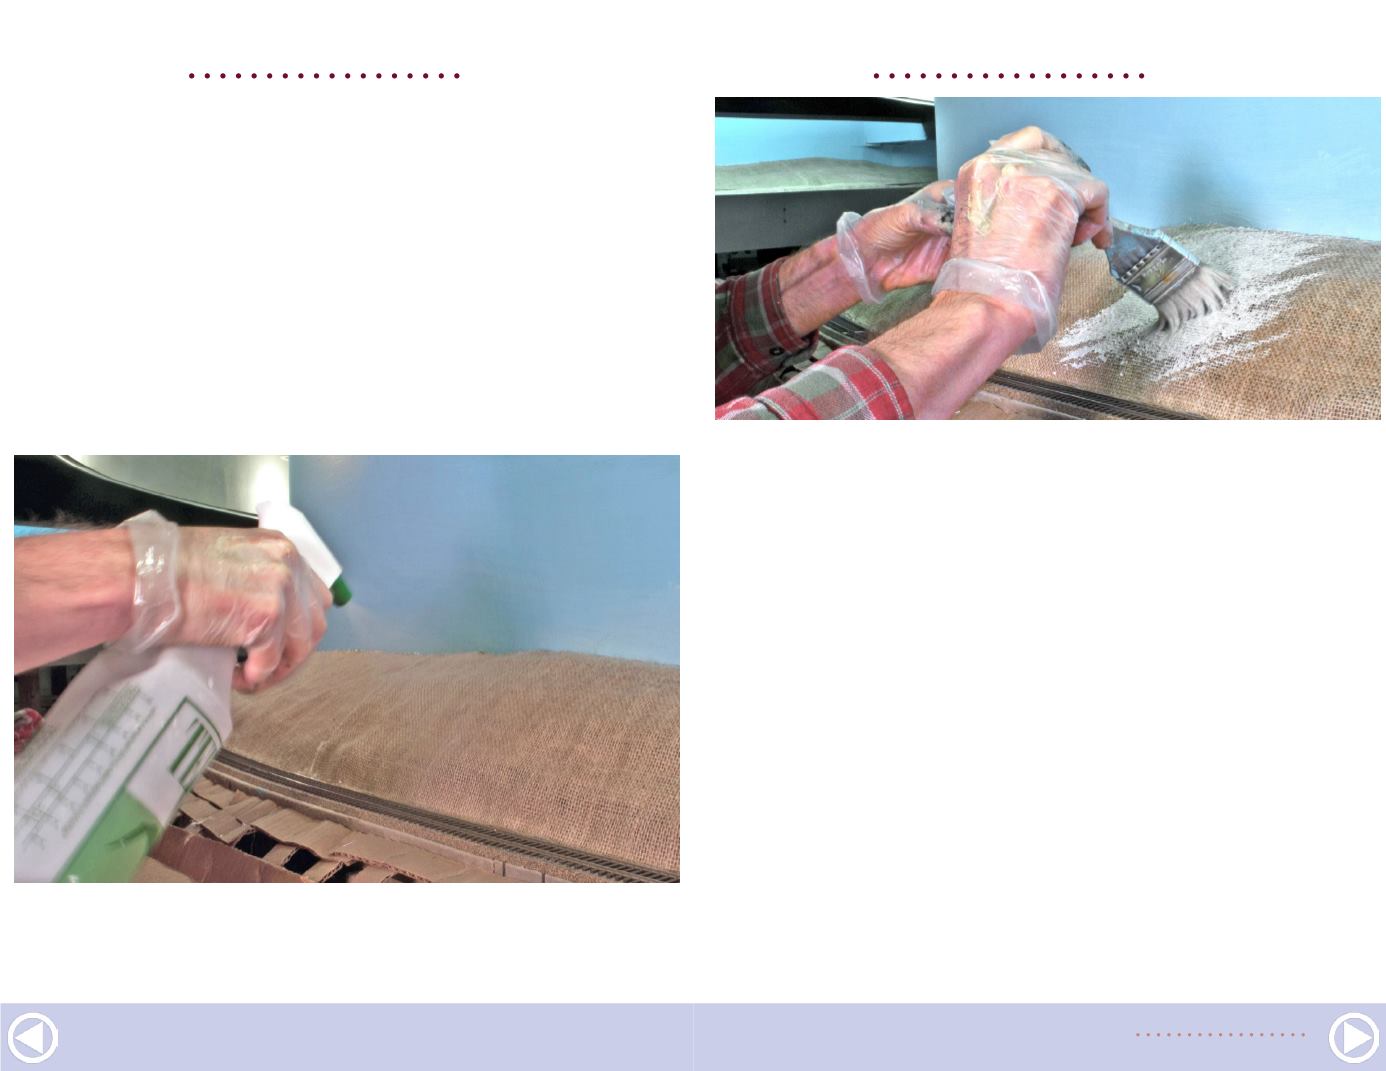
9. Spraying the burlap with wet water primes it to accept the
coat of creamy plaster and keeps it from drawing moisture out
of the plaster too quickly.
BURLAP HARDSHELL |
10
right way to mix plaster for optimum strength – which is accord-
ing to the manufacturer’s directions! That comes to 1 part water
to 3 parts plaster – by WEIGHT – for the plaster we use.
After making some density measurements, we found that a
mix of ¼ cup of plaster added to 3 tablespoons of water follows
the manufacturer’s recommendations fairly closely, and is a
lot quicker than measuring by weight. This size batch is small
enough that most modelers should have no trouble getting it
down before the plaster starts to set up. With practice, we have
found that a double-size batch is also practical but a triple-size
batch is too big to apply easily before the plaster gets too thick.
When mixed correctly, the fresh plaster will be no thicker than
light cream. This is ideal for brush application. The best way to
apply the plaster is with a cheap 2” natural-bristle paint brush
available from places like Home Depot or Dollar Tree. Be sure to
10. Sideways brush strokes, at a 45 degree angle to the weave,
improve coverage and minimize plaster drips.


