dampen the brush before working with it, and – once it touches
the wet plaster – never fail to rinse it out in water before letting
it leave your hand.
Before painting on the plaster, spray the burlap lightly with wet
water [9] so it bonds well with the plaster, and doesn’t absorb
the moisture in the plaster too rapidly.
The best way to actually paint the plaster onto the burlap is to
hold the brush by the edges of its handle [10] and make brush
strokes parallel to the plane of the brush – at right angles to
the way a brush is usually used to apply paint. Another hint
that minimizes plaster drips is to make the brush strokes at 45
degrees to the weave of the fabric.
Don’t be surprised to see pinholes in the first coat of plaster
BURLAP HARDSHELL |
9
. . . . . . . . . . . . . . . . . . . . . . . . . . . . . . . . . . . . . . . . . . . .
ROBERT YODLOWSKI
Bob was introduced to model trains with a
Lionel set under the Christmas tree. After
college, he joined a small TT model railroad
club that included several highly talented
brass locomotive scratchbuilders. In 1972, he
got interested in N scale and scratchbuild-
ing in styrene. In 1977 he joined the Nashua
Valley association in Bolton, MA and helped
enlarge their building and build a new 26’x40’
HO layout. Through the ‘80s he was very active in the club and
in railfanning, but about 1990 he simply lost interest in model
railroading. After retiring he got active again, and is now active
in two clubs.
. . . . . . . . . . . . . . . . . . . . . . . . . . . . . . . . . . . . . . . . . . . .
BURLAP HARDSHELL |
10
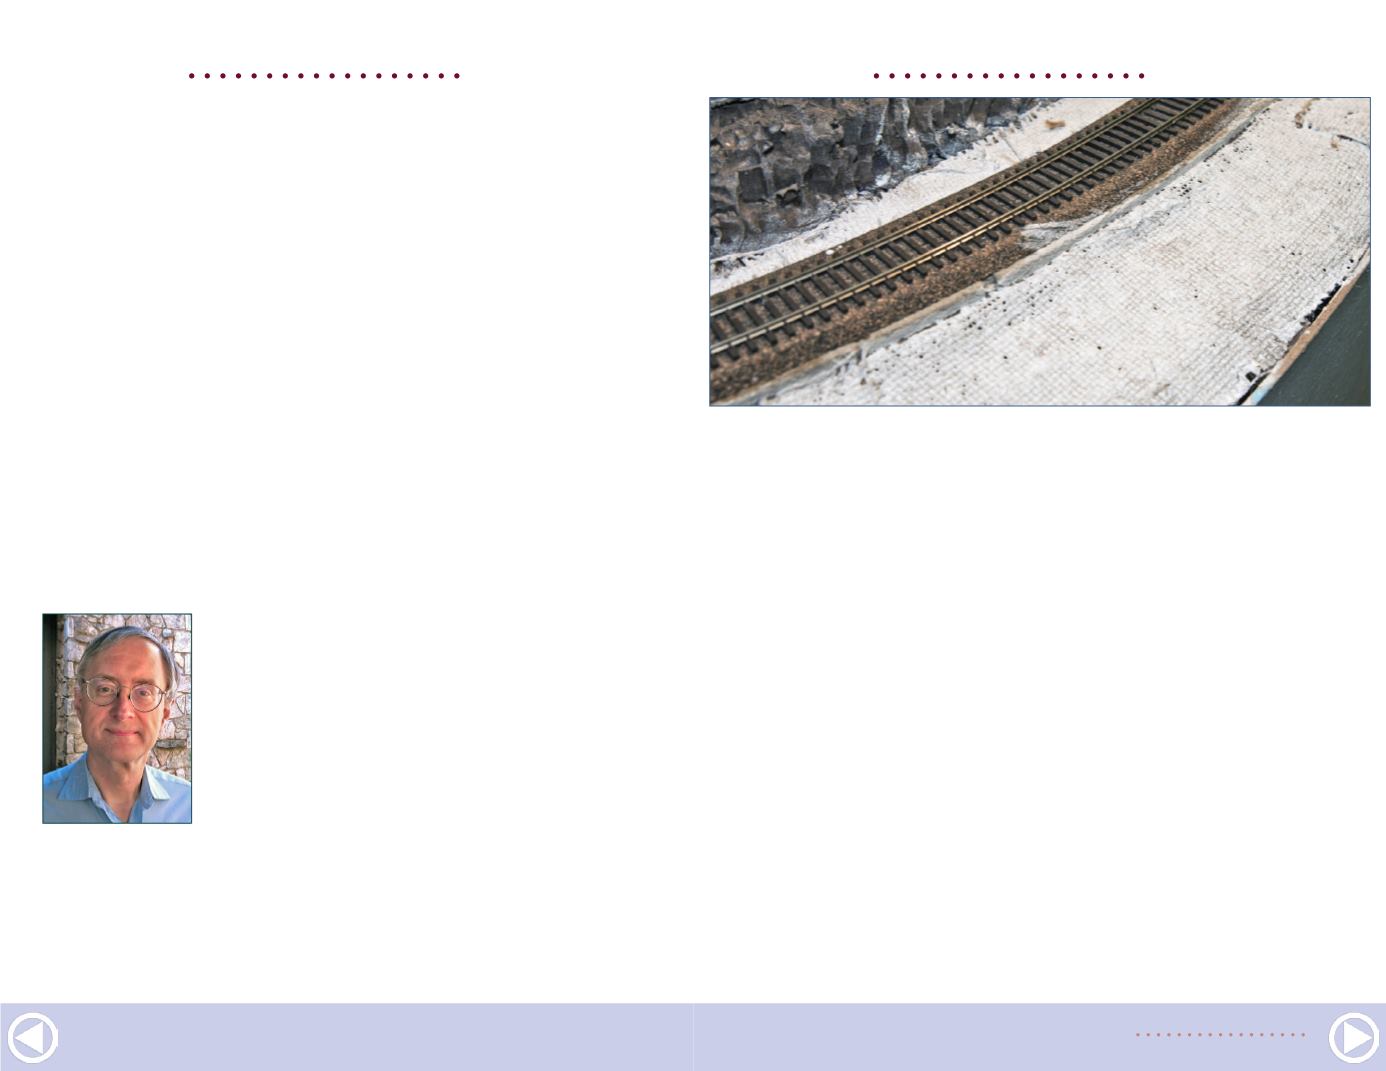
11. Pinholes are normal in the first coat. Let the initial coat set
up, then apply a second coat to fill in the holes and hide the
woven texture. Protect track with painter’s tape.
[11]. This is normal. The waiting time between the first and sec-
ond coats of plaster is not at all critical, as long as the first coat
is hard enough to support itself. If you wait for the first coat to
become dry to the touch, its bright white color makes it easier
to see where the second, darker coat [12] is being applied.
Modifications after the fact
One of the great advantages of using burlap as a scenery sup-
port becomes evident once the plaster has hardened: Making
fairly sizable contour modifications can be both quick and easy.
If you have an area that needs to be made a bit higher or lower,
tap it gently with a hammer or push it with your hands. This
will crack the plaster but, unlike paper-towel-based hard shell,
the burlap will remain intact.
Push the area into its desired new shape and support it to
keep it in place. To fix the new shape in place, simply apply


