The final clear coat of Testor’s Dullcote, thinned 50/50 with
lacquer thinner, was applied after the weathering had dried. As
usually happens, most of the chalk dust I’d applied to the roofs
[23], disappeared. If I get inspired, I may go back later and add
more dust as appropriate.
Following the Dullcote, I added the .010” clear styrene window
glazing. Adding it before the Dullcote would have either meant
I’d have to mask all the windows or live with the frosting that
occurs with Dullcote on clear windows. I did the caboose #2
clerestory windows using a scrap of blue-tinted clear styrene
from my scrap pile. Now and then it pays to stash away some
of those arcane but useful-looking pieces of hardware at the
end of a project.
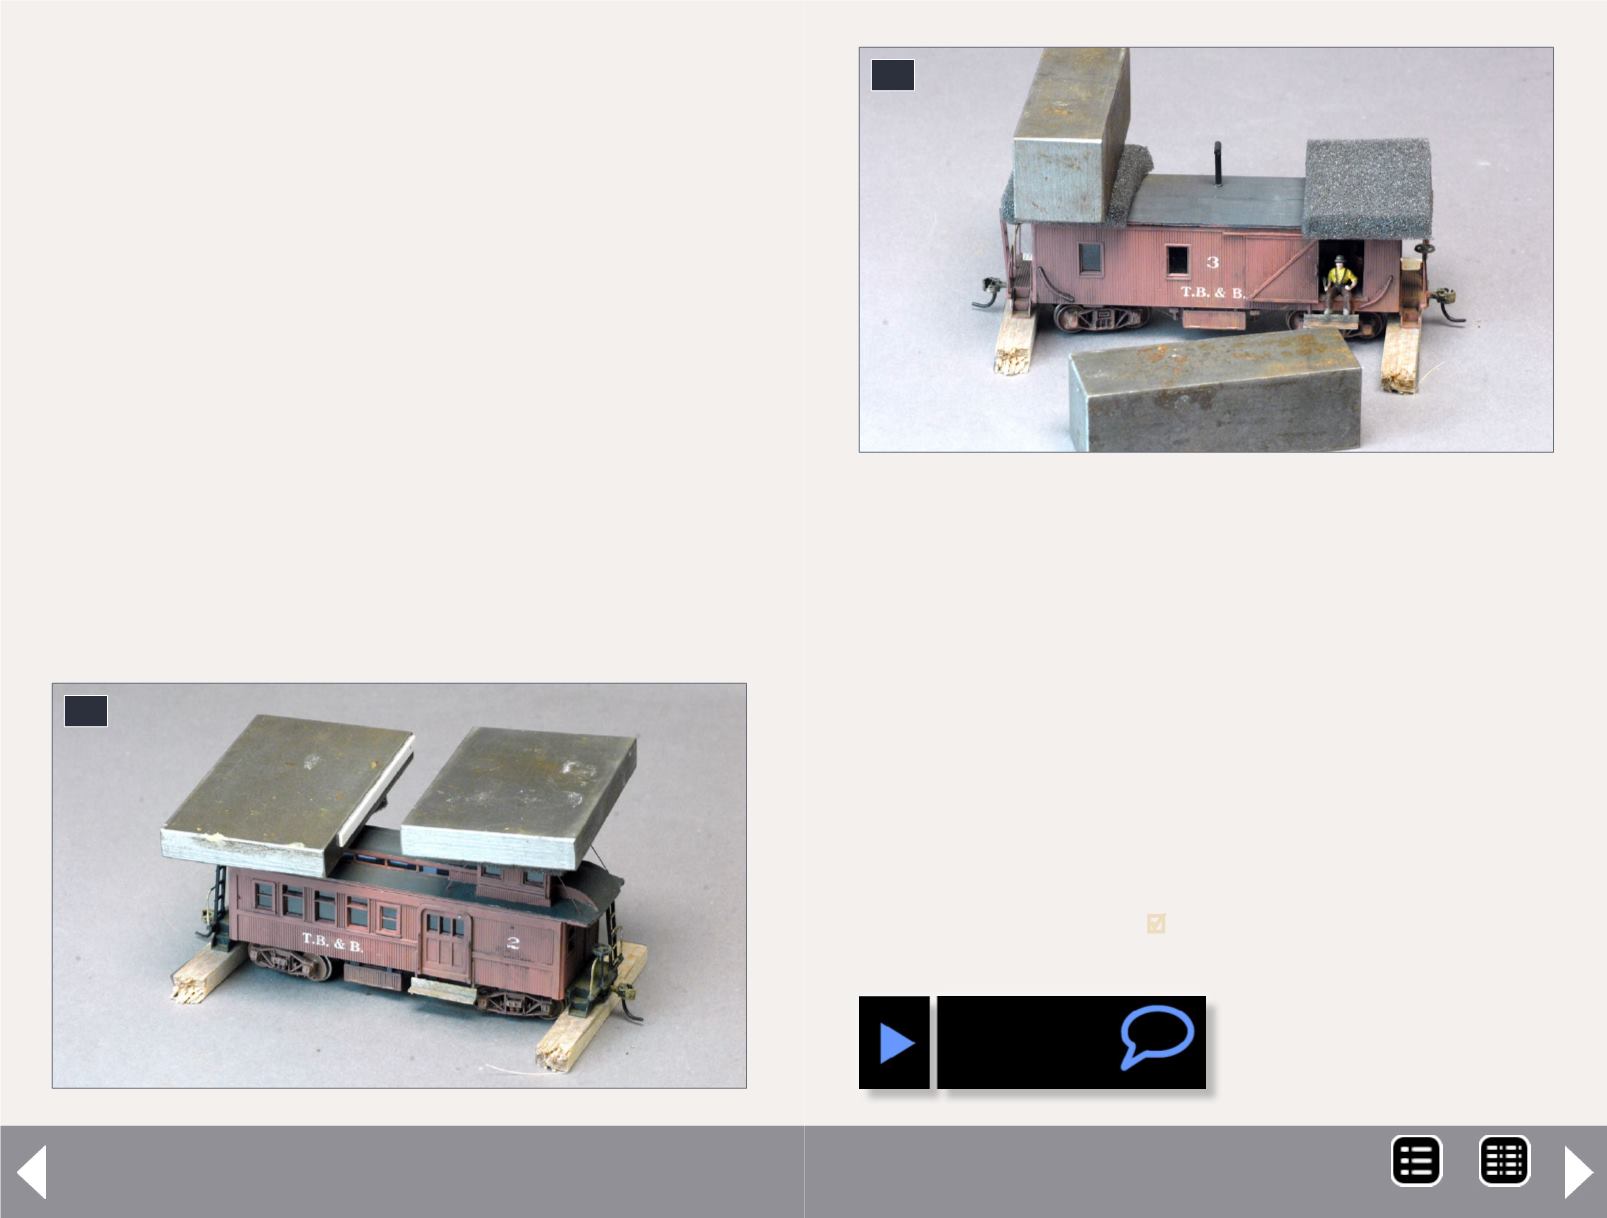
I have no plans for further interior detailing or lighting, so I
glued the roofs in place. I applied small dabs of Walthers Goo
to the roof lip that fits inside the body, positioned the roofs,
and held them in place with weights, as shown in [24 and 25].
Logging cabooses - 11
22
The balsa scraps under the end steps help hold the body stable
while the weights are in place.
The end result of this project is a pair of unique cabooses for
our layout’s logging trains. They’re fun, they look plausible
based on logger ingenuity and prototype photo inspirations,
and they were inexpensive and easy to kitbash using readily-
available materials. I highly recommend the effort if logging is
part of your railroad plan
.
22-23. Metal model assembly weights with small foam
pads were used to hold the roofs in place until the
adhesive dried. The wood scraps under the steps help
keep the bodies steady while the weights are in place.
23
MRH-Oct 2014


