from the areas of the roof and cupola to which I wanted to glue
something, so the solvent adhesive could have a good grip. The
same scrap filled the first clerestory window near the cupola,
and it would be acceptable logging practice to fill them all in on
a conversion such as this one.
Next came painting the body, trucks, roof, and undercarriage.
I used PollyScale Boxcar Red #414281 for the body, trucks and
roof on both of these cabooses. The #2 underframe I did with
PollyScale Grimy Black #414137. The paint was applied after
the parts were cleaned with an old soft toothbrush and dish
detergent, then rinsed in warm water and allowed to dry.
I’m giving the paint part of the story a once-over-lightly
because painting has been covered in detail in many other
how-to articles.
Tar paper roof
I wanted to add a tar paper roof to both models so the same
general procedures were used both times. In essence, my pro-
cedure involves applying paint to the model as an adhesive for
the tar paper, then the tissue/tar paper, followed by a top coat
of paint. When dried, the edges were trimmed with a sharp
knife and any paint errors were touched up. Here’s the step-by-
step on how it’s done.
I start by cutting tissue paper into scale 3’ strips, then trim a
piece from the strip to fit my next planned application spot.
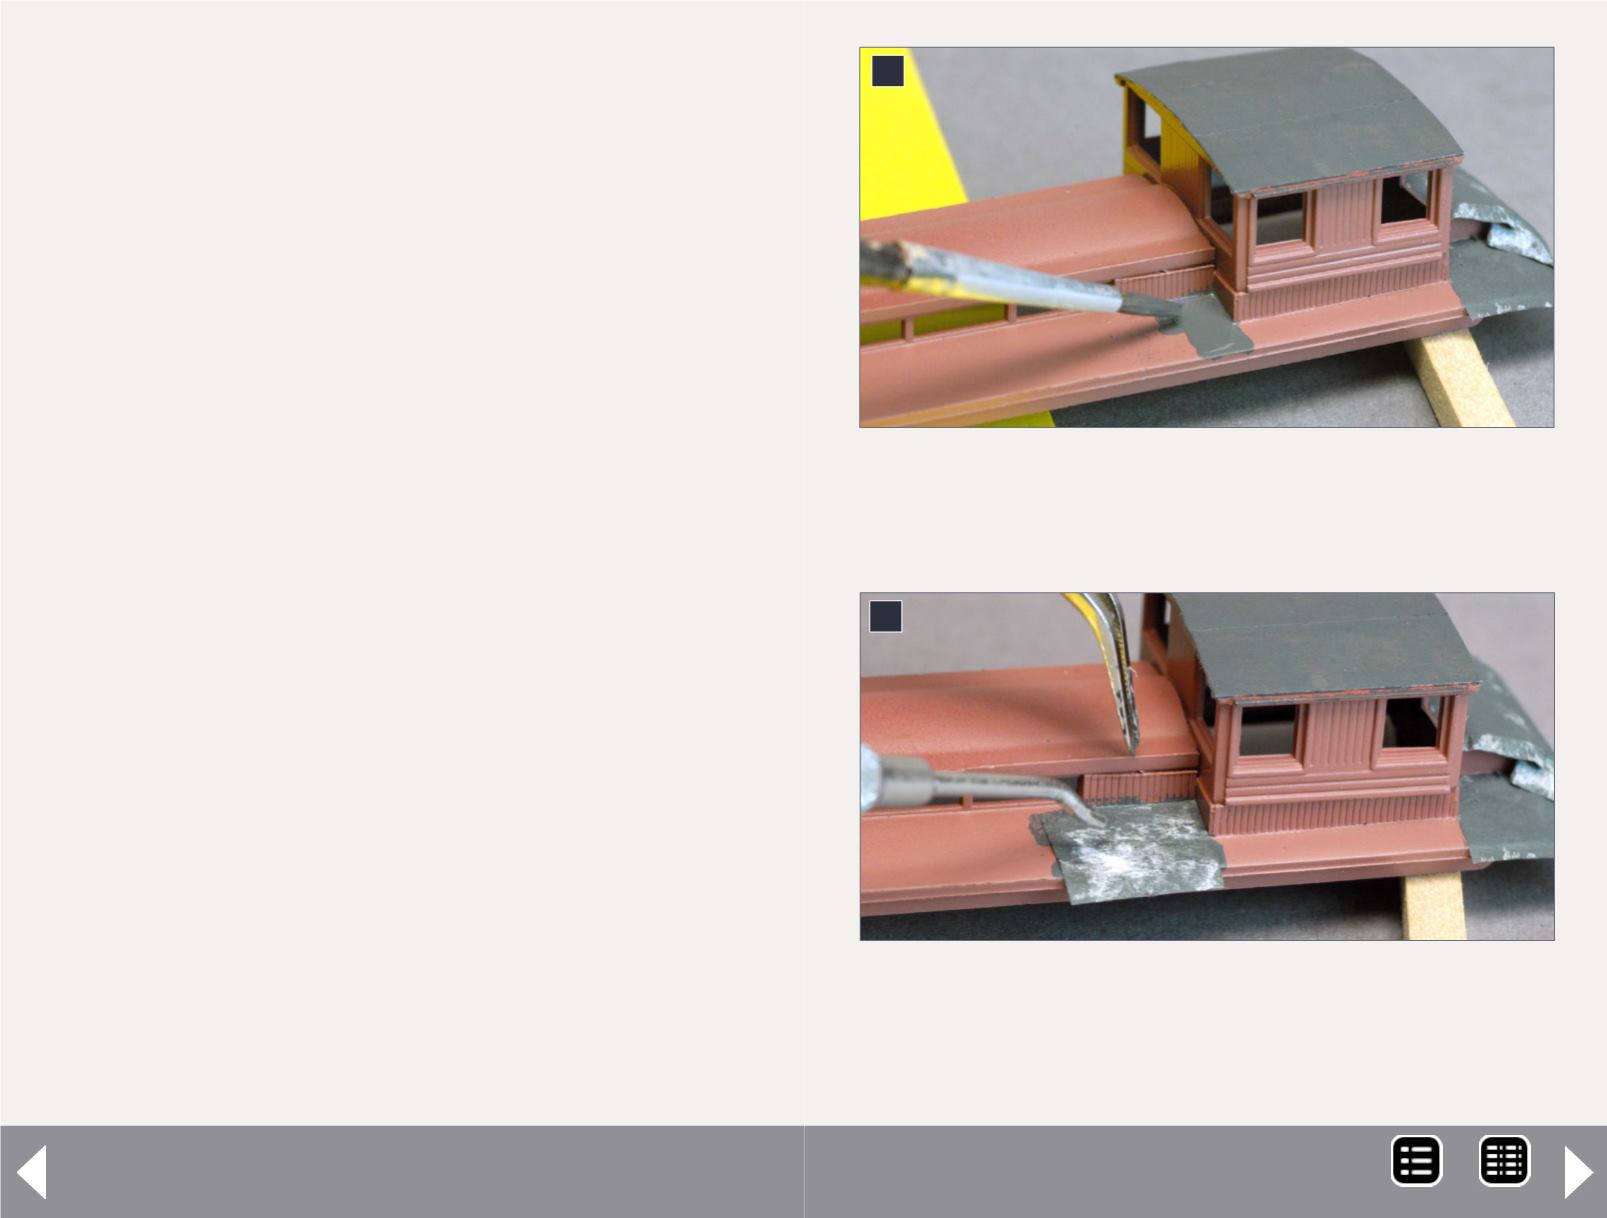
Next, I brush some paint, in this case PollyScale Grimy Black
Logging cabooses - 5
“...machinists’ square – very handy
for many modeling projects...”
8
8. Tar paper roof installation starts with a layer of
Grimy Black paint that’s used both for color and its
adhesive qualities.
9
9. The tar paper piece is positioned on the previously
applied section of black paint and carefully
manipulated into place with tweezers and, in my case,
a dental pick.
MRH-Oct 2014


