#414137, onto the roof where the tar paper will be applied [9].
The paint dries fairly quickly so I only work with a small area at
a time.
With the tissue on a scrap work surface I brush a bit of paint
into the edges that will become the underside of the tar paper
on the roof [10]. This is to ensure I have good adhesion for the
paper’s edges. The yellow background is to make it easier to
see the part being worked on in the photo. The prepped tissue
is then inverted onto the pre-painted roof section, and I use a
dental probe and tweezers to gently position it [9], taking care
to avoid ripping the paper once it’s saturated with paint. If the
paper rips, add a patch on the spot. that’s how loggers did it.
After the tissue is positioned I apply another light coat of the
black paint as a topcoat and sealer [10].
10
10. A final layer of the black paint is added to the top
of the tar paper.
Logging cabooses - 6
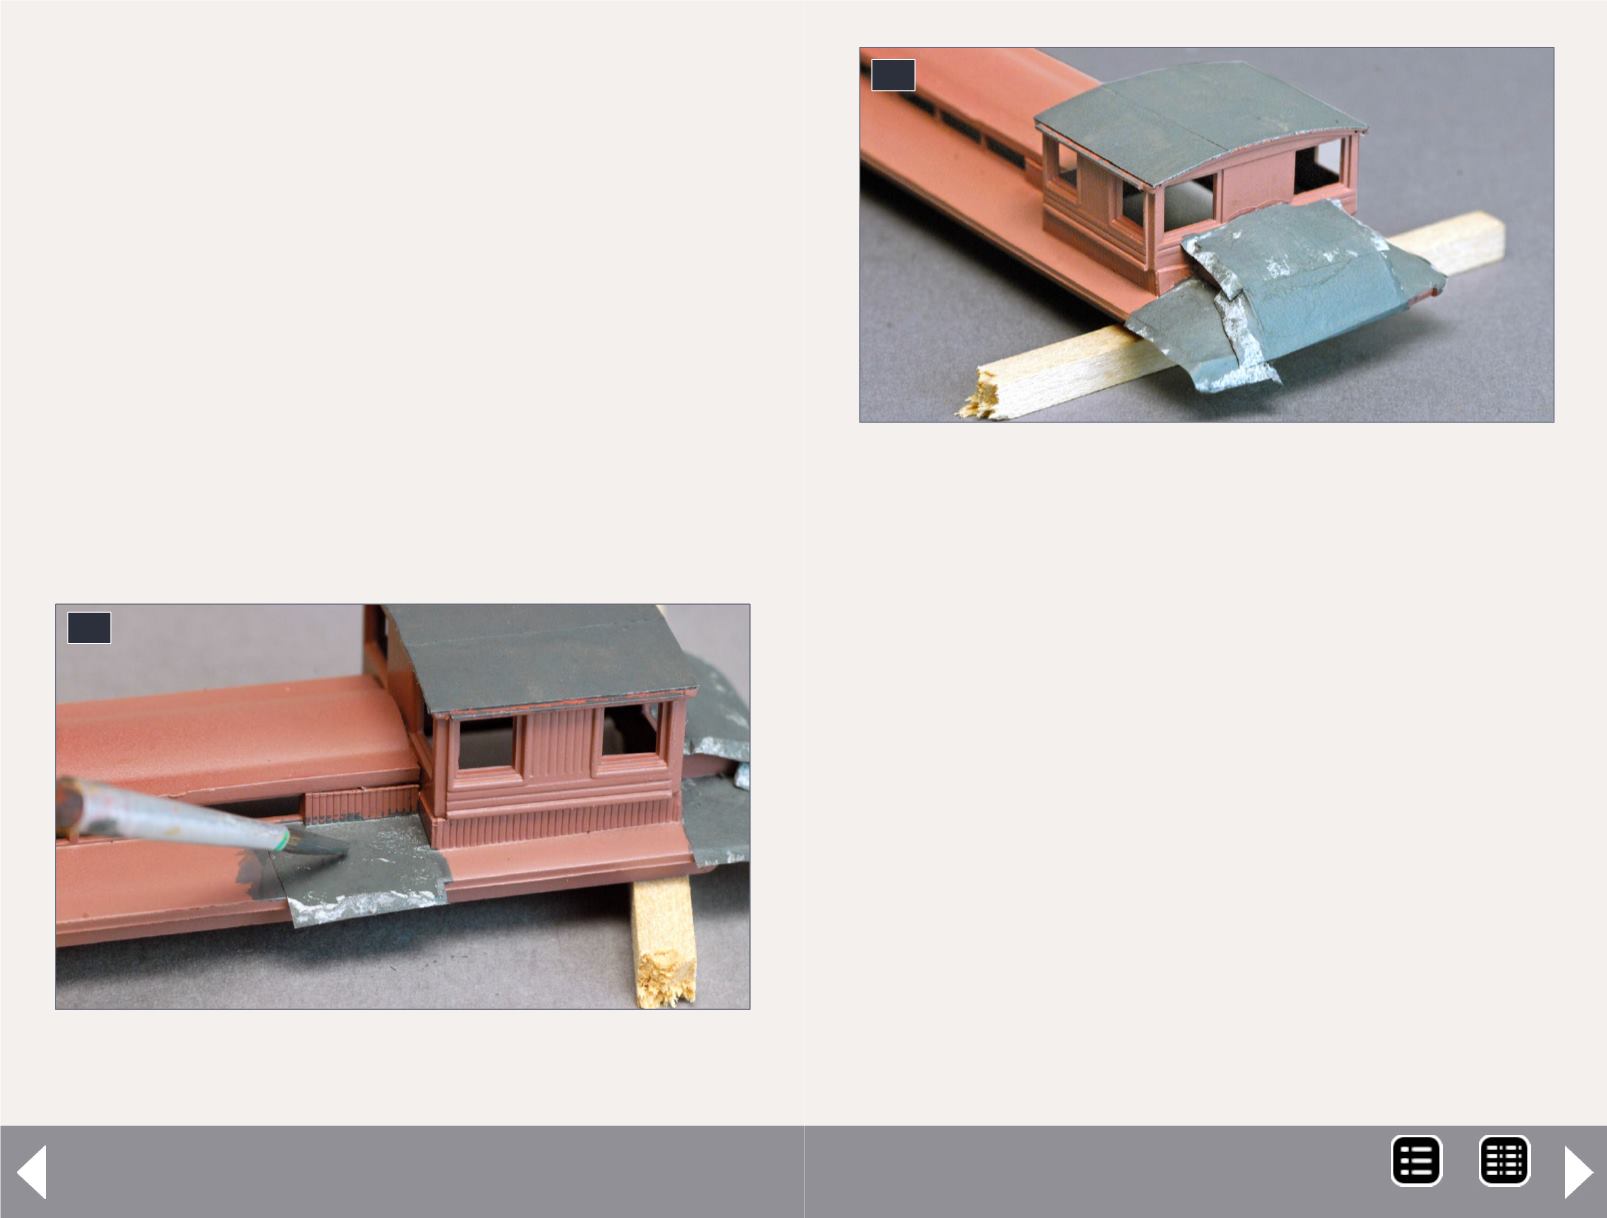
There’s enough flexibility in this system that even multiple
curved surfaces, such as the ends of the passenger car roof,
can have simulated tar paper applied successfully [11]. It
doesn’t matter if the tissue isn’t completely smooth or the
paint coat is likewise less than pristine because a tar paper roof
on a piece of logging equipment was not necessarily a thing
of beauty. They’d slap it down, add the tar coat and be done
with it. After the final paint dried, I went back and trimmed
the edges, but not too carefully, and did touch-up with a fine
brush, using either the body or roof color as appropriate.
Cupola braces made from .015” brass wire were added to each
top outside corner of the cupola end walls and installed in
holes drilled in the roof to produce about a 45-degree slant in
the wires. Close is good enough for this.
11
11. The tissue/tar paper is flexible enough that it easily
conforms to many multiple-curve surfaces such as this
roof end and corner. If it’s wrinkled a bit, that’s fine,
the roof on a piece of logging equipment was seldom a
cosmetic prizewinner.
MRH-Oct 2014


