down by the walkway. Be very careful prying/pulling these
out – I broke a couple of them. I then placed the caboose back
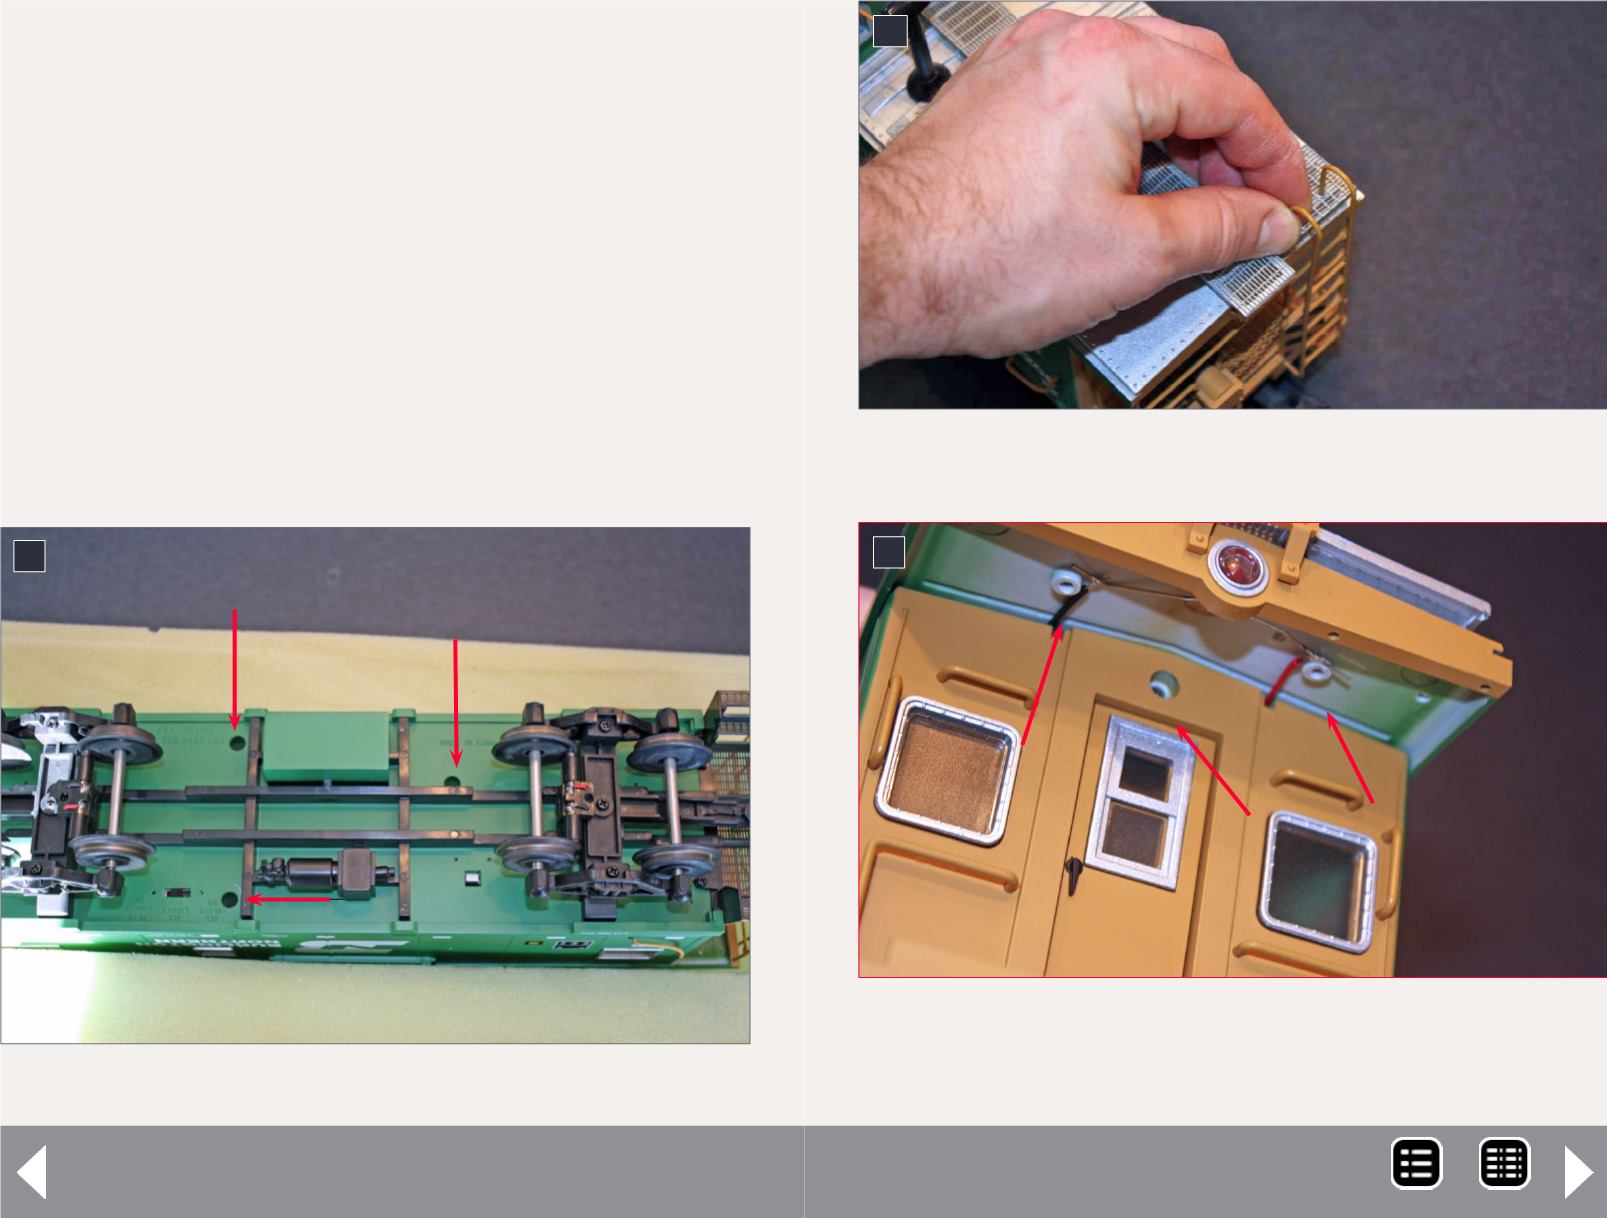
into the cradle, bottom-side up. Three more screws must be
removed from each end [7]. Then I pulled off the roof.
My goal for the interior was to provide a basic representation
of a caboose. I also wanted to replace the interior lighting.
The lighting provided by the manufacturer wasn’t very realis-
tic to me, so I removed it all (light bulbs, circuit board, etc.). I
planned to add 0604 warm white surface-mount (SMD) LEDs. I
also thought of adding a desk lamp on the conductor’s table.
The caboose came with a flashing red LED on the rear, but
some local rail fans told me BN cabooses have a steady, non-
flashing, rear light. I decided to change that as well.
5. Three underbody screws to be removed.
5
Extended-vision caboose - 4
6. Gently pull the ladder and end platform details off. Be
careful of the three pins by the platform.
6
7
7. Remove the screws from these three locations at
each end of the caboose. This is the last step before
removing the roof.
MRH-Nov 2014


