Making your rolling stock look like the real thing
DT&I 50' Hydroframe - 2
N
ot long ago fellow freight car modeler, Frank Jordan,
sent me a shot from the RR-Fallen Flags site of a DT&I
50-foot box car. The shot was taken only a year after my
1977 modeling era. Frank knew this was important to me because
I could duplicate the wonderful weathering patterns reflected in
the photo. The cushion underframe 50-foot car would be a breeze
to model because Kadee produces this exact car. The car is perfect
and the Kadee factory lettering is dead-on accurate.
The only issue I would have to address would be the color of the
paint. These cars came out in the mid 60s, and the Kadee car is
painted in the correct Lime Green. However, over the years this
green faded into a pale PC shade of green. The only solution I could
come up with was to repaint the car. Although I knew this would
destroy the wonderful factory lettering, I discovered Highball
Graphics makes a correct decal set for this exact car. In fact, High-
ball Graphics even points out how badly the DT&I green faded on
these cars.
As I researched prototype photos on various web sites, I noticed
that many of these cars were lettered in a simplified paint scheme
wearing only reporting marks and the big DT&I logo. I decided to
model a second car so I could represent one of the cars in that neat
HYDROFRAME-60 scheme.
My favorite part of this project was weathering the car. This really
brings the car to life. I have found that in order to obtain a believ-
able prototypical look, it is important to weather my cars using
a combination of three techniques. Artist oil paint is very useful
for modeling bleeding rust patches. I then use my airbrush to add
areas of dust and grime. Finally I finish using weathering pow-
ders. The powders add a certain dimension, and complement
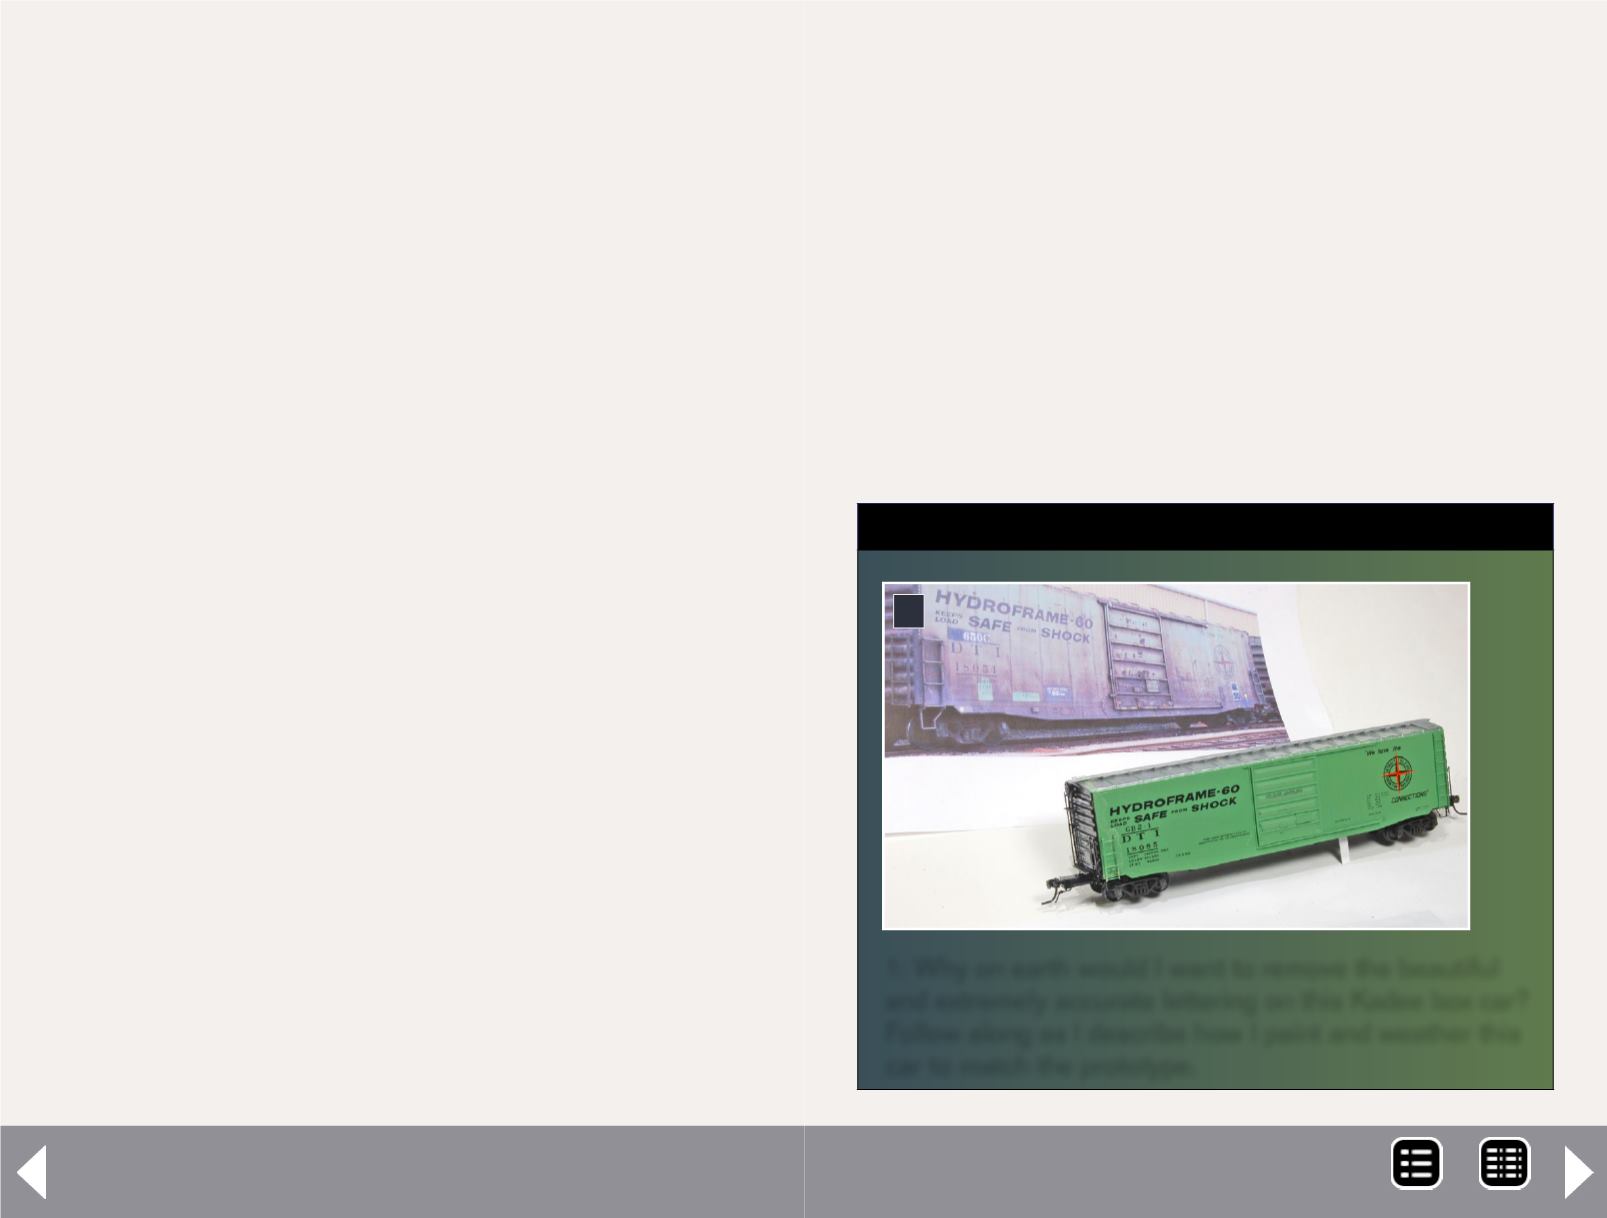
STEP 1: Removing the factory lettering
1: Why on earth would I want to remove the beautiful
and extremely accurate lettering on this Kadee box car?
Follow along as I describe how I paint and weather this
car to match the prototype.
1
the airbrush effect. I also came up with a fast way to weather the
welded seams. As I observed photos of these cars, I noticed the
welded seams were very weathered. I needed to weather these
thin welds. In the past I would run masking tape strips on each
side of the seams and then use my airbrush to apply Grimy black.
However this process was not only tedious and time consuming,
but there was always the risk of some portion of the decal com-
ing off when I removed the masking tape! I decided to simply draw
my welded seams on clear decal paper. Then I could use my XActo
knife to cut the seams from the decal paper. I could then apply
each strip onto the seams using standard decaling practices. Follow
along as I show how I repaint and decal the car using the very com-
plete and accurate Highball Graphics decal set.
MRH-Nov 2013


