a description will pop up. To illustrate how SketchUp works, I’ll
walk through the creation of a shipping crate.
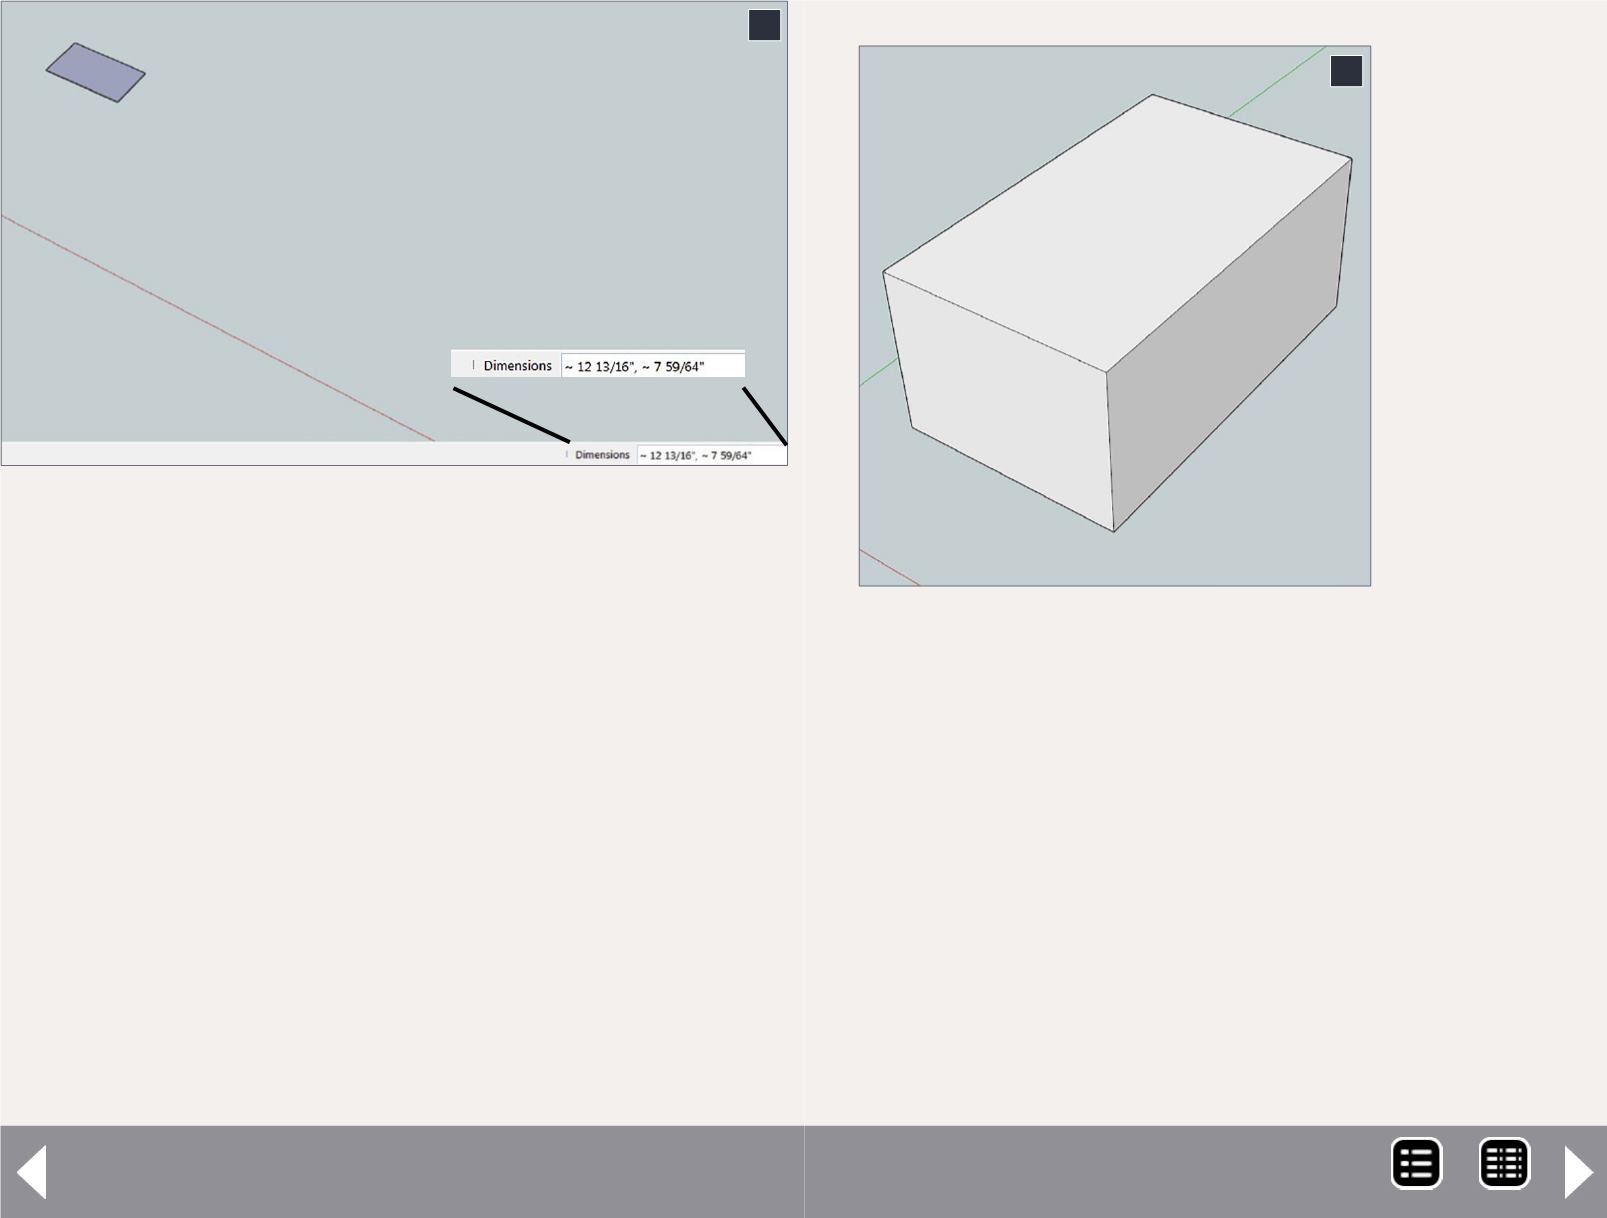
Select the rectangle tool, click and hold at a point in the draw-
ing area, and drag the icon a short distance. A small rectangle
will be created. The dimensions of the rectangle will be dis-
played in the lower-right corner.
Now type the dimensions you want (48,80, the size of a large
shipping crate). Press Enter and the rectangle will be adjusted
to the desired size. You do not type in the Dimension box, just
hit the keys and SketchUp will handle it.
Pick up the Push/Pull tool, select the rectangle, and pull it up.
The distance is not critical, just start the movement. Type the
desired distance “36 Enter,” and the basic shape, a box 48” x
80” x 36”, will be created.
Intro to 3D modeling - 6
6. Start of Rectangle; note the dimensions in the lower
right corner
6
The size of
the crate
is now set.
This is how
all objects
in SketchUp
are created.
A shape is
drawn on
any surface
and then it
is pushed
or pulled as
desired.
This is a good
time to play
around with
the view
tools: Orbit,
Pan, Zoom, Zoom Window, and Zoom Extents. If you have a
mouse wheel, you can use it for zooming in and out.
Now to make it more interesting, put some 2x4s around the
edges for reinforcement. You could use the rectangle tool,
draw rectangles on the faces and pull them out, but there’s an
easier way. Select the Offset tool, click on a the vertical long
face, and start to drag a copy of the rectangle (this works with
any shape). Once you have started the rectangle type “6 Enter”
and you have a 6” border. This accounts for the width of the 2x4
plus the thickness of the 2x4 on the adjacent faces. Now take the
Push/Pull tool, push the center rectangle in, and type “2 Enter.”
The result is seen in [8].
7
7. The basic crate shape, 48” x 80” x 36”
MRH-Aug 2014


