For my initial tree build I followed their instructions: Build the
trees using the SuperSage as trunks, and the included SuperTree
material as the branches. Once assembled, each tree is painted
and then flocked.
For the very large tree, I wanted to try a different approach than I
had used in the past. I used a more generic leaf flake underneath
the Silflor maple leaf product (also available from Scenic Express)
to give me the great look the Silflor leaf provides, without all of
the cost.
Starting Small
Its best to start something new on a small test piece to learn the
required techniques. I selected one of the smaller trunks as an
appropriate starting point.
First step is to insert a toothpick handle/mounting pin into the
bottom of the trunk. I chose toothpicks mostly due to their avail-
ability and my general preference for white glue, which makes
using metal less practical.
Once the tooth-
pick is dry, I
began adding
branches. The
manufacturer
recommends
using CA to
attach them to
the trunks. I tried
it, but I found it did not work for me at all. I ended up reverting to
my old friend white glue, and patience. This method requires a lot
more drying time than CA, but the results are similar.
I prefer the natural colors of the main trunk material, but the man-
ufacturer recommends painting them and I tend to agree. Natural
finishes, if not carefully selected and blended can stand out in a
bad way when everything else is artificial.
Continuing to follow their instructions, I sprayed the tree with
a coat of flat brown paint, after which I dry brushed a light gray
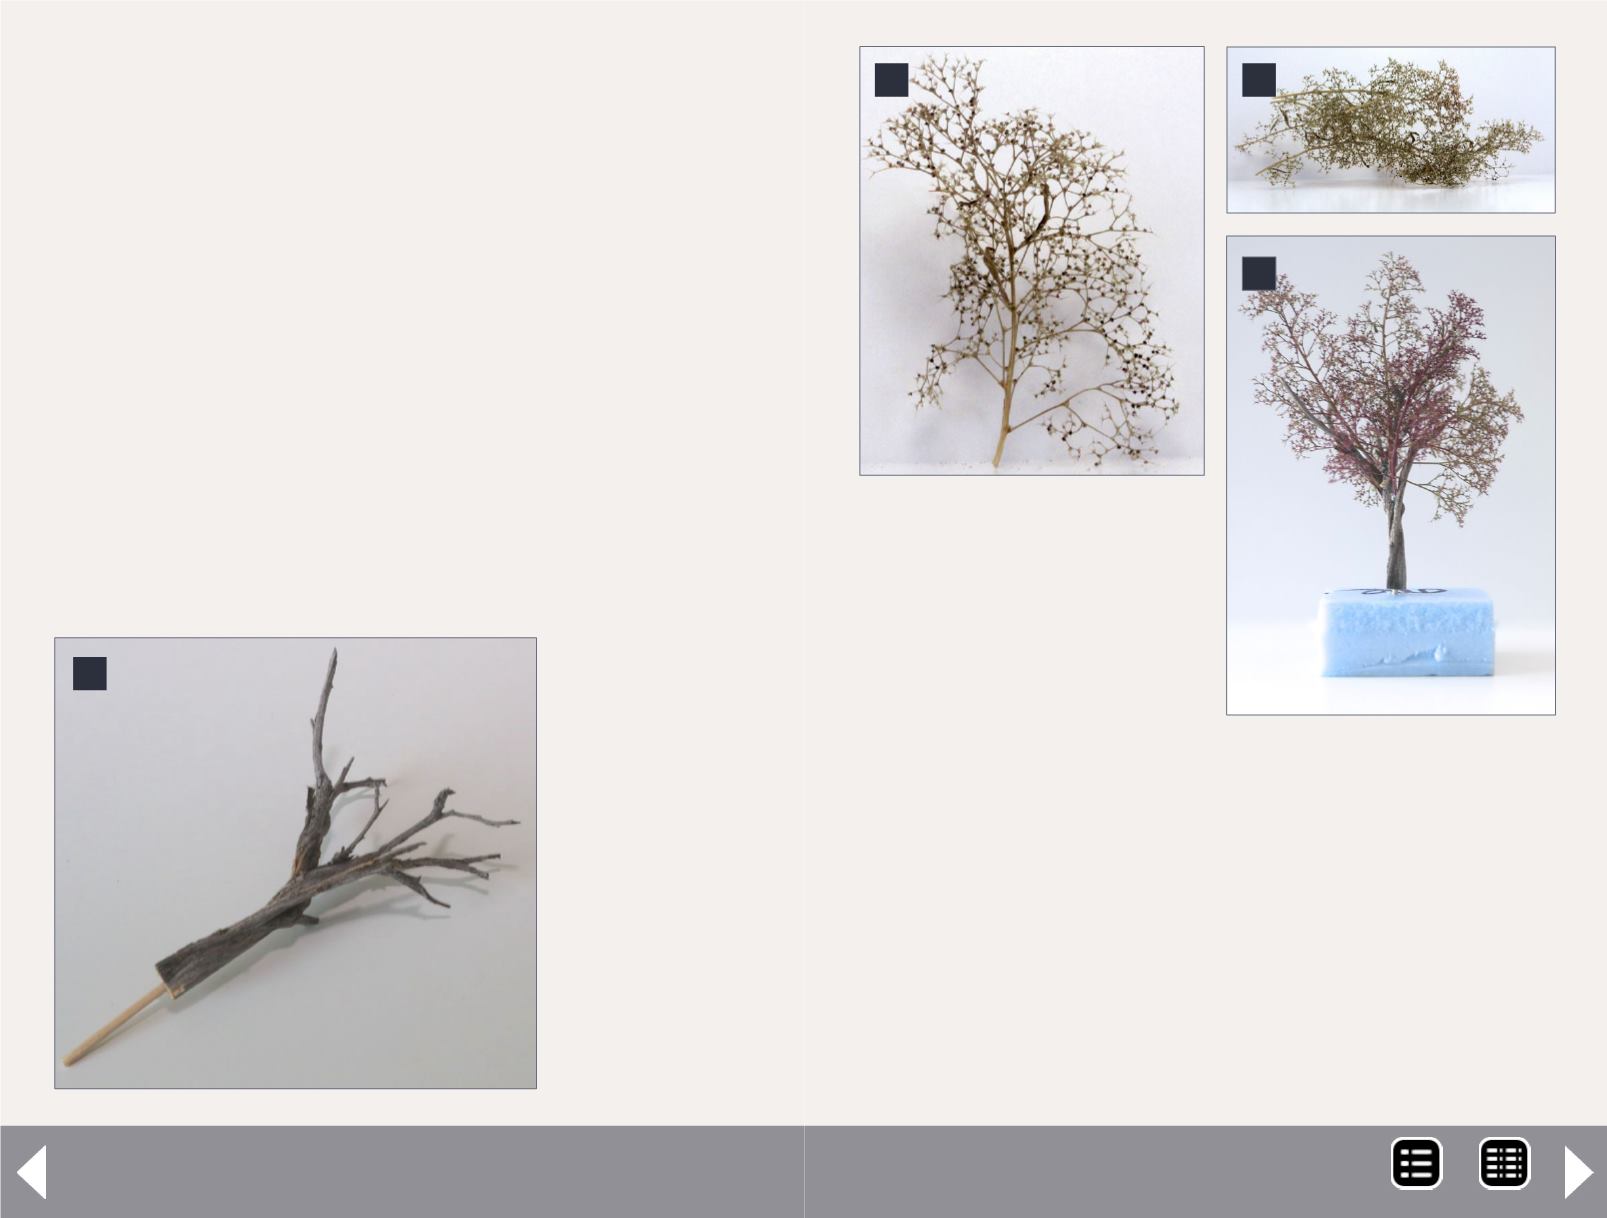
3: The tree
trunk with
the toothpick
mounted in the
base.
3
4: This single SuperTree branch
shows the detail that comes on
the branches.
5: Bulk SuperTree branch material.
6: The completed tree with all the
desired branches attached.
4
5
6
SuperSize your trees - 3
MRH-Aug 2013


