I placed the castings in what I thought should be their cor-
rect positions, then checked to see that the locomotives
– Heislers and Shays, cleared the castings. The wedge plow
just makes it past.
Once I fixed the floor in place and temporarily placed the
engine house in position to make sure everything fit correctly, I
drilled holes through the layout for the lighting wires.
Adding windows, doors, details, and animation
With the positioning finalized, I removed the building and
weathered it inside and out. This is where I glued the final pieces
of the building – the center post between the two front doors,
21
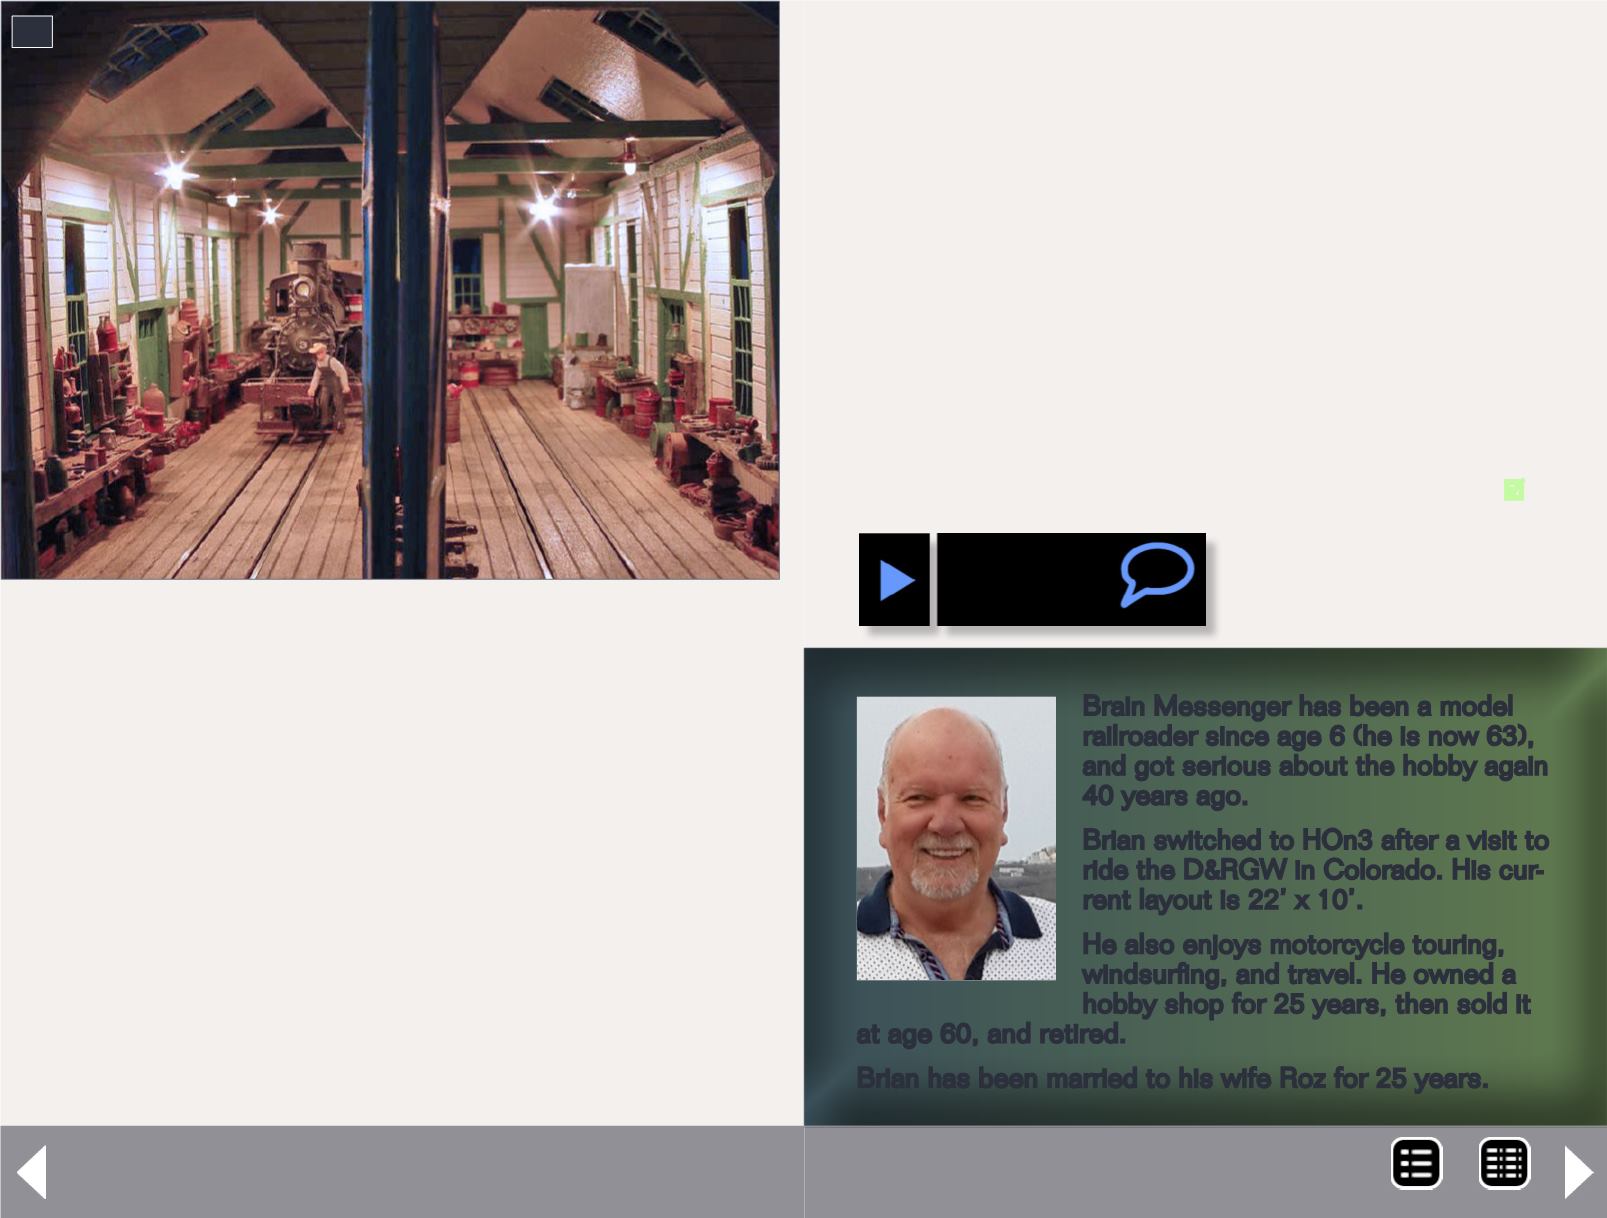
21. The lights create a nice warm glow for the night
crew as they ready one of the locomotives for the next
day’s work.
two outside front doors, center doors, and the two doors at the
back of the building. The last pieces glued were the seven win-
dows in the open position.
This is where the final and fun part of the process began.
I added ballast and scenery material around the area, plus
the castings, junk piles, and everything else found around
such a facility.
I added an arc welding module to the interior under a work-
bench, with a figure kneeling as if welding. This was connected
to the lighting circuit with a separate switch to be able to turn
on the welding module independently while the lights are on.
With the ground cover hiding the wiring, and the final detail
added to the interior, the Engine House was complete. I still must
add the open window frames to the outside of the building...
Brain Messenger has been a model
railroader since age 6 (he is now 63),
and got serious about the hobby again
40 years ago.
Brian switched to HOn3 after a visit to
ride the D&RGW in Colorado. His cur-
rent layout is 22’ x 10’.
He also enjoys motorcycle touring,
windsurfing, and travel. He owned a
hobby shop for 25 years, then sold it
at age 60, and retired.
Brian has been married to his wife Roz for 25 years.
Building a two stall engine house- 12
MRH-Jul 2014


