Painting the details
A real time-consuming job was next painting the castings. First
I sprayed the castings with acrylic earth color paint as a base
coat. I then set up the various colors I needed to paint the
objects on the workbenches, shelving, wall cabinets, and carts.
Once this was done, I placed the objects in position inside the
engine house and made sure that the locomotives cleared
them all before gluing them in place. Once glued in place, I
gave them a black wash for a used look. This wash hides any
“small” mistakes that were made in the painting process. Note:
a good paint job can hide minor flaws, but a poor paint job can
destroy an excellent model.
I will place all leftover items plus some extra details around the
outside of the engine house once it is in place on the layout.
All the doors will be glued in the open position, as this will be
a building in use 24 hours a day, seven days a week. Because of
this, I elected not to make working doors with hinges.
Interior lighting
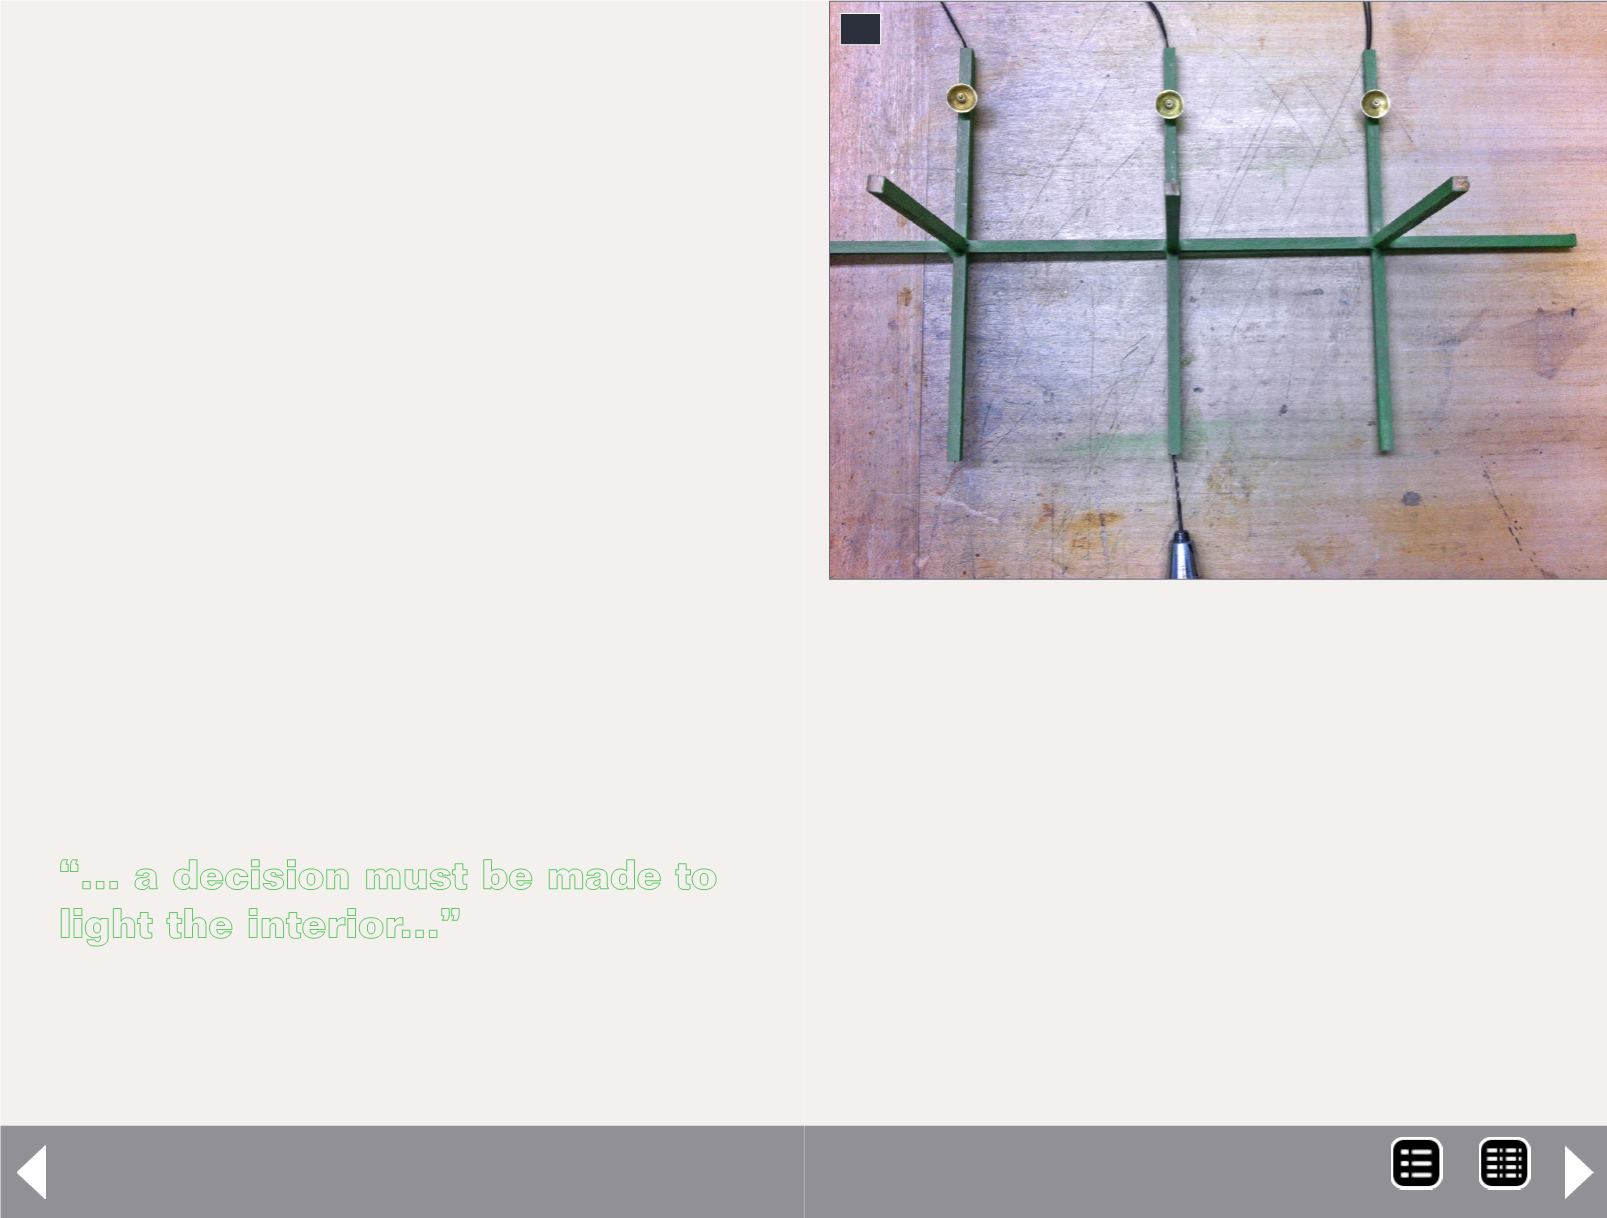
At this point, a decision must be made to light the interior
or not. I mounted a ridge pole down the center, to which
I mounted lampshades with grain-of-wheat bulbs. Per the
instructions, there will be support posts underneath this longi-
tudinal pole when the model is complete.
The photos below show how the lights were fitted. For each,
I drilled a 1.5mm hole in the ends of the left and right brac-
ing and then pulled the wires through . I made sure the lamp-
shades were in the correct positions, then collected the wires
20
20. I decided to add lighting to the engine house.
Lights are centered over the tracks on the overhead
cross braces.
and fed them down as conduit through the floor, to run under
the layout to switches for the power.
The enginehouse needed black wash all over it, again to give
it that well-used look. For the rust look on the metal objects, I
use Gryphonne Sepia as well as Ogryn Flesh washes from the
Citadel range of washes.
Once I was happy with everything in place and the lighting was
done, I transferred the flooring to the layout and glued it in
place. It was a simple step to glue the building in place and add
details around the exterior.
Building a two stall engine house- 11
“... a decision must be made to
light the interior...”
MRH-Jul 2014


