and weight
them mini-
mize warp-
ing. If warping
occurs, brac-
ing on both
interior and
exterior will
correct it.
I laid all the
metal door
and window
castings on
masking tape,
sticky side up,
for spraying
with an air-
brush (quicker
than painting
with a brush.
I use my air-
brush only if
there are a
lot of parts to
be sprayed).
Once thor-
oughly
dry, turned them over and sprayed the unpainted side.
Airbrushing speeds up the drying time to minutes, and a
smoother finish is obtained. I then started with the exterior
and interior bracing.
Modifications to the kit
The instructions call for a stone foundation along the bottom
of the engine house. I deviated from this, and added scribed
siding vertically to keep the whole structure wood. This is a
personal preference, but makes it easier to add the work-
benches and details flush with the walls on both the exterior
and the interior.
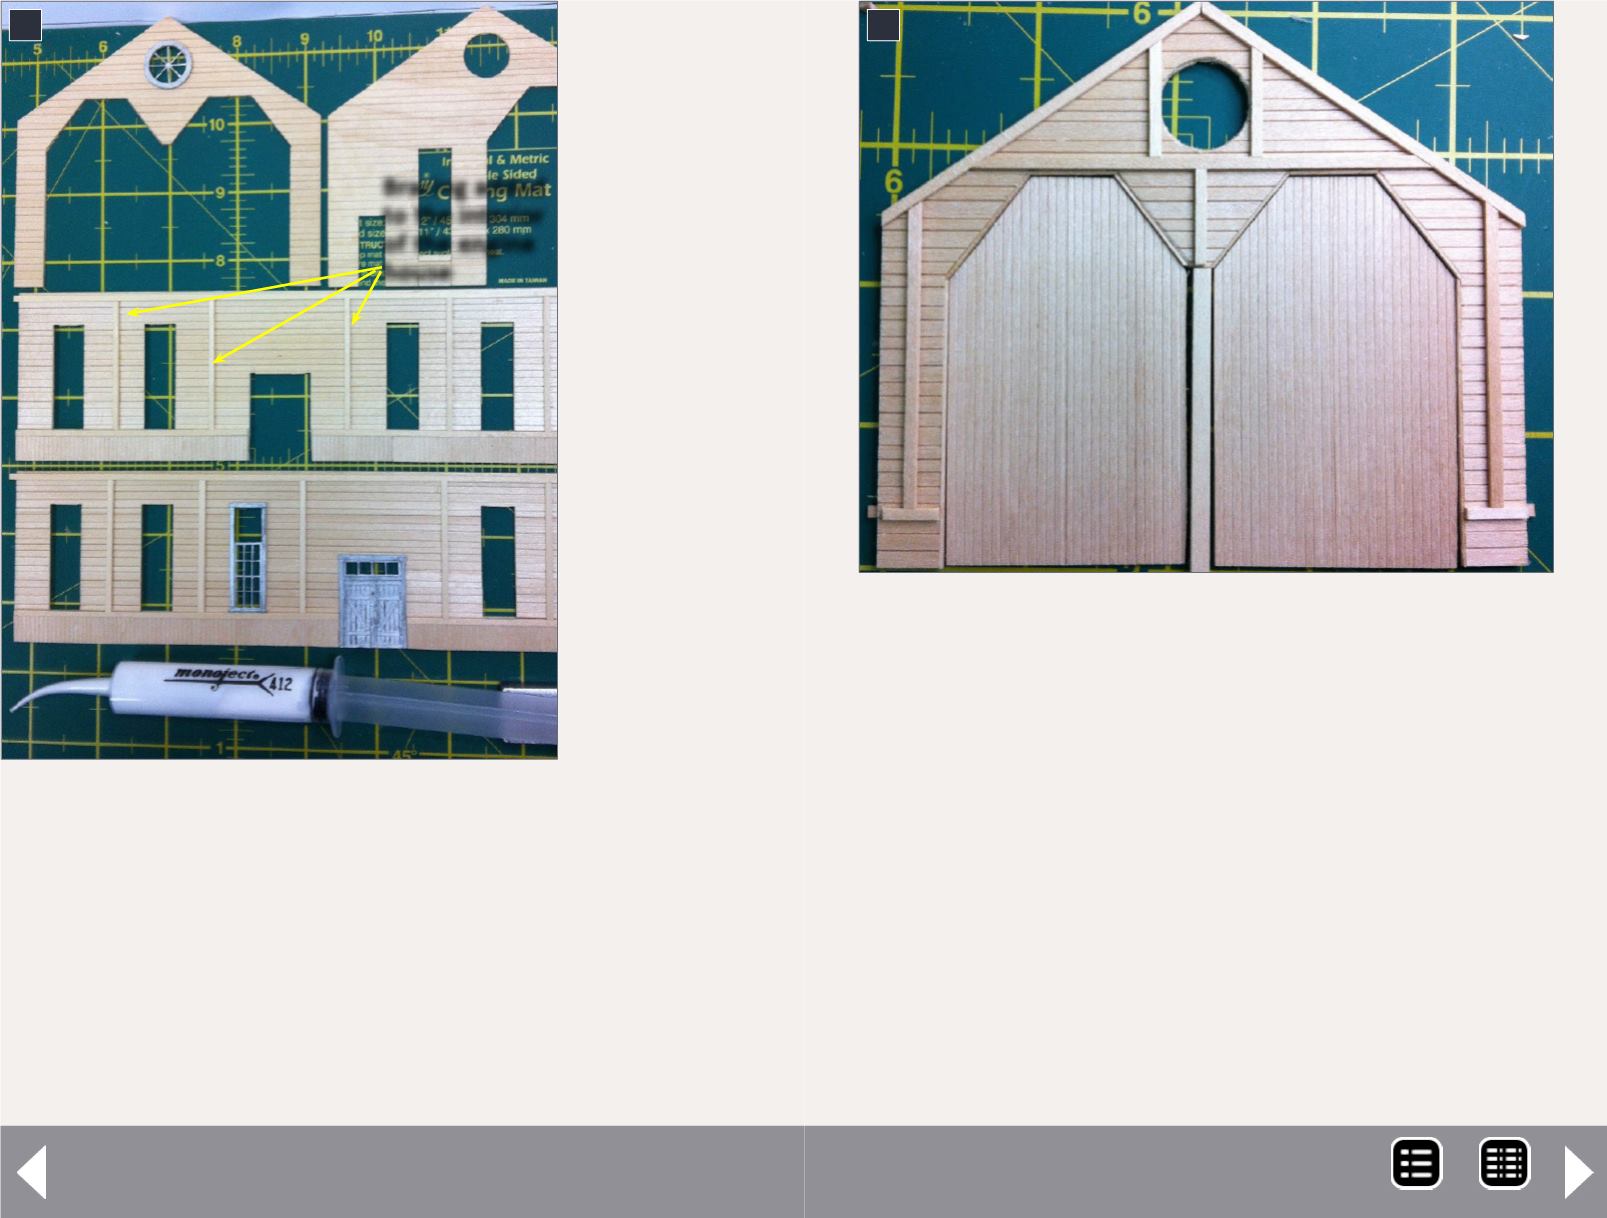
After bracing the track doorways, I tackled the main doors.
Here the instructions say to use the cut individual stripwood
supplied to make up the doors. Instead I used thin scribed sid-
ing affixed back-to-back with double-sided tape to give the
inside and outside the individual-board look. It worked very
well. I marked the scribed siding, using the side walls with the
5
5. Bracing adds both interior detail and
strengthens the structure.
Bracing added
to the interior
of the engine
house
6. This picture shows the details of the interior bracing
of the front doors of the engine house.
6
Building a two stall engine house- 4
MRH-Jul 2014


