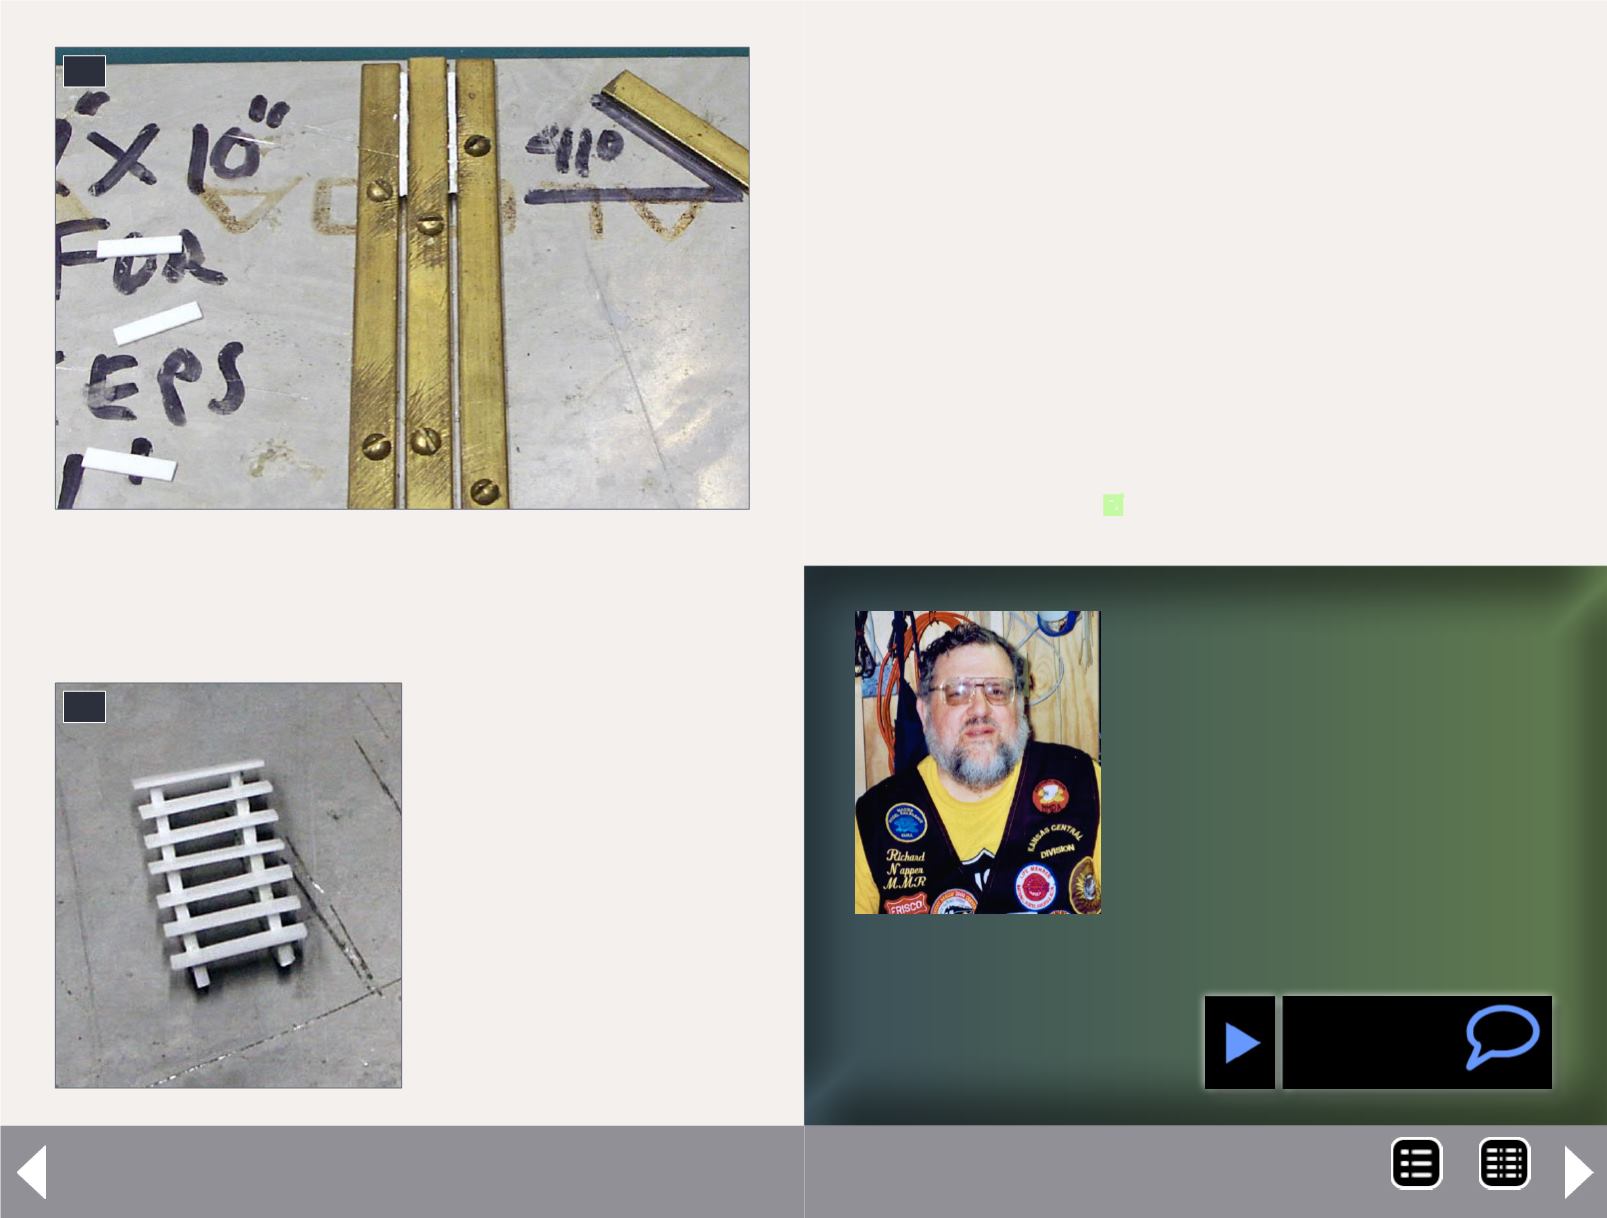
20. Part of the stair jig is this section I made to hold
the stringers while the treads are cemented to them.
This fixture is a must, as it is almost impossible to
cement the treads to the stringers without it.
21. The finished stairs.
A little clean-up and
painting, and they are
ready to be added to the
structure.
Windows and doors - 11
20
21
have both stair stringers for
your steps.
Now we will use the second half of the stair jig. Mount the two
step stringers, parallel to each other, in the two slots on the left
side of the jig. Make your steps out of 2x10’s.
Again using Tenax-7R, bond your steps to the stringers. Again let
dry for 24 hours before removing your new steps from the jig.
Here are your new steps. Using this jig you can make stairways
as long or as short as needed.
I hope you see how versatile my jigs are for making steps,
windows, and doors. Some people will be critical of the piece
sizes I use, thinking they are too thick, but I have never been
criticized for doing so on my finished structures. Have fun, and
remember the Frisco!
Sadly, Richard Napper passed away
in March of 2013. Richard had been
a model railroader for about 50
years, modeling the Frisco, Missouri
Kansas and Texas, Missouri Pacific,
and the Chicago Rock Island and
Pacific. Richard was a life mem-
ber of the National Model Railroad
Association, Mid-Continent Region,
Kansas Central Division. Richard is
greatly missed by those who knew
him, and MRH is pleased to remember Richard by publish-
ing this article from him sent
shortly before he passed.
MRH-May 2014


