Up the Creek Column - 3
Installation
Per Tomar's instructions I
started installation by drill-
ing a 1/4" hole between the
Oakhill main and siding, being
careful to deburr the edges of
the hole. The semaphore post
and control wires pass through
this hole so any splinters can
become a problem for smooth
semaphore operation (4).
There was a splice plate under
the Oakhill roadbed below the
semaphore location. Luckily I
could mount the servos com-
pletely on the splice plate so it
wasn't a huge problem.
I checked the semaphore
against the hole to ensure it
fit and the control wires didn't
bind before proceeding (5).
4
4: Drilling the mounting
hole for the train order
semaphore.
5
5: Test fitting the sema-
phore in the mounting
hole. Note the control
wires and the tiny power
leads for the LED at the
top of the mast.
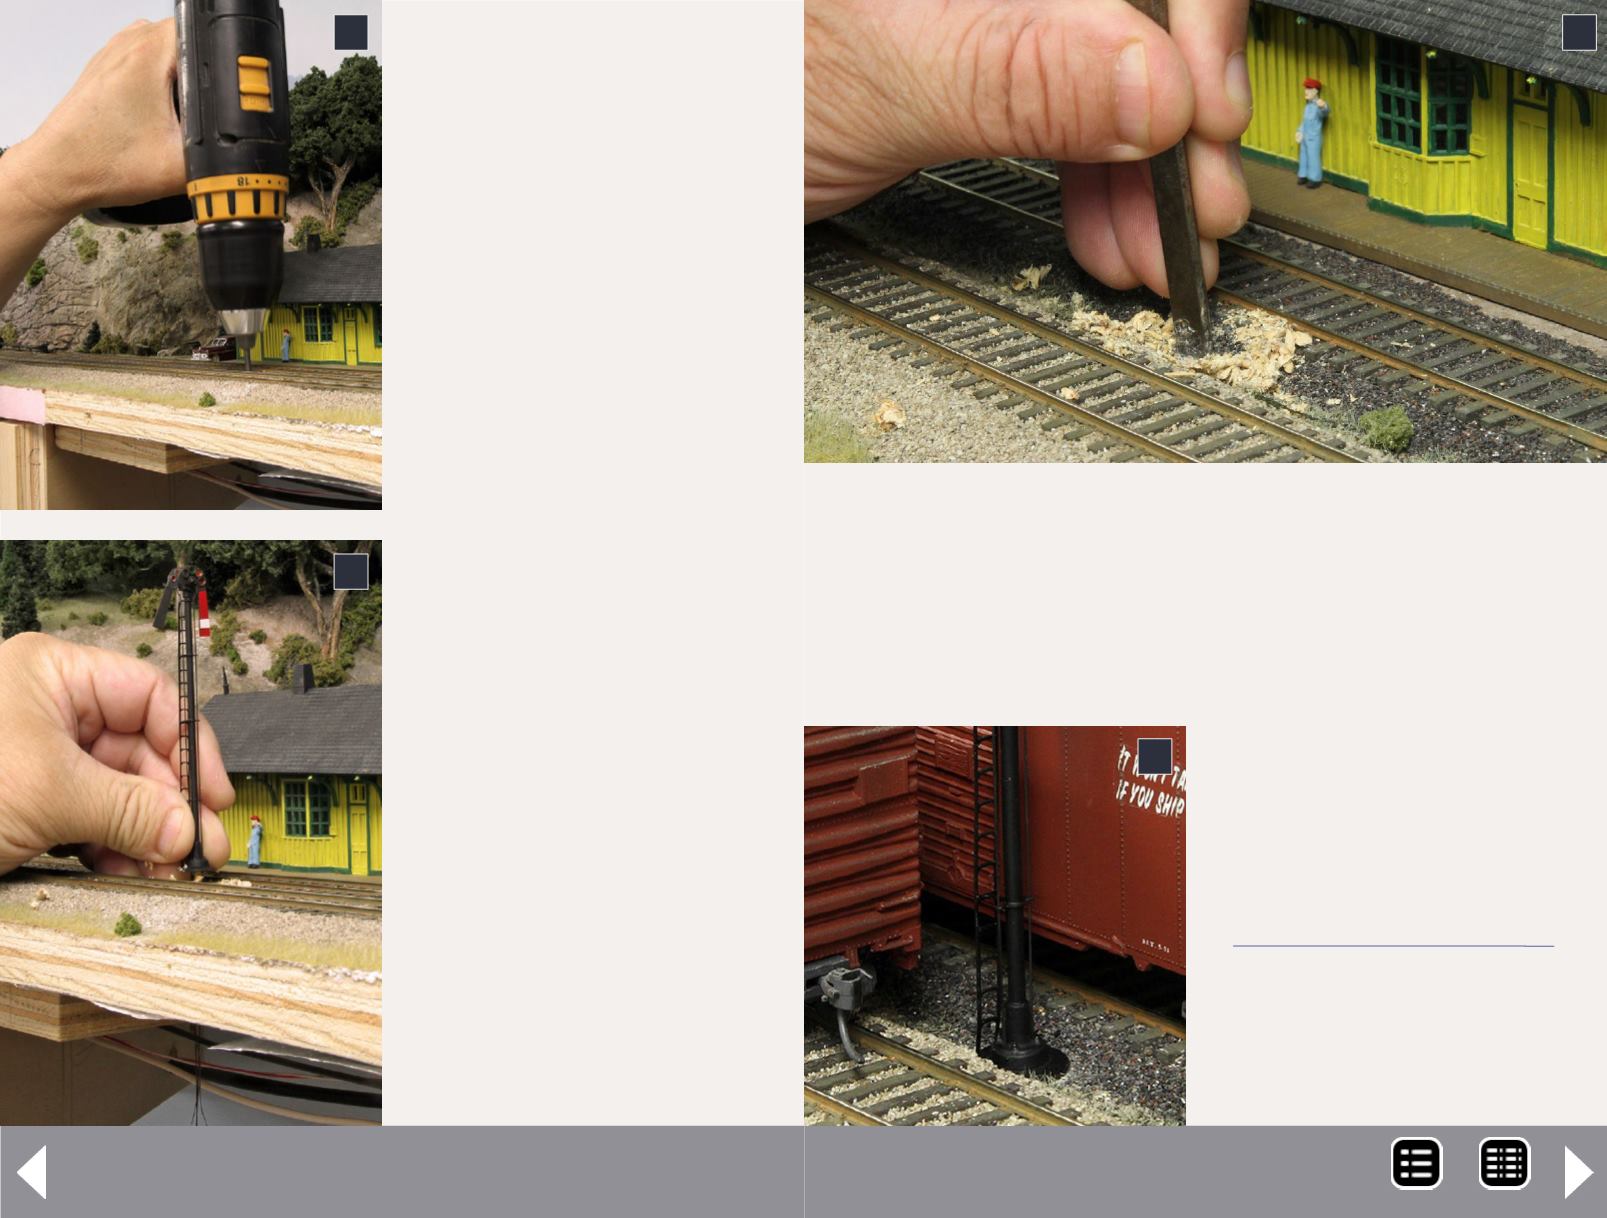
Because the track was already ballasted where the sema-
phore would be installed, I used a steel scraper to remove
enough ballast to make a flat mounting surface for the sema-
phore base (6). After scraping, I test fit the semaphore to be
sure its base would fit. I also
wanted to be sure there was
adequate clearance between
the semaphore and passing
railroad equipment (7).
6: Scraping away ballast near the hole to make room for
the semaphore's base.
6
7: Test fitting the sema-
phore's base. Does it
rest level with no ballast
chunks below?
7
MRH-Oct 2013


