Teach Your Engineers to Turn Heads - 4
motor shaft. My test was to move it with a thin flexible wire.
If it moves easily, ACC the motor in place. If not, adjust until
it does. Every one of these I’ve made requires this attention.
After initial gluing, I add two 0.080x0.080 inch strips to cradle
the motor in place for added support. Next I press-fit the head
on in appropriate position so it will rotate from forward to rear
(remember to view the figure from the “arm-out” side). Next,
paint the engineer as you like (9-10).
Powering the head motor uses an old trick, relying on the for-
ward voltage drop of diodes. Diodes exhibit a small voltage
drop across them of somewhere from 0.3-0.8 volts depending
on the type of diode and the amount of current they are pass-
ing. These diodes will need to be able to handle the stall cur-
rent of your loco motor. The 1N4001 through 1N4006 series
of diodes are rated at one amp – more than enough for my
loco motor. These diodes are cheap and readily available. My
Athearn GP9’s were running between 250-400ma (actual mea-
surements). So at these currents, my 1N4002 diode has a volt-
age drop of 0.56 Volts (measured) – or two in series have 1.12
Volts. This is perfect to power the pager motor, using it as a
“rotary solenoid” equivalent in a stall motor configuration.
By feeding the motor lead either from a DCC decoder or from
the track lead directly in a traditional DC-controlled layout, we
can energize the head motor in either direction based on the
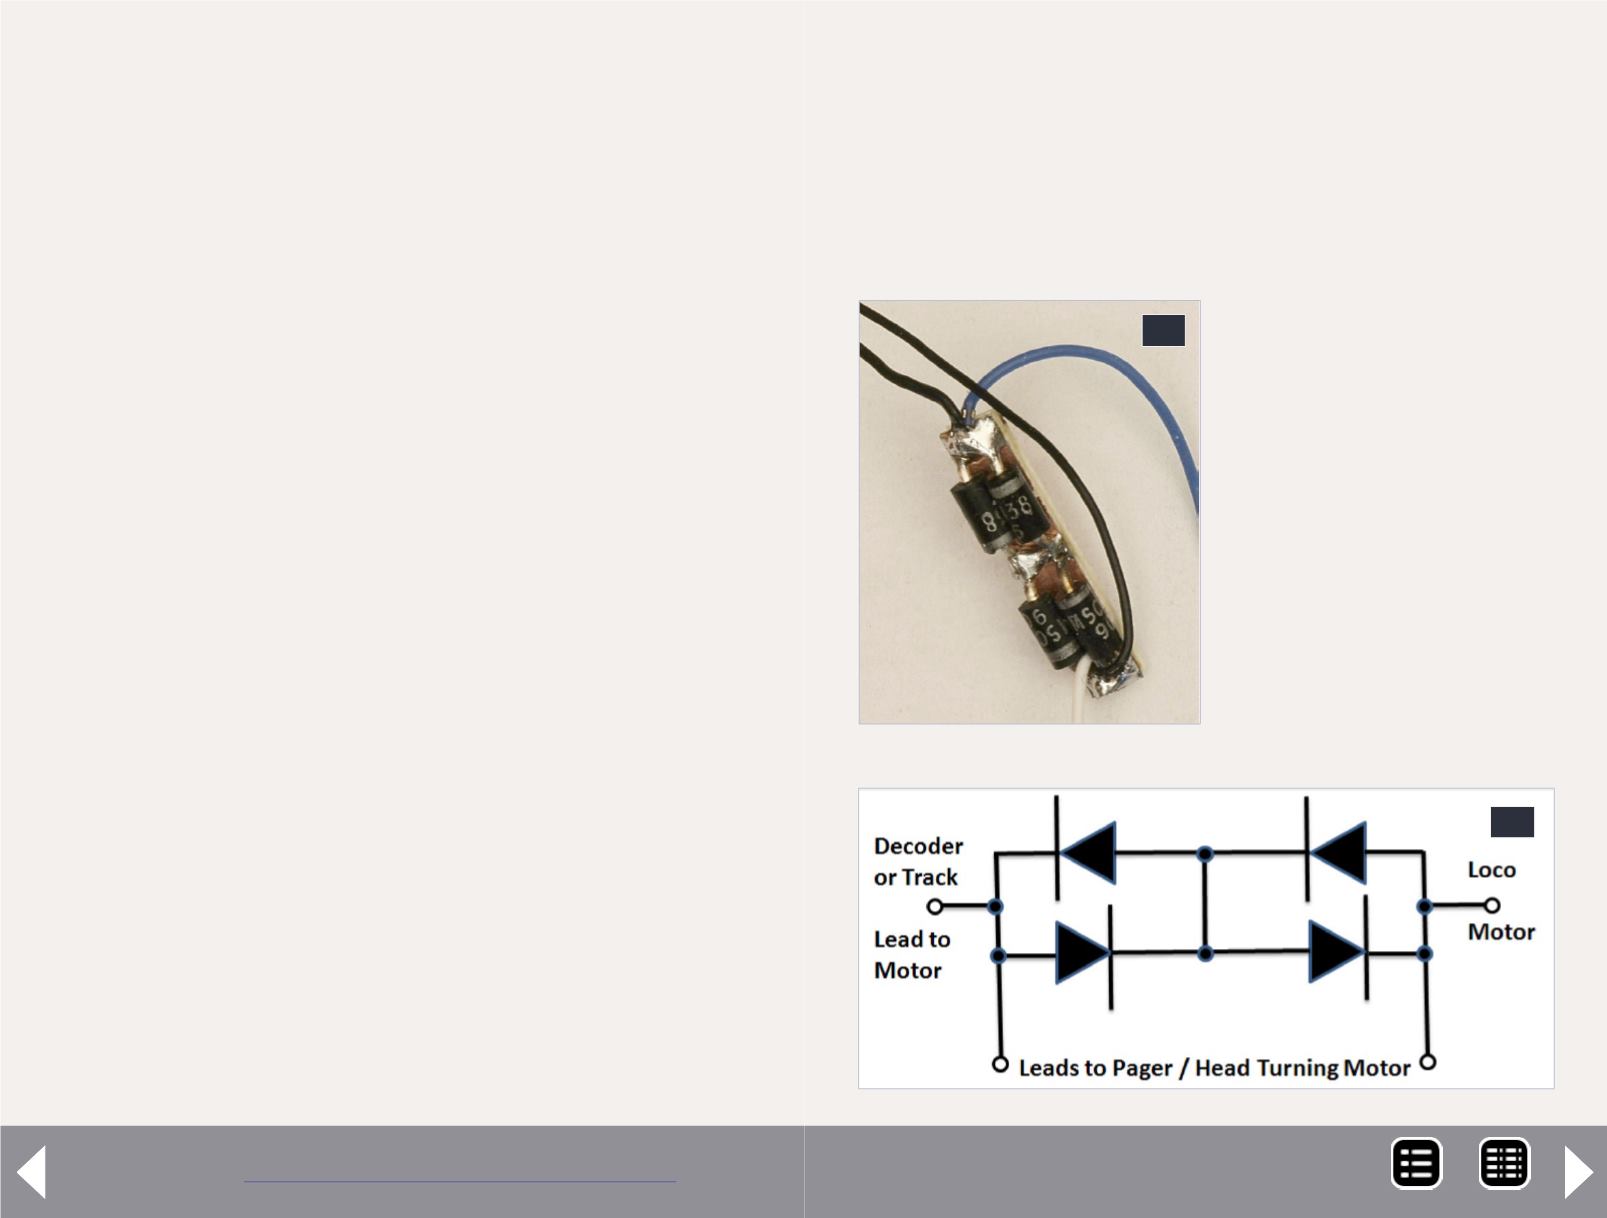
power delivered to the loco motor. Wire the diodes as shown
in figure 12. Disconnect one wire that runs from the decoder
(or track, for conventional DC) to the loco motor. Connect that
wire to one end of the diode assembly. Connect the other end
of the diode assembly to the motor terminal.
The leads from the head motor go to either side of the diodes.
Test before making the connections permanent that the pager
11: Diode assembly wired.
12: Diode assembly sche-
matic diagram.
11
motor is wired in the correct orientation, so the head will turn
in the direction that your locomotive is traveling! It doesn’t
matter which side of the loco motor connection you insert the
diodes. I used a small piece of single-sided printed circuit board
(or PC tie material) with cuts and holes in the copper to isolate,
mount and solder the connections. The cuts in the copper are
actually under the diodes in picture 11. I wrapped the diode
assembly in tape after all wires were attached to insulate it.
12
MRH-Feb 2013


