 
          13. The rust damage and corrosion is complete
        
        
          and ready for another Dullcote application. Another
        
        
          application is added before the next step.
        
        
          13
        
        
          Rustbucket weathering - 8


            When all of the replicated damage meets my expecta-


            tions, I mist the work again with another shot of Dull-


            cote. Now that the model has its telltale rust pits and


            other damage, I can move to step 5.


            STEP 4: Adding corrosion and damage


            Continued ...


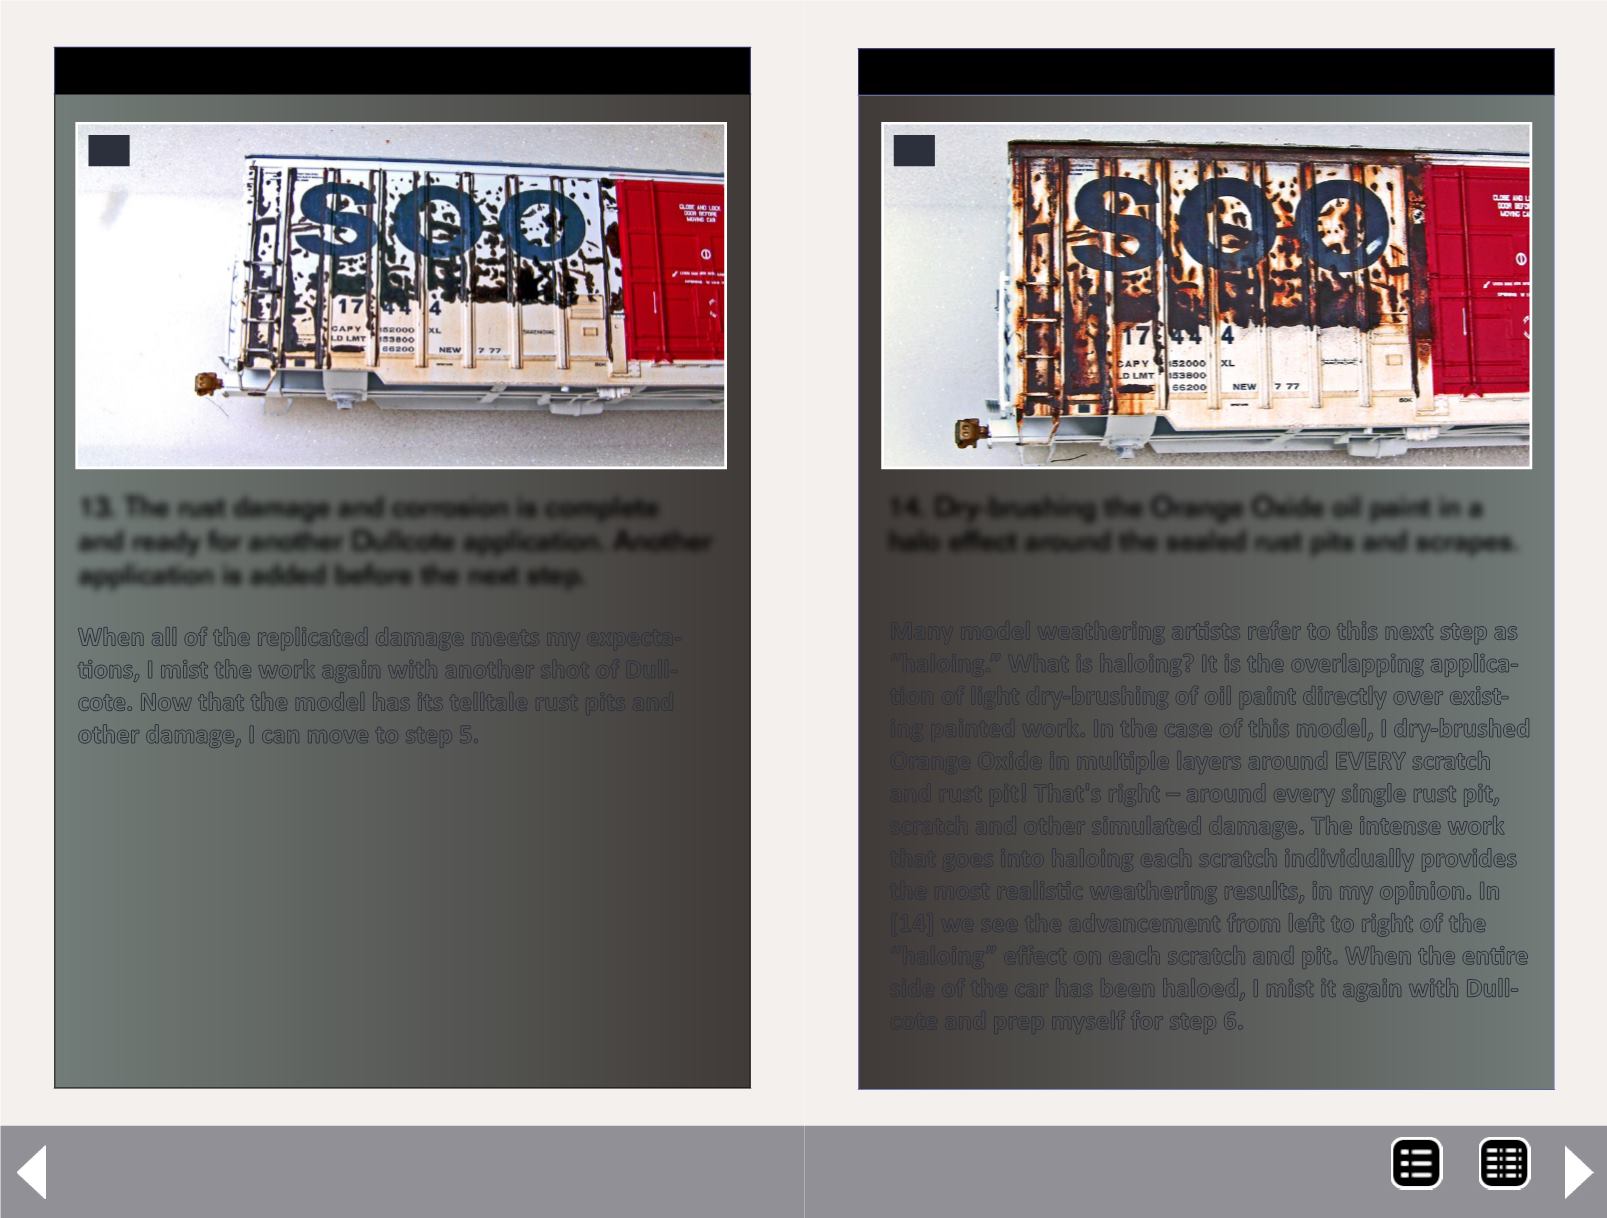
          14. Dry-brushing the Orange Oxide oil paint in a
        
        
          halo effect around the sealed rust pits and scrapes.
        
        
          14


            Many model weathering artists refer to this next step as


            “haloing.” What is haloing? It is the overlapping applica-


            tion of light dry-brushing of oil paint directly over exist-


            ing painted work. In the case of this model, I dry-brushed


            Orange Oxide in multiple layers around EVERY scratch


            and rust pit! That's right – around every single rust pit,


            scratch and other simulated damage. The intense work


            that goes into haloing each scratch individually provides


            the most realistic weathering results, in my opinion. In


            [14] we see the advancement from left to right of the


            “haloing” effect on each scratch and pit. When the entire


            side of the car has been haloed, I mist it again with Dull-


            cote and prep myself for step 6.


            STEP 5: Haloing


          MRH-Aug 2014