Rustbucket weathering - 3
me, but you should determine what works best for you. Since
I am right-handed, I work left-to-right to avoid resting my hand
on a section of freshly applied weathering. Left-handed individ-
uals should work right to left.
The very first step in my weathering process is to merely wipe
the car clean of any dust. While some weathering buffs insist
on giving the model a bath in clean soapy water, and drying it
thoroughly before getting started, I never felt this procedure
was necessary, since the model will be getting dirty anyway.
So here is the Fox Valley model ready for weathering. The
reporting mark numbers on this model will be removed or
painted over, and the car will receive its new number 16916
with set of number decals from a Microscale sheet at a later
point during the weathering.
Next, I gather the media I will need to get the weathering as
close to the real thing as possible. As I mentioned, I never
spend much money on art supplies. I believe it is how the
3
3. This is the Fox Valley model direct from the box,
ready for weathering.
media are used, as opposed to how much money is spent, that
fine results CAN be realized.
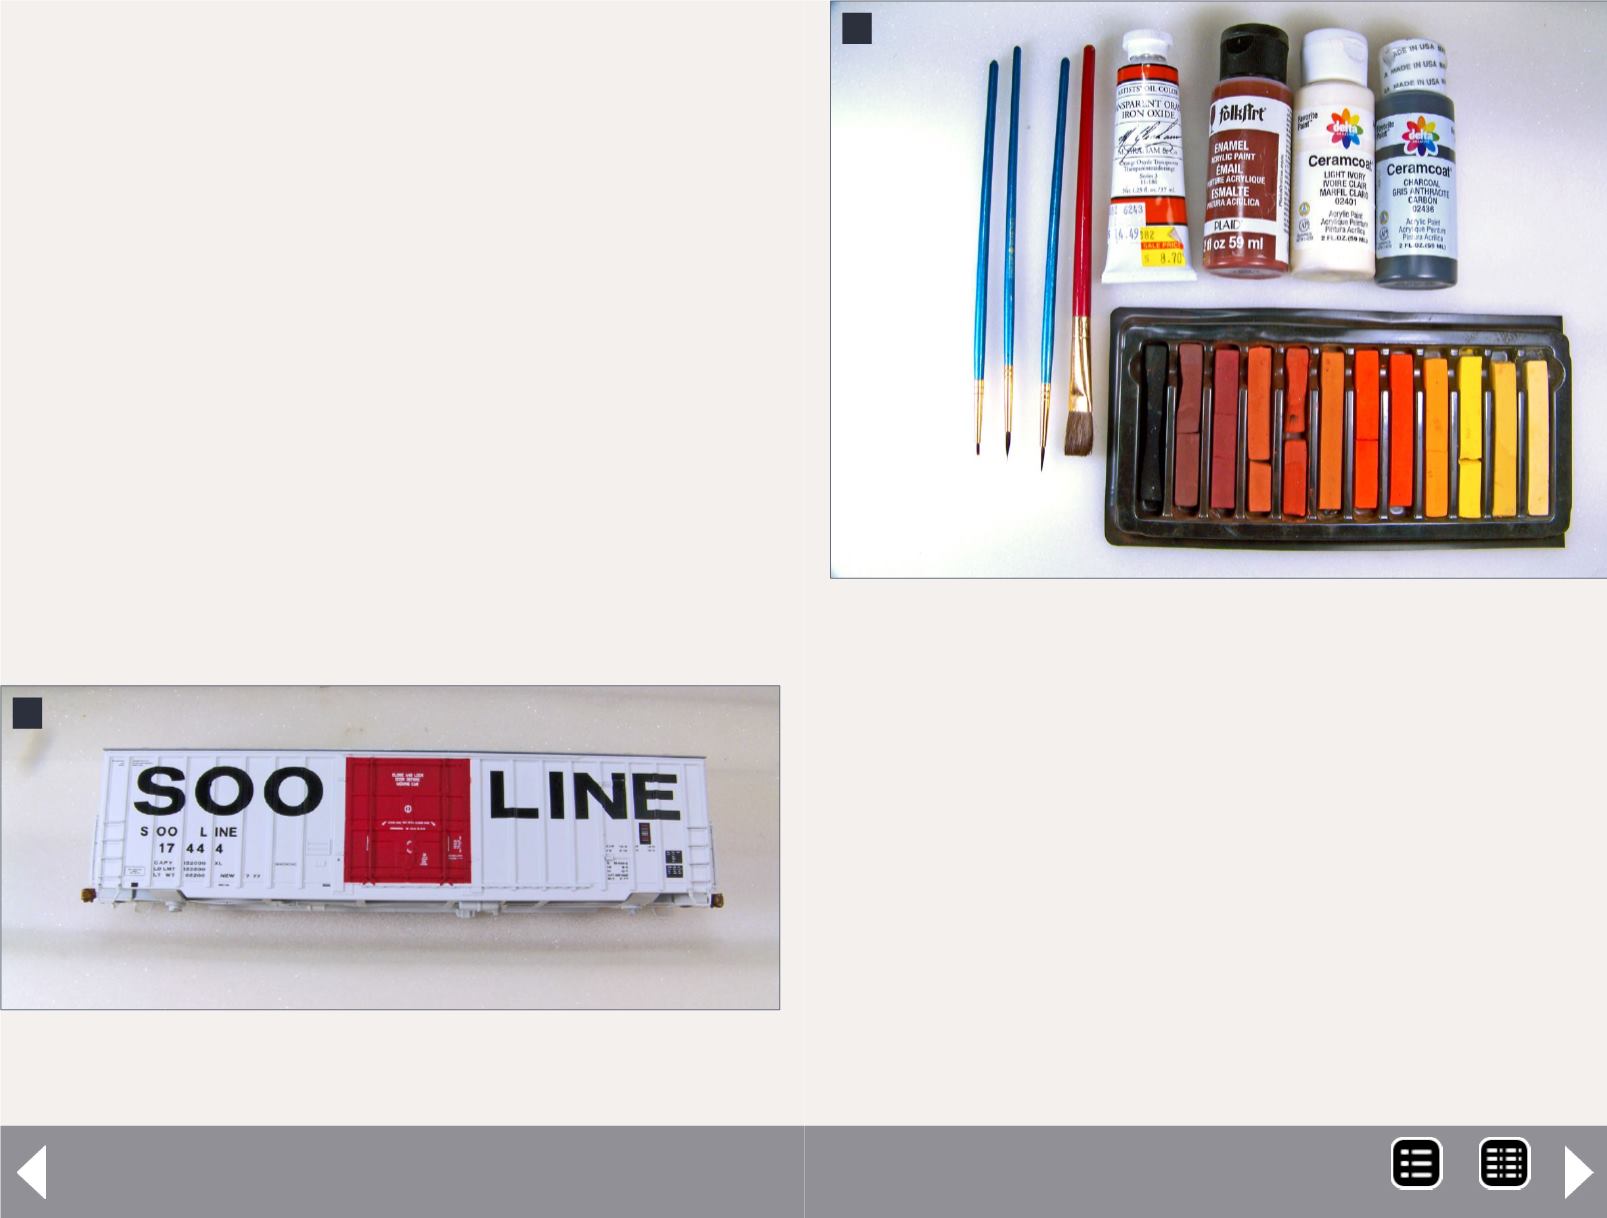
In [4] you can see the basic artist media that I used for this
project. Beginning from the left, I have three inexpensive fine-
line soft-hair brushes and a soft-hair wide brush. Next my
favorite oil paint, a tube of Graham & Co. “Transparent Orange
Oxide” oil paint. This color of oil pigments is hands-down the
most valuable medium in my art supply cache. Next are three
very inexpensive colors of acrylic craft paints. The colors I used
are Black, (not pictured) Burnt Sienna, Ivory White, and lastly,
Charcoal Gray.
These colors come in bottles that can be purchased at nearly
any department store for mere pennies. Finally, a set of equally
4. The media that will be employed for this project.
4
MRH-Aug 2014


