Lite and Narrow Column - 6
Recall assembling the tapered part of the main tipple bin. It is
time to repeat those steps and assemble the two for the shaker
house. Cut eight sheets of .020” styrene 12’ x 9½’. These are
different because these bins are higher than the enclosed one.
Again, make your cuts from the corners of the pieces toward
the center, allowing for a 2’ square opening in the bottom.
After assembling the bins and gluing them to the 12’ squares,
add three scale 2” x 8” strips to three of the sides and two to
the other side leaving the center open. This is where the truck
chute attaches to the bin.
Cut four 9” H-beams 29’ long. Glue them to the outside corners
of the bin with the panels on three sides and the attach the bin
6
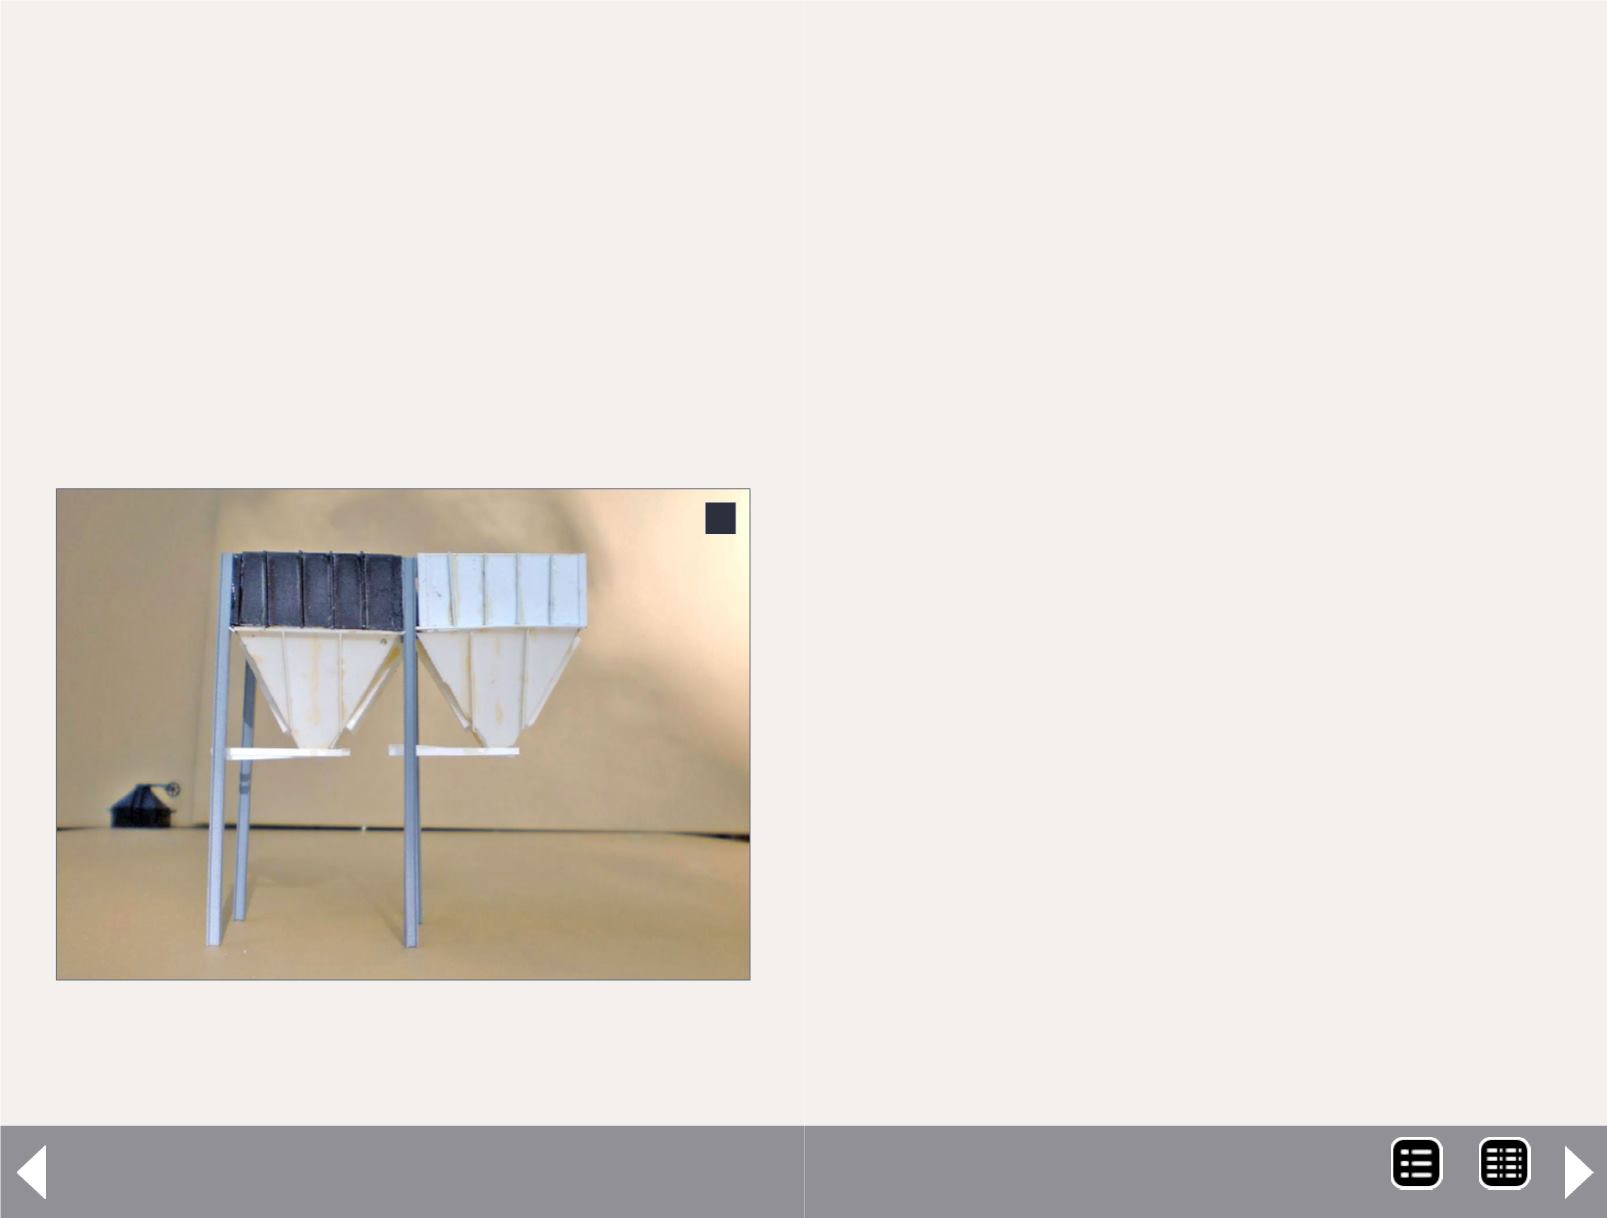
6. The bins under the shaker house under construction.
The operating mechanisms for the chutes and the outside
chutes have yet to be installed.
with the panels on two sides. Make sure the top of the bins
is flat, as this is where the shaker building will sit. Cross-brace
the columns with 9” I-beams and put a slice plate in the cen-
ter. At the bottom of each H-beam, glue an 18” square of .020”
styrene, and the put gussets on each leg. You can add Archer
rivet decals to the gussets for added detail.
The truck chutes are fabricated from .020” styrene. The upper
section which attaches to the bin is one piece, 2’ x 7’ for the
floor and two pieces 1’ 6” x 7’ for the sides. These are built the
same way a coal chute is made for coaling towers.
The chute extends from the bin through the support brac-
ing, and is held in place by attaching .030” styrene rod to the
sides and then cross-bracing with scale 1” x 3” styrene. The
lower section of the chutes can be raised or lowered, so they
are hinged just beyond the support cross-bracing. Pulleys and
cables were added to allow workmen to operate the chutes
from the ground, and load hopper cars or trucks, depending on
what was spotted at the chute.
More black paint
I spray-painted the entire assembly black and touched-up the
gears and track with a silver marker. After drying, I attached
the concrete footings to the H-beams.
The shaker house is located on top of the storage bins. Begin
by cutting and gluing a piece of .020” styrene to the top of the
finished storage bins. Cut four pieces of .040” styrene 3’ tall
and 12’ wide. Mark the center of the pieces and measure 5’ on
each side. Scribe a line from the 5’ marks to the corner of the
12’ side, and snap off to make an angle.
Glue the four pieces in place at each end and in the center.
Enclose the top and sides with .020” styrene. Glue corrugated
MRH-Aug 2014


