the groove between each section, securing with wood screws
from the bottom.
Electrical
I chose a DC power pack to begin the layout. DCC is more
expense, not only for the power supply, but also for DCC-
equipped locomotives. However, I do plan to switch over to
DCC, and upgrade the locomotive to DCC. After the conversion
to DCC, I plan to use the DC power pack for accessories.
The power pack (throttle) will be placed on top of the module on
the shortest wall. This will locate it roughly in the center of this
point-to-point layout. At first, I thought the location of the power
pack would be an issue, but this will enforce operational prac-
tices by increasing time between the engine stop and turnout
throws or uncoupling (I am not modeling a race track).
The wires will be soldered to the tracks on each module. A
scrap piece of rail can be used to fish the wire through the
insulation to the groove on the sides. The wires can then be
run in this groove to the power pack. The groove can be cov-
ered with scrap rigid insulation, hiding the wires, but still
making them accessible. For wire connections, twist the wire
together and space-out connections to prevent shorts.
Equipment
I found an Athearn GP38-2 and three freight cars that would
fit the remaining budget. Certainly used equipment is cheaper,
but I like the new-equipment smell.
Expenditures
I was a skeptic about cost when I started. I thought there was no
way I could model the short line I wanted on a $500 budget with
the space I have. But I came in just under the target budget.
$500 layout 1st place - 6
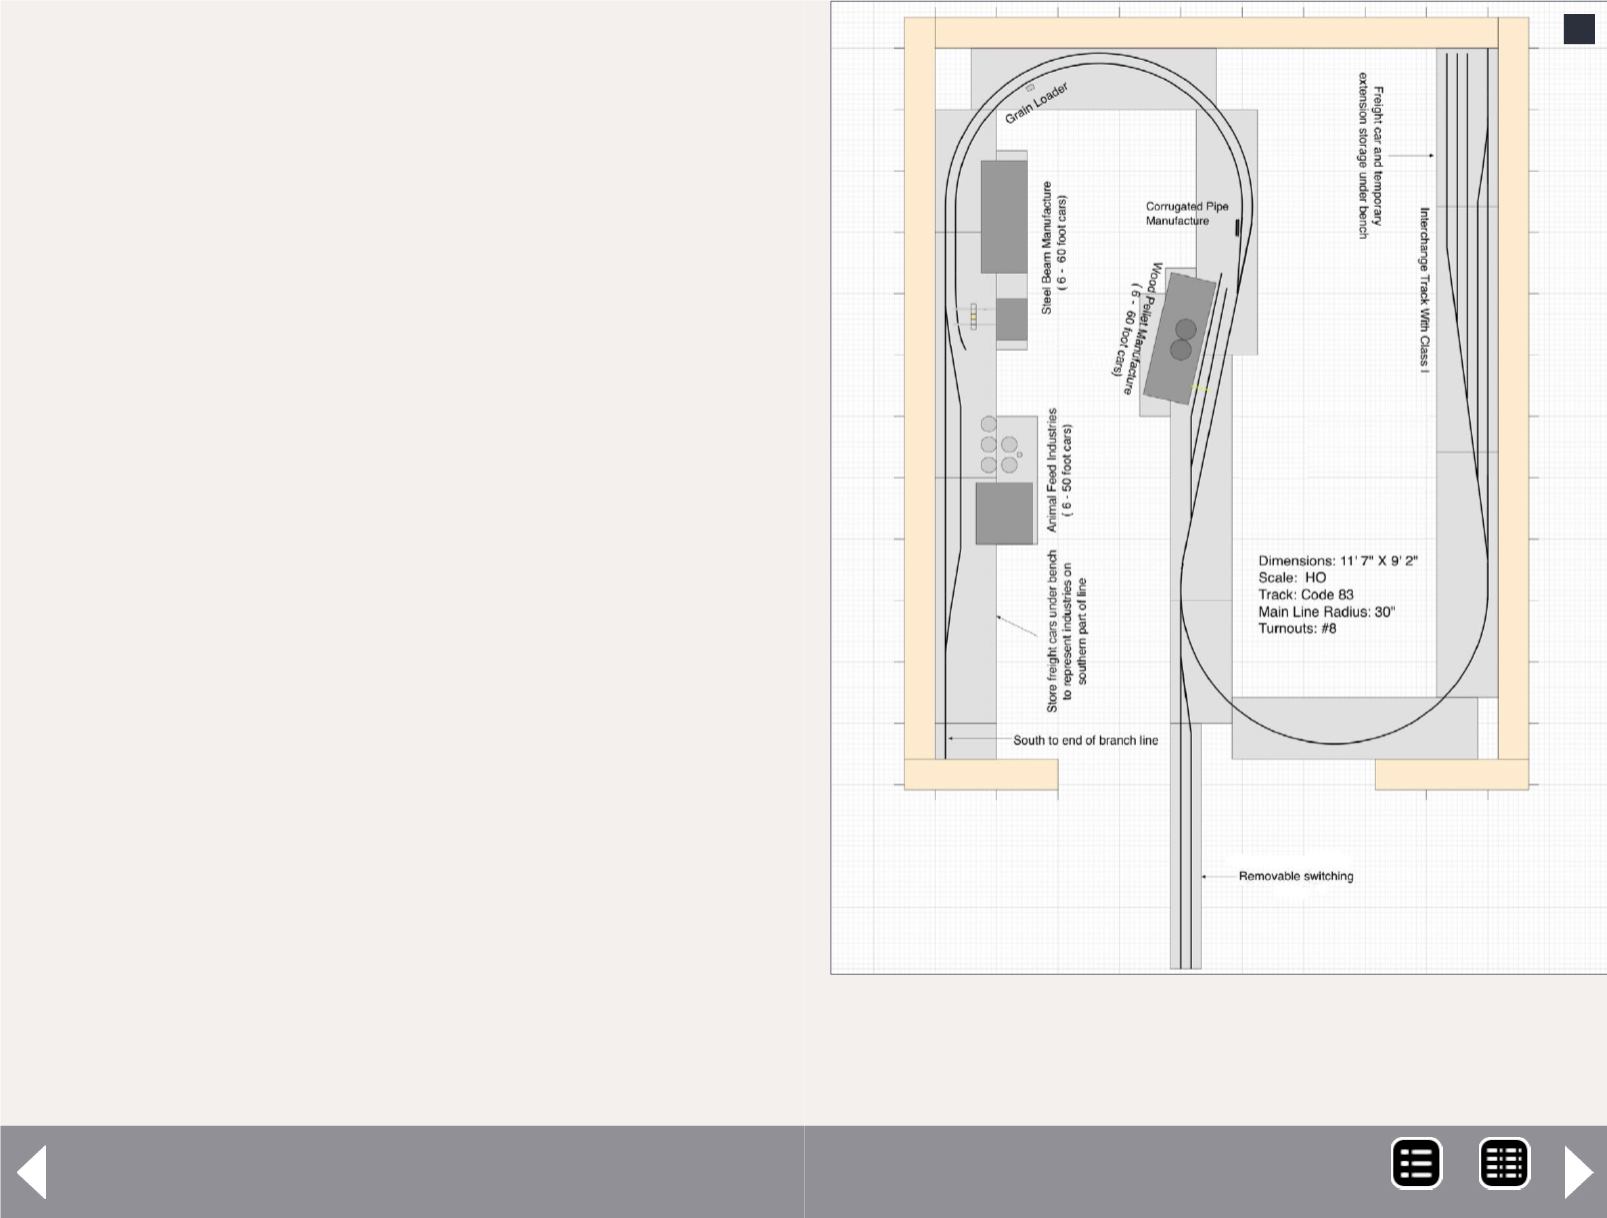
6. When the budget permits, the layout can be
expanded to represent all industries in the town and
elsewhere on the shortline.
6
MRH-Jun 2014


