holes for the wood screws). The one tool I have is a cordless
rechargeable screwdriver and some hex-shank drill bits. This
tool or a cordless drill will make construction easier. I selected
1/2” rigid foam insulation for the surface of the module, for
ease of transportation.
Cut the 11 pieces of 8’ 2x2 in half, for the 11 sets of 48” legs.
Next cut six pieces of the 8’ 1x3 in half, for the sides of the 4’
modules. One piece of the 1x3 is cut into four equal pieces
for the sides of the 2’ modules. The remaining four pieces of
8’ 1x3 are cut into 10-1/2” lengths, yielding 36 pieces for the
cross bracing, five boards for each of the 4’ modules and three
5
5. Construction details for the 1’ x 4’ modules
$500 layout 1st place - 5
boards for the two 2’ modules. Optionally, another couple of
lengths of 1x3 can be purchased to add bracing on the legs.
To prevent damage to floors, cut some scrap cardboard boxes
into 2” squares and wrap them in plastic wrap. Place these
under the legs to catch any wood sap.
For the surface of the modules, cut one 1/2”x48”x96” rigid
foam insulation into eight lengths of 1’x4’. The second sheet
of rigid insulation provides the next four lengths of 1‘x4‘, four
lengths of 1‘x2‘ and three lengths of 8”x4’. The remaining
board will provide the remaining three lengths of 8”x4‘ and
two lengths of 8”x2’.
Cut 4” off of each 8”x4’ length, and off of each 8”x2’ length,
saving the leftover for splines. You should now have the follow-
ing 1/2” rigid foam insulation pieces:
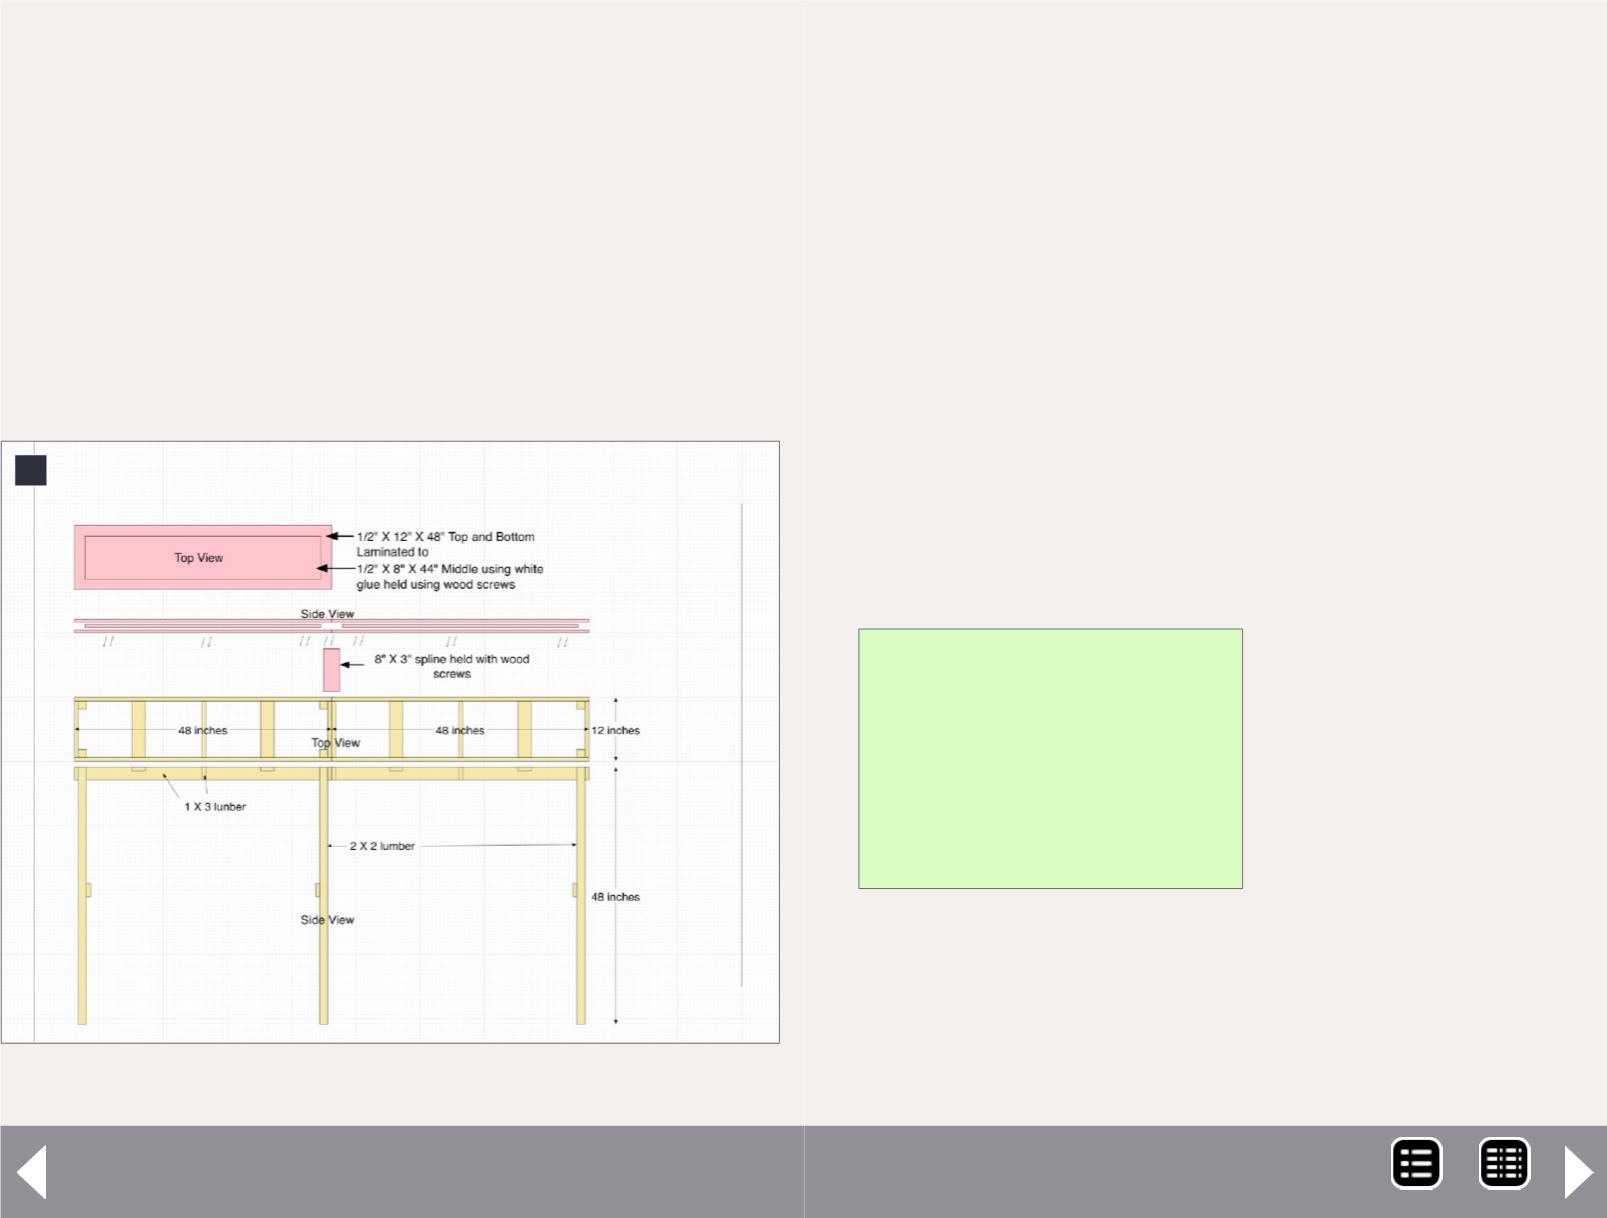
Laminate the sheets
together by applying
white glue to a surface of
the 8”x44” section and
centering on a 1’x4’ sec-
tion. Apply white glue
to the exposed surface
of the 8”x44” piece and
place the second sheet of 1’x4’ sheet on top. Use six wood
screws to secure the sheets together until the glue dries.
Repeat for the 2’ sections.
Place each section (screws down) on the wood frames, and
secure with wood screws. Trim the spline to 3”x8” and place in
Quantity
Description
12
1’x4’
6
8”x44”
4
1’x2’
2
8”x20”
MRH-Jun 2014


