Note the 2‐pin connector in the speaker leads. This allows the
shell to be completely removed for maintenance or storage.
With a bit of carving on the Styrofoam insert to provide room
for the speaker, enclosure, and the connector, the shell can
even be put back into the original box.
Behind the fan grilles
One of the best-sounding installations I do has the speaker(s)
behind upward-facing fan grilles. The GP9 shown in [3] is a
prime example. There is room in front of the rear light lens
and the 16 x 35 mm speaker covers the only opening in the
top of the shell. The trick is making sure that the speaker cone
doesn’t contact any plastic nubs hanging down from the shell.
Some installations require a shim to move the speaker down
and away from the shell to accomplish this.
In order to have room for the speaker, height needs to be
removed from the weight. The loco in [3] had the weight
removed and milled down until the motor almost protruded
above the weight. In my column “17 DCC Tips” from June 2013
I showed how to use a belt sander for
this task. So no special tools are necessary for this installation.
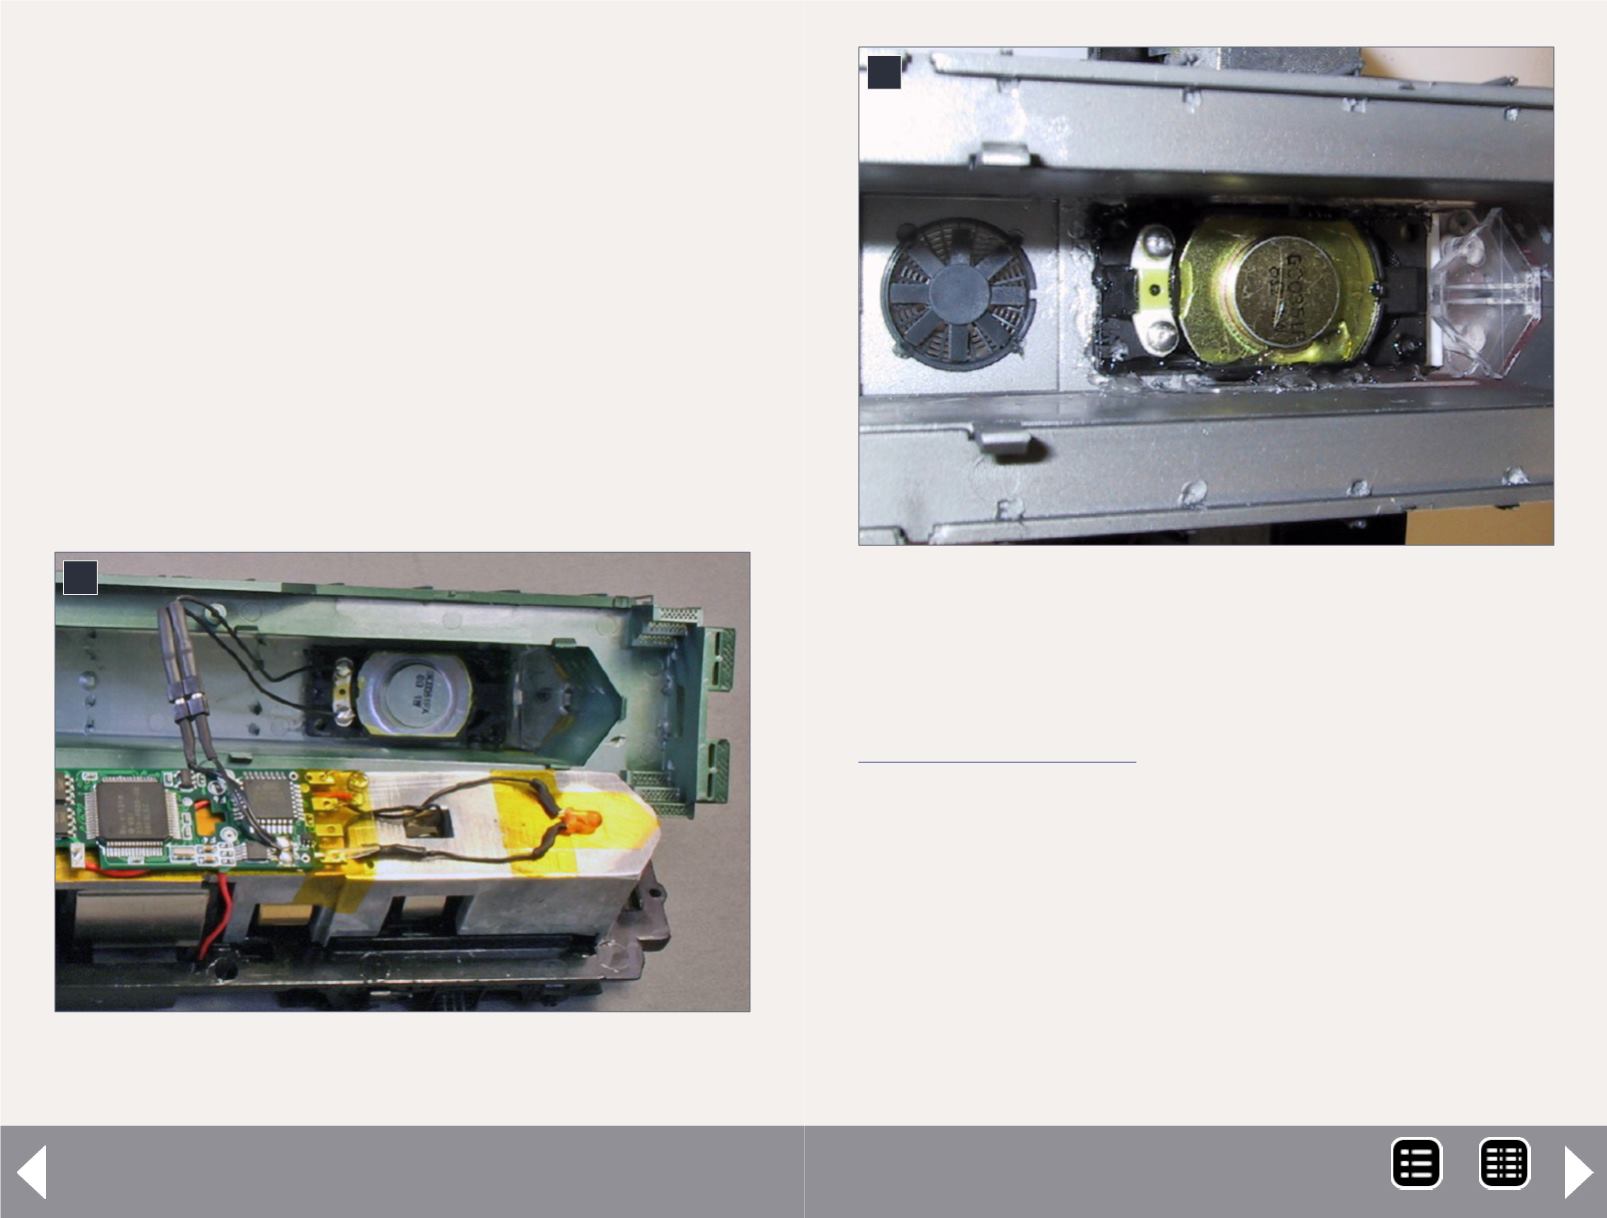
Figure 4 shows a similar shell where there are more grille
openings. You can see the speaker held in with clear caulk.
Check out the small plastic nubs protruding near the grille.
Similar ones above the speaker are what you need the cone
to clear. To finish this installation, I put a piece of black plastic
over the open grille to seal it. I held it in place with a bead of
caulk. The rear LED will rest on top of the weight and needs to
be adjusted so it shines on the flat portion of the lens assem-
bly in the shell.
3.16 x 35 mm speaker installed behind the fan grilles in a
Proto 2000 GP9.
3
4. Proto 2000 loco with several open grilles.
4
DCC Impulses Column - 4
MRH-Jul 2014


