Up the Creek Column - 4
photography. Although I couldn’t see over the top of the back-
drop, it didn’t provide the feeling isolation of isolation I wanted.
On the positive side, air circulation wouldn’t be a problem and the
low height should let me shine photo lights over the backdrop for
better-illuminated layout photography. Finally, crews could see the
existing fast clocks in the sky over the backdrop.
A 3’ height provided a better feeling of isolation and air circula-
tion would probably be adequate. But ceiling lights on the far side
were still visible and shining photo lights through the 12” space
between backdrop and ceiling probably wouldn’t work well.
The 4’ high backdrops provided a terrific feeling of isolation from
the rest of the railroad. There were no distractions from lights on
the far side of the backdrop. Air circulation wouldn’t be great, but
fans under the layout would help. I’d also need two additional fast
clocks so crews can always see the time -- extremely important for
TT&TO operation.
In the end, the feeling of isolation provided by the full-height back-
drops won out.
Backdrop mounting
By March 2014 I was finally ready to start peninsula backdrop con-
struction. I’d decided on its height and an ultra-skinny laminated
backdrop, but what would I use to build it?
Masonite spline on the ceiling
I asked myself, could I build Masonite splines on the edge of the
peninsular roadbed, then screw them to the ceiling. If I clamped
the splines to cleats on the edge of the benchwork they should
match the curvature perfectly [6]. If this worked I’d be able to
attach the backdrop top and bottom.
I ordered a 4x8 sheet’s worth of 1-3/4” tall 3/16” Masonite splines
from a local cabinet shop that used a panel saw to cut themmore
accurately than I could. A few days later a serpent of Masonite
appeared on top of the roadbed. Good train buddy and construc-
tion super-hero Paul helped me cut the serpent to length and
screw it to the ceiling – definitely a two-man job.
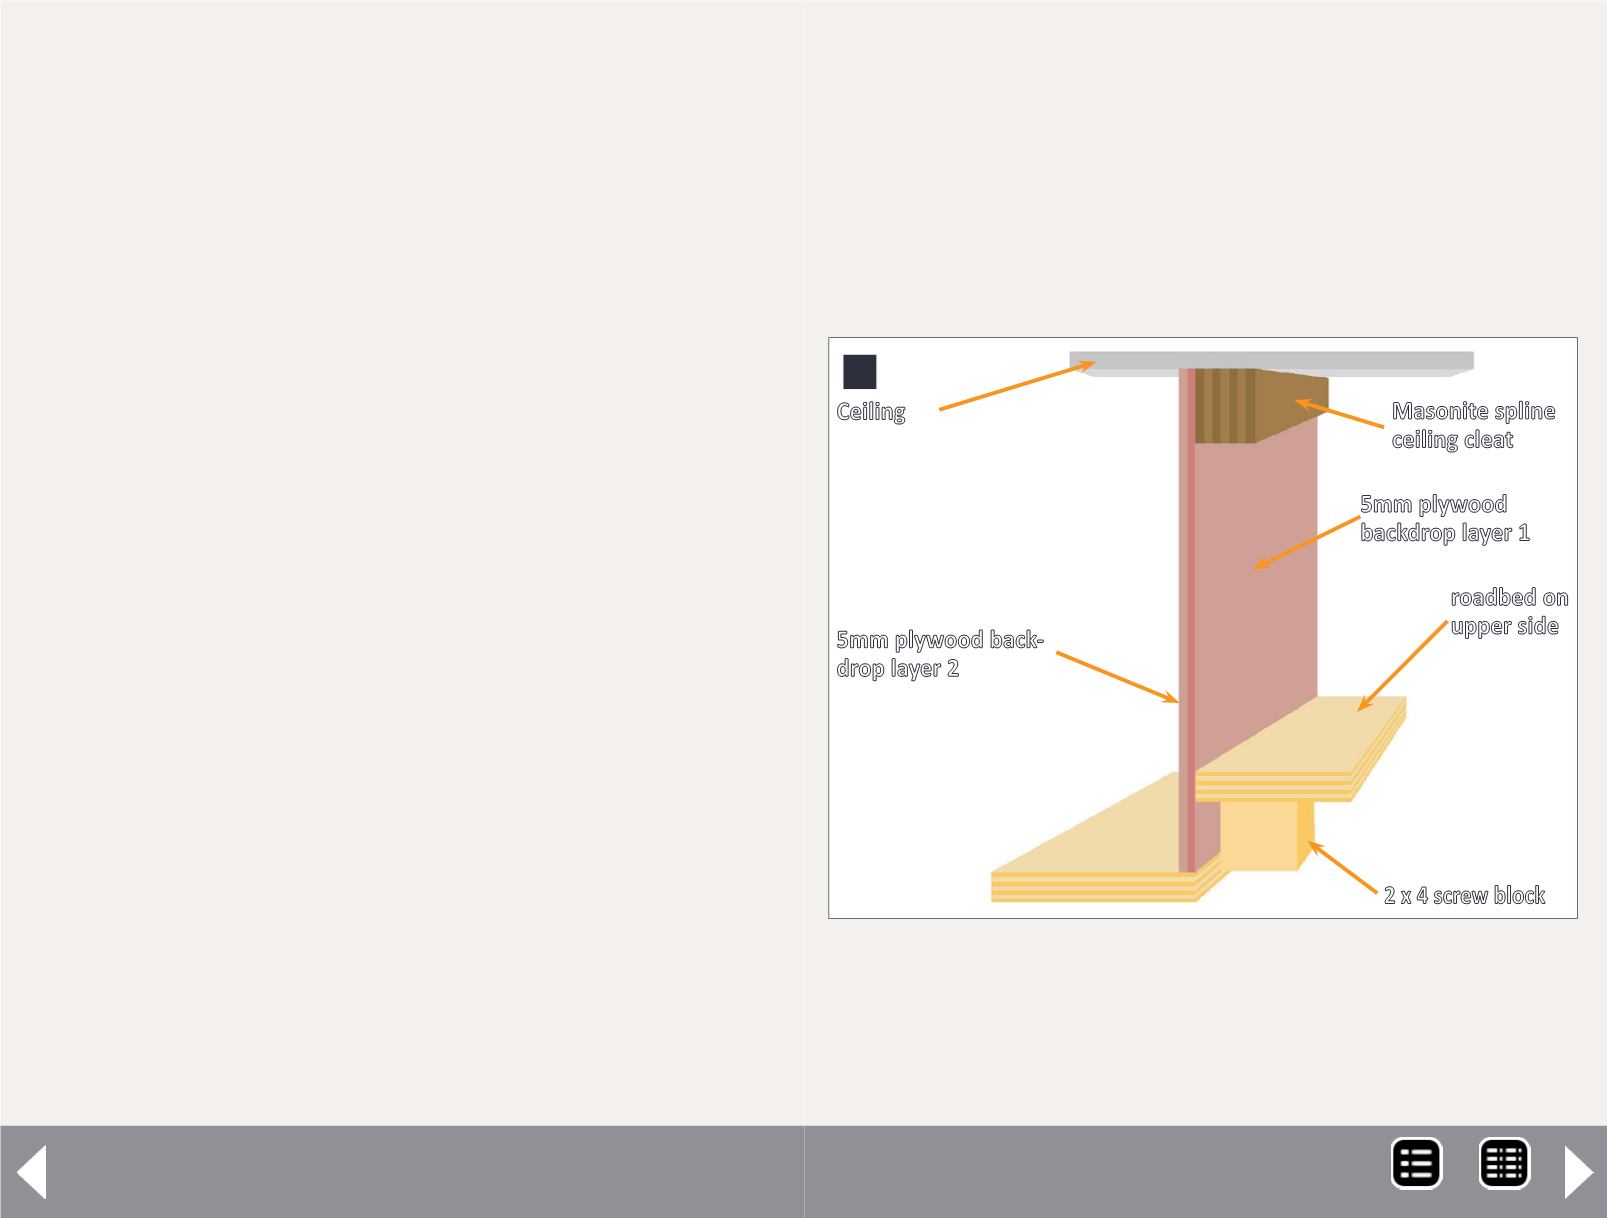
5: Laminated backdrop cross section diagram. Two
layers of 5 mm plywood are laminated and attached
to a Masonite spline cleat on the ceiling and the
height difference between the two sides of the penin-
sula’s benchwork surface.
5
2 x 4 screw
block
roadbed on
upper side
Masonite spline
ceiling cleat
5mm plywood back-
drop layer 2
5mm plywood
backdrop layer 1
Ceiling
MRH-Jul 2014


