wheel and brake gear. The left and right sides of the car are
identified as the left and right sides of the car when the viewer
is facing the B end. No matter which way you look at the car,
there is always a clearly defined A end, B end, left side and
right side of the car.
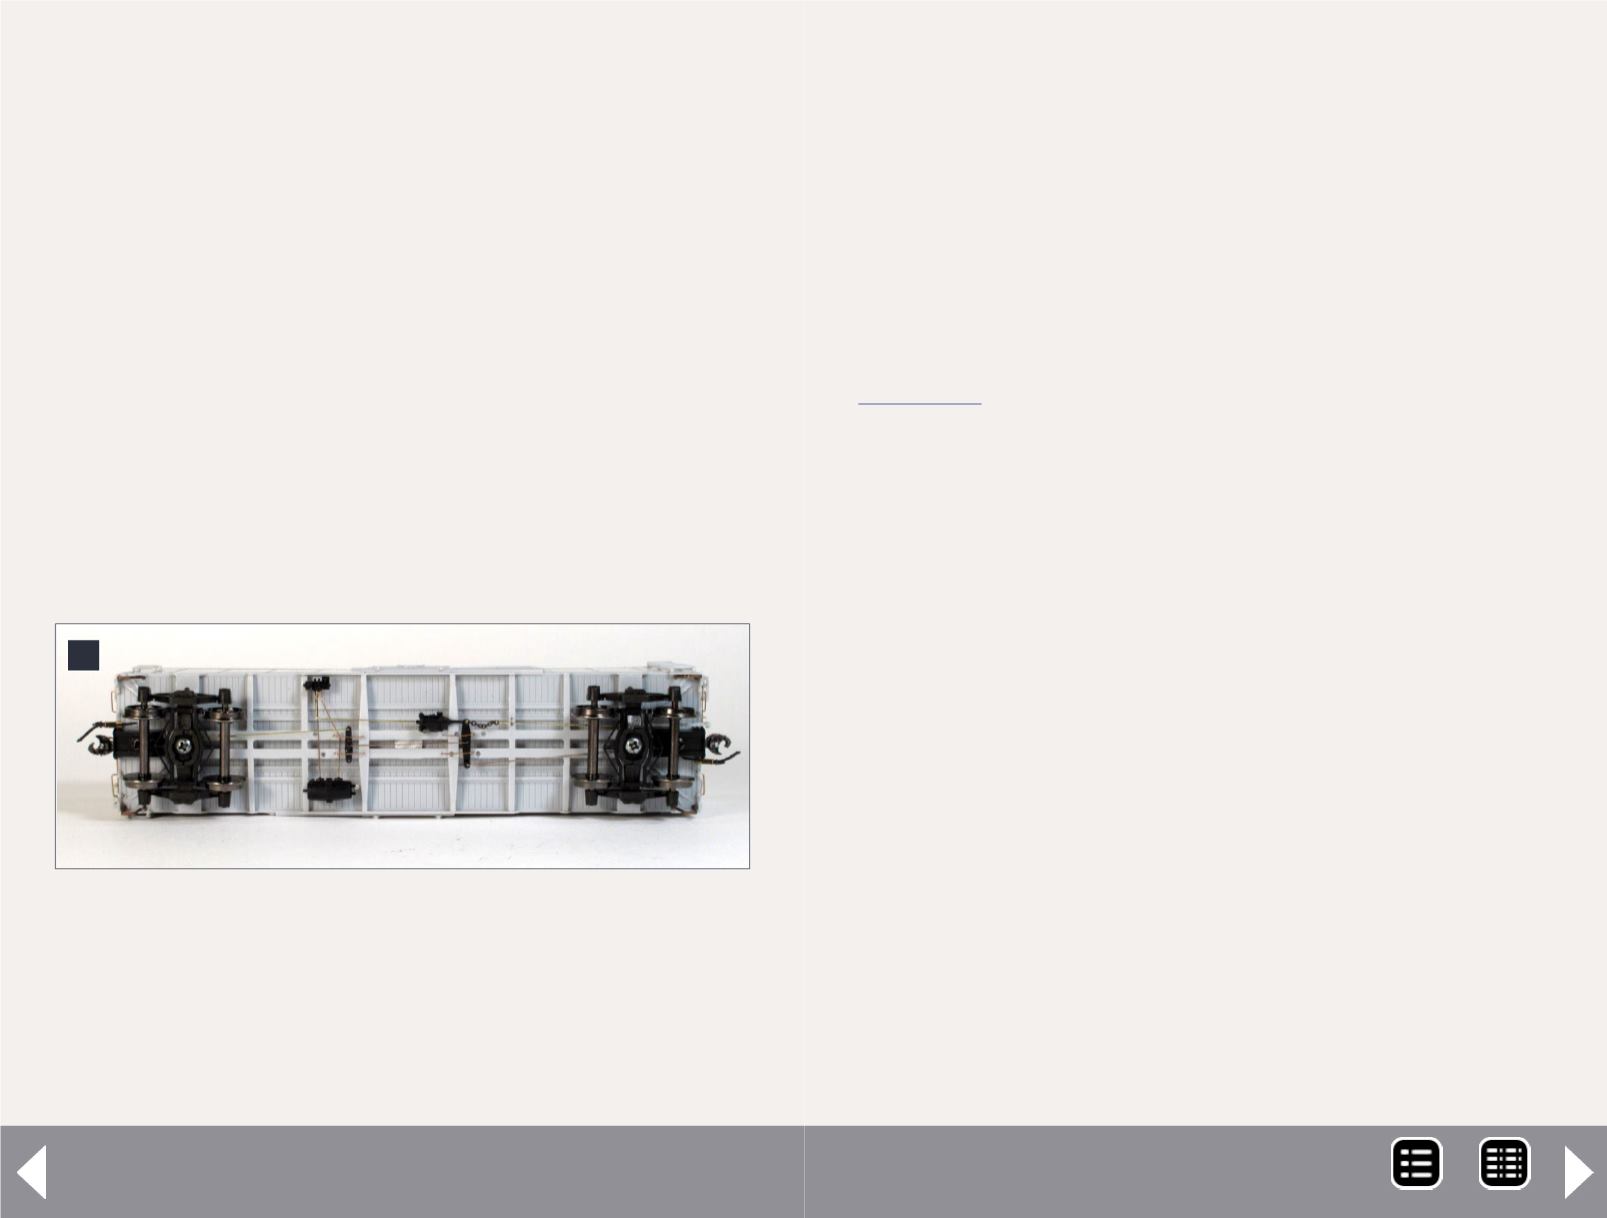
I assembled the underframe per the car’s instructions but dis-
carded the brake gear sprue and used a Cal Scale No. 294 brake
gear and set and Tichy .010” wire. I consulted prototype pho-
tos to ensure I mounted the reservoir, AB valve and cylinder in
the correct places. I omitted the train line. I used a short sec-
tion of Builders-In-Scale No. 252 chain to attach the cylinder
and the brake rod.
I took great care to ensure that no gear was hanging in a man-
ner that would interfere with the model’s operation on my lay-
out. I filed down the injection molding post in the center of the
car to make the underframe fit. I discarded the plastic coupler
boxes included with the kit and substituted Kadee No. 178
scale couplers, which I glued in place and then screwed in to
provide a solid connection to the carbody.
Photo [9] shows the trucks installed. I used the new Kadee
No. 564 50-ton Bettendorf Self-Centering Trucks with two-
piece HGC parts for this model. I’m not satisfied with the
appearance of the Accurail Bettendorf truck and have not
found a suitable alternative, but this new Kadee truck side-
frame looks great and operates well, and it is now my new
standard. I ordered the truck sideframes direct from Kadee
without the wheelsets and used Reboxx No.
01-1.030 wheelsets.
Next I constructed the B end of the car. I used many of the
kit-supplied parts, but cut off the retainer pipe and applied
it as a separate piece. I used a Kadee brake wheel and made
my own uncoupling levers from Tichy .010” wire and a few
Detail Associates No. 2206 eye bolts. I also cut the trip pin off
the Kadee coupler and added a Hi-Tech Details No. 6040 air
hose with brass mounting bracket. Since I am modeling an as-
delivered car, I mounted the tack board in the high position. I
finished the A end in the same manner but without the brake
gear, of course!
Next, I moved on to the car sides. Again, this was a simple and
straightforward process. I attached the kit-supplied grab irons,
ladder and car door, and then added the placard and route
car holder to the door. I followed the same procedure for both
sides. I cemented the doors in place.
Last, I constructed the car’s roof. For this model I used Plano
No. 11920 40-foot Gypsum Boxcar Running Board, Diamond
Pattern, which is a photo-etched stainless steel detail part. I
made latitudinal running board supports with Evergreen .010”
9
9. The underframe of the built-up model. I used the Cal
Scale AB valve, reservoir and cylinder but replaced all
the plastic linkage with brass rod. I did not include the
train line or connections from the train line to the valve.
I constructed the underframe on rest of the cars in this
article to the same standard. John Golden photo.
Seaboard B8 & B9 - 7
MRH-Jun 2014


