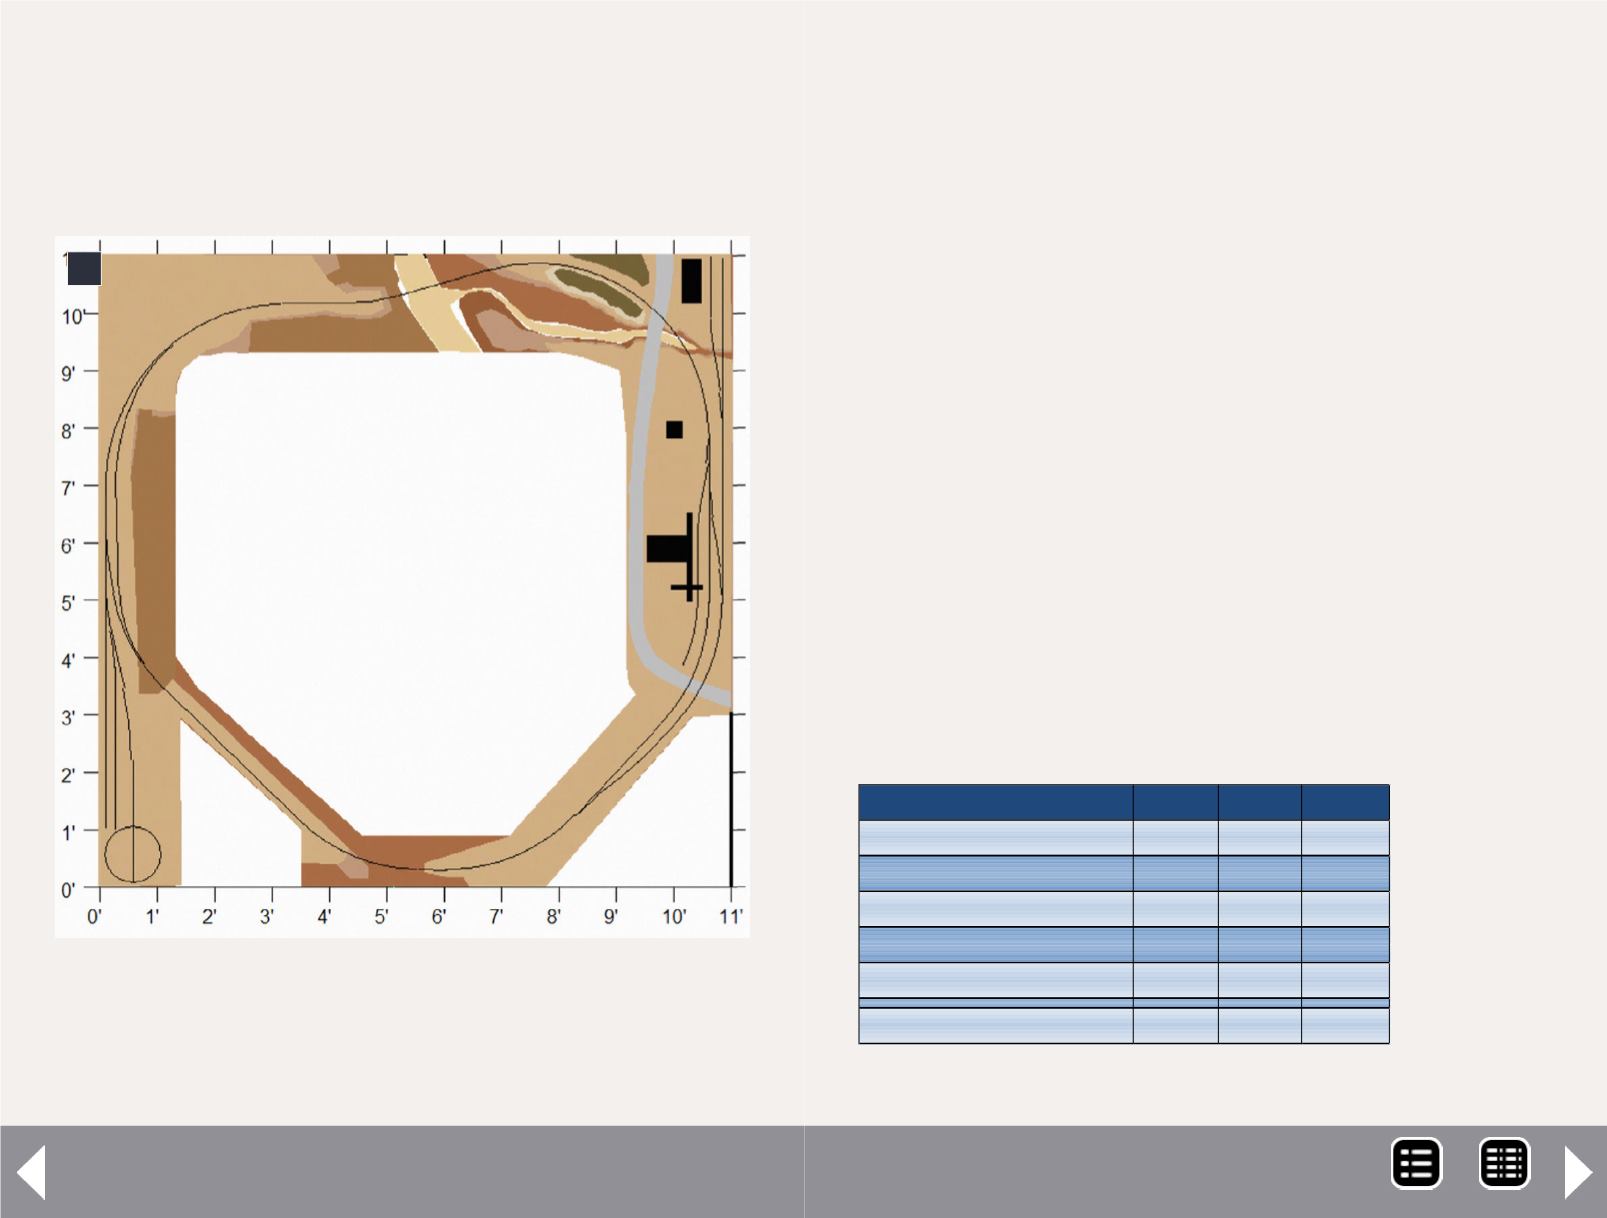
5: More refined XtrackCAD track plan with some
scenic elements suggested. You can get the full
XtrackCAD file in the MRH subscriber bonus
downloads for this month.
5
it does, and it's free. Drawing up a simple plan like this one will be
a very useful learning experience, so I advise taking the time to do
this. Learn it well now in the beginning, and it will pay off great divi-
dends later when the plans are a bit more complex.
Third Place Layout for $500 - 6
Description
Cost
Quantity Sub Total
Midwest Cork (box)
$30.00
1 $30.00
White Glue, medium container
$5.00
1 $5.00
Straight sewing pins
$2.00
1 $2.00
Thimble/Sharpie Marker
$2.00
1 $2.00
Previous Expenditures
$253.00
Expenditures to this point:
$292.00
Here is a beginning (4) that I have envisioned using my shelf system.
This is a very simple plan indeed, but the priority is getting trains
running first, and then coming back and embellishing the plant later.
The curve radius has a 36" minimum, the switches are #6.
Here's one way (5) the plan could be embellished. This is my test
layout, and I have decided to add a lower level narrow gauge loop
to test and exercise my HOn3 equipment. It is but one possible
arrangement, on a sizeable canvas that is truly limited only by one's
imagination.
Roadbed
My roadbed of preference for overlaying foam is Midwest cork; a
box of 25 3' strips will cost $17.00 in N scale, $30.00 in HO, or $38.00
in O. For accounting simplicity, we'll assume HO cork is being used.
The total distance around my room is roughly 44', so a box contain-
ing 75' should be more than sufficient for a single track route. If
you're looking at G scale, you could skip roadbed or even carve the
foam into a roadbed profile, yielding variation in the depth of the
built-up grade.
To lay the cork, I use white glue ($5.00, Ace) and straight pins
($2.00, Walmart). You may desire a thimble ($2.00, Walmart)
to put the pins through the cork, but I find the butt-end of a
Table 3: Roadbed expenditures.
MRH-Jul 2013


