way, and only use the front headlights. But you can use the
same technique for the front headlight and install a rear one
if you want.
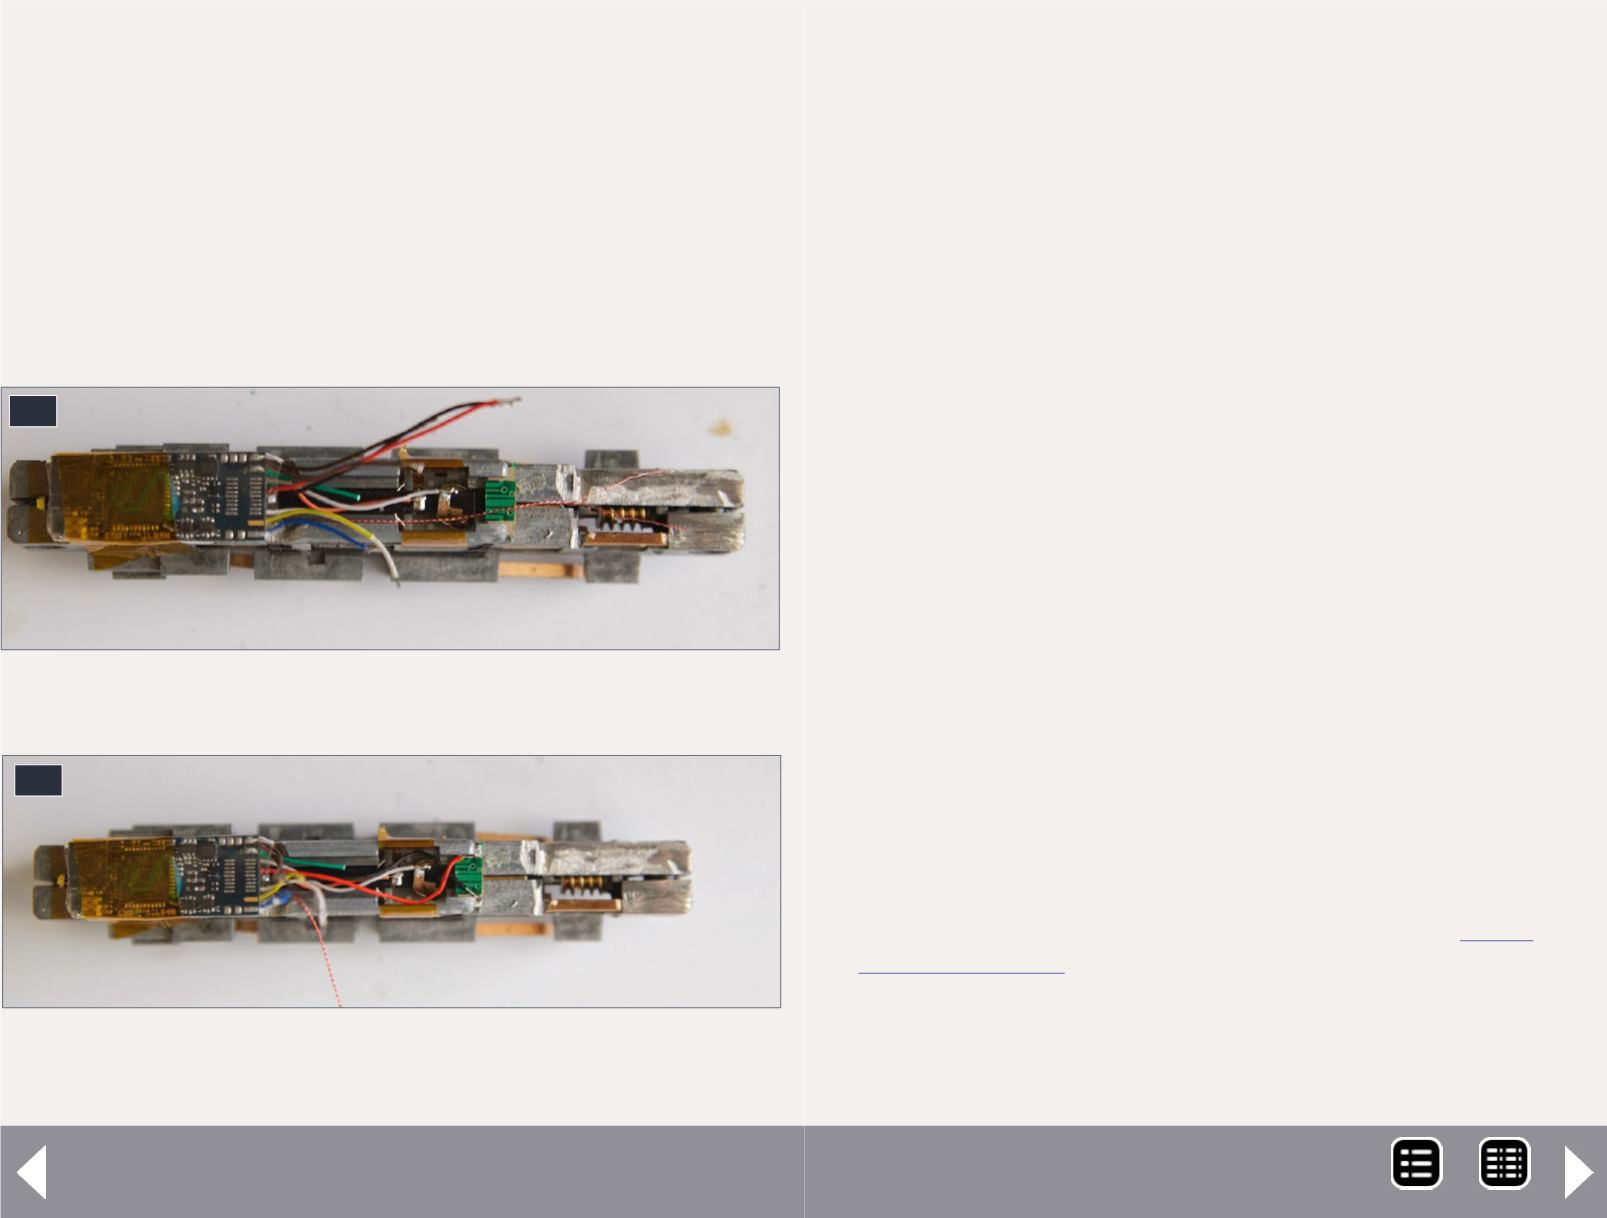
Now it’s time to install the decoder. First, solder the motor
wires. The gray wire goes to the top motor brush; the orange to
the bottom. You can identify which is which because the contact
strip for the bottom brush wraps around the side of the motor.
Though the photo [28] shows the decoder taped to the front of
the frame, I solder these two wires BEFORE I tape the decoder to
the frame. Then I use Kapton tape to hold the decoder in place
Next, I solder the red and black power pickup wires to the
small piece of circuit board. I then solder a 1K 1/8 watt resis-
tor to the blue wire, and solder the LED wires to the white and
blue wires respectively. I use heat shrink tubing to insulate
the wire joints: 1 mm heat-shrink tubing on the white wire,
and 1/16” tubing over the resistor, insulating both ends of the
blue-resistor-LED wire connection. Here is the final result [30].
Zoom in to see the blue wire and the “bulge” of black heat-
shrink tubing.
At this point, I put the trucks back on the frame, and test the
installation on my layout. I want to make sure there is no
short, that the motor runs, and that the headlight works. It
did. Then I install the speaker. I use gel CA cement to glue the
speaker to one side of the frame to keep it in place. Then I
solder the speaker wires to the brown decoder speaker supply
wires, and insulate the joints with 1 mm heat shrink tubing.
The last step is to put a small piece of Kapton tape over the
wires to keep everything in place. Then I test the completed
installation on the layout. When I’m sure everything works, I
put the shell back on. Now it’s time to program the decoder
with the 4-digit address, the correct horn, adjust sound vol-
ume, and so on.
I made a short video of the completed RS-11 in action.
I have used essentially the same techniques to install sound
in Atlas RS-3, GP7, SD9, GP30 and VO-1000 locomotives, and a
Fox Valley Models GEVO. If you are interested in hearing some
N scale sound - 10
28
28. The decoder is taped to the frame.
29
29. The red and black wires are soldered to the small
piece of circuit board.
MRH-Dec 2014


