This inaccuracy can be mitigated to some extent by the use
of a “sync block” to consistently start and stop the train at a
fixed point at the beginning and end of each playback. This
block is controlled by a relay added to the PICAXE circuit. The
relay is activated by pressing the sync button at some time
before the train reaches the block at the end of each record-
ing. As you approach the block after activating it, the speed
should be decreased so that the train enters the block slowly.
Be sure to keep the speed control set to the same slow
speed for a few seconds after the train enters the block to
keep a train that may be out of sync during playback moving
until it gets to the block. Failing to do this can cause the train
to stop before getting to the sync block, throwing everything
off. After the pause, change to PLAY and the recorded run
will be replayed.
If the controller is used with a point-to-point layout that has
diodes at each end, a separate sync block is not needed. Every
time the train passes the diode, it will stop and will be back in
sync when it restarts. See:
for information on how these diodes can be installed.
An optional “Start” button can be added to the circuit to have
the train start up while in play mode only after this button is
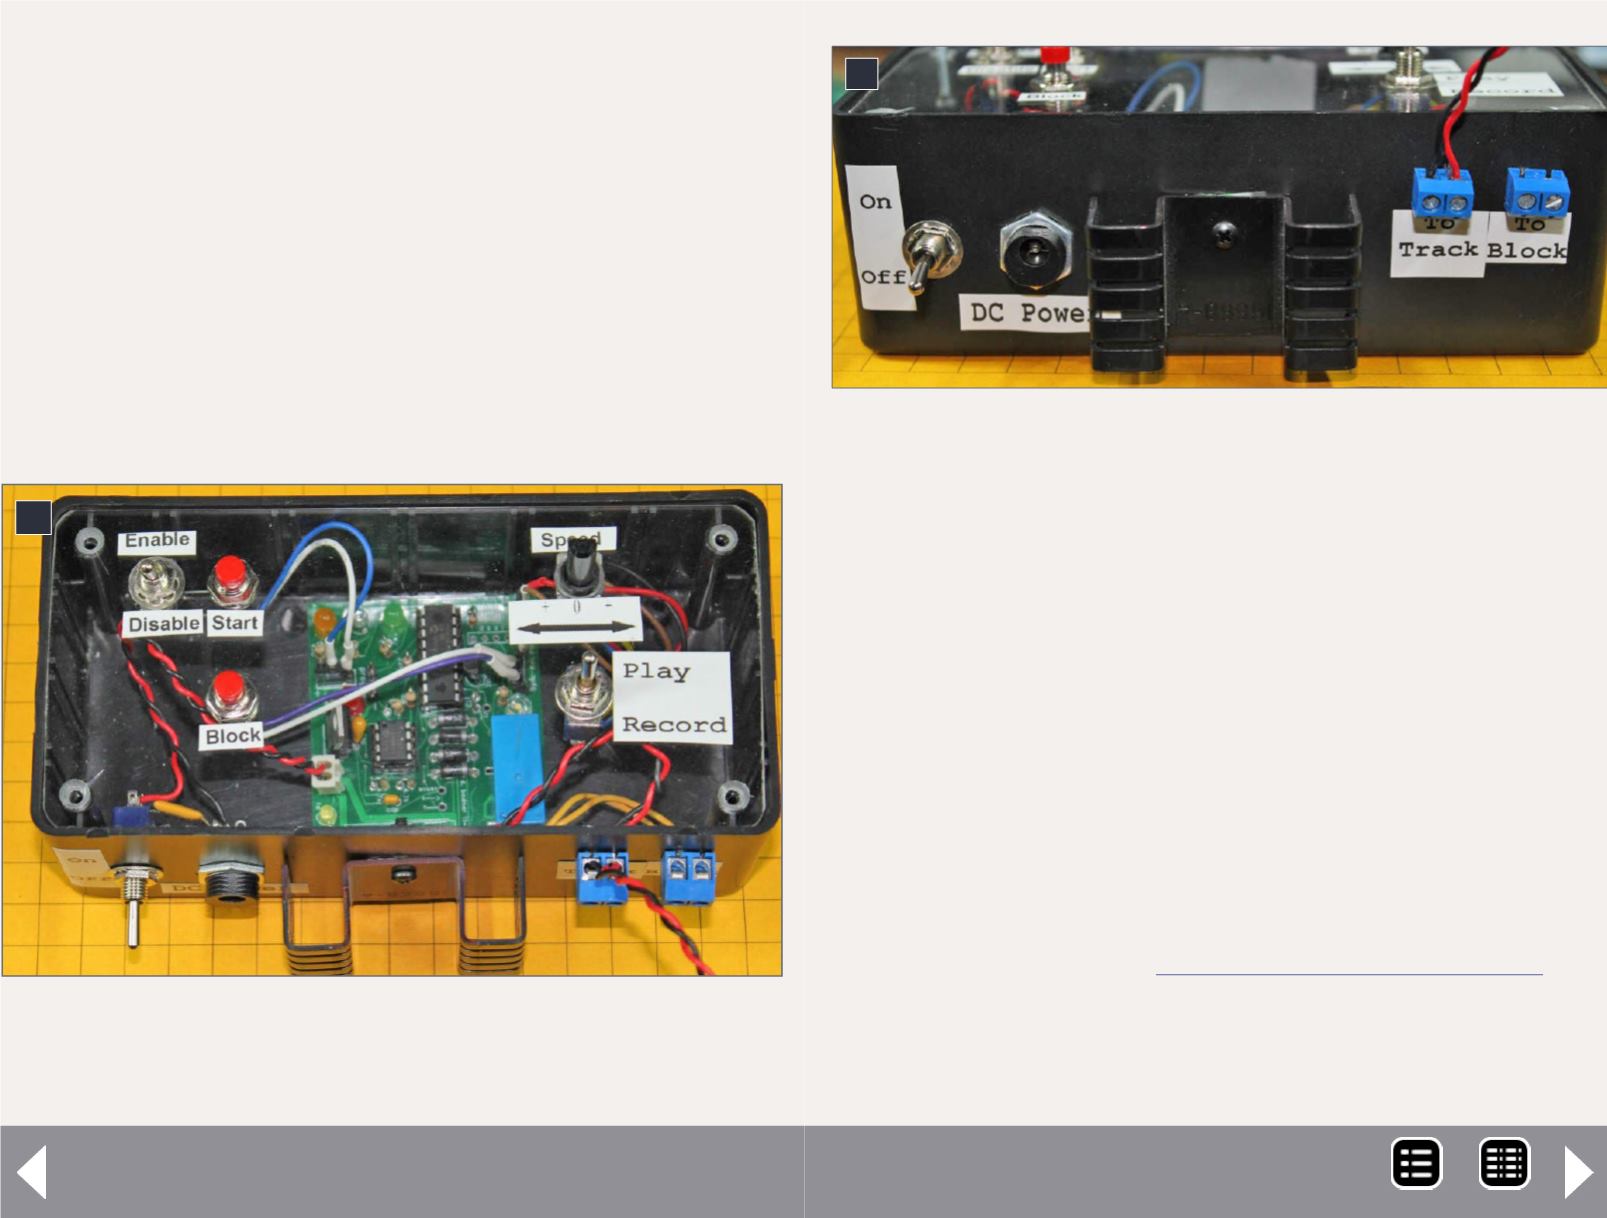
8. A top view of the recorder. Mark the controls
so you don’t have to rely on your memory for the
purpose of each switch.
9. This view of the side of the second unit shows the ON/
OFF switch, DC POWER connection and the two pairs of
output connections. The first is labeled “To Track.” These
two contacts go to the track. The other two connections,
labeled “To Block” are for the stop block. Connect one
terminal to the uncut section of track and the other to the
cut section of track so power can be supplied to the stop
block when the relay is not active.
8
9
PICAXE circuit part 2 - 6
MRH-Jul 2014


